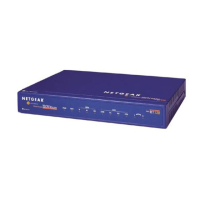
Model RT328 and Model RH348 ISDN Routers Installation Giude
Configuring TCP/IP Properties by DHCP
At this point your PC is configured to obtain its TCP/IP configuration information automatically
from a DHCP server on the local network. The Model RT328/RH348 router is shipped
preconfigured as a DHCP server and will assign the TCP/IP configuration information described
in the previous section.
If you will be using the configuration recommended by NETGEAR:
1. Turn on the router. Be sure the router has been on for at least one minute before
continuing to step 2.
2. Reboot your PC.
For additional configuration information, such as DNS addresses, you can either add the
information to the DHCP setup of the router and reboot the PC again or enter the information
manually to the PC as described in the following section.
Configuring TCP/IP Properties Manually
If you choose not to configure your PC by DHCP, you must manually enter the following
information in the TCP/IP Properties section of the Network Control Panel of your PC:
• IP address and Subnet Mask (choose from your assigned IP addresses or private IP addresses)
• Gateway (enter the IP address of the router)
• DNS Server Addresses (enter IP addresses provided by your ISP)
Verifying TCP/IP Properties
After your PC has been configured and rebooted, you can check the TCP/IP configuration using
the Windows utility winipcfg.exe (for Windows NT
®
systems, use ipconfig.exe). From the Start
button, open the Run window, type winipcfg, and click on OK.
Note: In addition to displaying the current TCP/IP properties, the winipcfg utility allows
you to release and renew DHCP-assigned information without rebooting the PC.