EasyManua.ls Logo

NETGEAR XS716T - User Manual

NETGEAR XS716T
2 pages
Print Icon
To Next Page IconTo Next Page
Loading...
Installation
ProSAFE Smart Managed Switch
XS708T and XS716T
XS716T
XS708T
Configure the Switch With a Static IP
Address
If you are using static IP addresses in your network, configure the switch
IP address before connecting the switch to your network. The default IP
address of the switch is 192.168.0.239.
Note: If your network uses a DHCP server, this section does not apply. Go
directly to Connect the Switch to a Network.
1. Configure a computer with a static IP address.
2. Plug the switch into a power outlet and connect your computer to the
switch using an Ethernet cable.
3. Open a web browser and enter the IP address of your switch.
The default IP address of the switch is 192.168.0.239.
A login page displays.
4. Enter password for the password.
5. Select System > Management > IP Configuration.
6. Enter the static IP address that you want to assign to the switch.
7. Click the Apply button.
Your settings are saved.
Connect the Switch to a Network
1. Connect each computer or device to an RJ-45 network port on the
switch front panel.
Use Category 5e (Cat 5e) or higher rated Ethernet cable (Cat 6, Cat 6a,
or Cat 7) terminated with an RJ-45 connector to make 10-Gigabit
connections.
Note: We recommend Cat 6a or Cat 7 cables if the cable distance is
greater than 45 m (148 ).
Package Contents
• NETGEAR ProSAFE Smart Managed Switch XS708T or XS716T
• Rubber footpads for tabletop installation
• AC power cord (localized to country of sale)
• 19-inch rack-mount kit for rack installation
• Resource CD
2. Connect the switch to your network.
3. Power on the switch.
Configure the Switch
You can configure the switch either by using a computers web browser or by
installing the Smart Control Center Utility on your Windows-based computer.
Web Browser Access
1. Connect the switch to your network.
2. For initial configuration, open a web browser on a computer that is on the
same network and subnet as the switch and enter the switchs IP address.
If you are unsure how to determine the IP address of the switch, you can
use the Smart Control Center Utility.
3. Enter the password.
The default password is password.
4. Click the Login button.
5. Configure the switch for your network.
For information about switch configuration, see the soware administration
guide for your switch.
XS716T 10-Gigabit Ethernet
Smart Managed Switch
Server Workstation
ReadyDATA
Question and Answer IconNeed help?

Do you have a question about the NETGEAR XS716T and is the answer not in the manual?

Summary

Configure Switch Static IP Address

Static IP Configuration Process

Steps to assign a static IP address to the switch via a web browser, including IP assignment and saving settings.

Connect Switch to Network

Network Connection Steps

Guide on connecting devices, using appropriate cables for 10-Gigabit connections, and powering the switch.

Configure Switch Methods

Web Browser Access Configuration

Detailed steps for accessing and configuring the switch using a web browser, including login and network setup.

Smart Control Center Utility

Install SCC Utility

Instructions for installing the Smart Control Center Utility from the resource CD, requiring Adobe Air.

Configure Switch via SCC Utility

SCC Utility Configuration Steps

Steps to configure the switch using the SCC utility, including discovery, selection, and browser access.

Troubleshooting Tips

Common Setup and Connectivity Issues

Tips for resolving common problems, including power sequence, cable connections, and network settings.

Support Resources

Online Support and Documentation

Information on accessing NETGEAR support, product registration, downloads, manuals, and regulatory compliance.

Overview

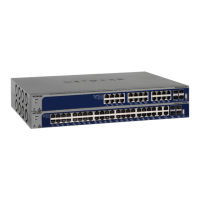
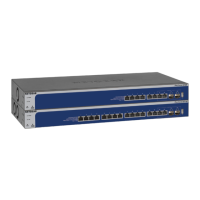
This document describes the NETGEAR ProSAFE Smart Managed Switch, available in XS708T and XS716T models. This device is designed to provide high-speed network connectivity, particularly for environments requiring 10-Gigabit Ethernet. It functions as a central hub for connecting multiple network devices, facilitating data transfer and network management.

Function Description

The NETGEAR ProSAFE Smart Managed Switch serves as a core component in a network infrastructure, enabling efficient data communication between connected devices. Its primary function is to forward data packets between network segments, ensuring that information reaches its intended destination. As a "smart managed" switch, it offers a balance between the simplicity of unmanaged switches and the advanced capabilities of fully managed switches. This means users can configure and monitor various network parameters, optimize performance, and enhance security without the complexity often associated with enterprise-grade managed switches.

The switch supports 10-Gigabit Ethernet connections, making it suitable for demanding applications such as large file transfers, virtualization, and multimedia streaming, where high bandwidth is crucial. It acts as a central point for connecting servers, workstations, storage devices (like ReadyDATA), and other network-enabled equipment, creating a robust and high-performance local area network (LAN).

Usage Features

The NETGEAR ProSAFE Smart Managed Switch offers flexible configuration options and ease of use, catering to both users familiar with network management and those new to it.

Initial Setup and Configuration:

The switch can be configured using two primary methods:

  1. Web Browser Access: This method allows users to configure the switch through a standard web browser from any computer on the same network.

    • Static IP Address Configuration: If your network uses static IP addresses, you can assign a specific IP address to the switch before connecting it to the main network. The default IP address is 192.168.0.239. This involves connecting a computer directly to the switch, configuring the computer with a static IP, opening a web browser, entering the switch's default IP, logging in with the default password ("password"), and then navigating to System > Management > IP Configuration to set the desired static IP.
    • DHCP Network Configuration: If your network uses a DHCP server, the switch will automatically obtain an IP address, simplifying the initial setup. In this scenario, you can proceed directly to connecting the switch to your network.
    • Connecting to the Network: Once the IP address is set or obtained, connect each computer or device to an RJ-45 network port on the switch's front panel. For 10-Gigabit connections, it is recommended to use Category 5e (Cat 5e) or higher rated Ethernet cables (Cat 6, Cat 6a, or Cat 7) terminated with an RJ-45 connector. For cable distances greater than 45 meters (148 ft), Cat 6a or Cat 7 cables are recommended. After connecting devices, power on the switch.
    • Web Browser Access for Configuration: To access the switch's configuration interface, open a web browser on a computer on the same network and subnet as the switch, and enter the switch's IP address. The default password is "password." After logging in, you can configure various network settings as needed.
  2. Smart Control Center Utility: This Windows-based utility provides a graphical interface for discovering and configuring NETGEAR Smart Managed Switches on the network.

    • Installation: The utility is provided on the resource CD included with the switch, or it can be downloaded from the NETGEAR support website. It requires Adobe Air to be installed. To install, insert the resource CD, click the "Smart Control Center Utility" link, and follow the prompts. If the CD does not auto-launch, you can open Windows Explorer, right-click the "Autostart" file, and select "Run as Administrator."
    • Discovery and Configuration: After installation, double-click the "Smart Control Center" icon. Click the "Discover" button to find Smart Managed Switches on your network. The utility will display each switch's MAC address, IP address, and model number. If the switch is not discovered, ensure cable connections are secure, and temporarily disable antivirus or firewall programs on your computer. Select the desired switch, click "Web Browser Access," enter the password ("password"), and click "Login" to access the System Information page and configure the switch.
    • Troubleshooting Discovery: If the utility fails to discover the switch, verify cable connections, ensure the computer's IP address is in the same subnet as the switch, and temporarily disable antivirus or firewall software. The utility uses UDP source and destination ports 63323 and 63324, so ensure these are allowed through security software.

Network Connectivity:

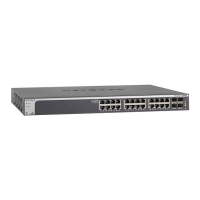
The switch provides multiple RJ-45 network ports for connecting various devices. It supports different Ethernet cable categories to accommodate varying speed requirements and distances. The use of higher-rated cables (Cat 6a or Cat 7) is crucial for achieving optimal 10-Gigabit performance over longer distances.

Power Management:

The switch requires connection to a power outlet using the provided AC power cord. Proper power-on sequence is recommended: turn on the switch and wait two minutes, then turn on the computer and connect it to the switch.

Security:

The switch is protected by a default password ("password") for initial access. Users are encouraged to change this password for enhanced security after the initial setup.

Maintenance Features

While the document primarily focuses on initial setup and configuration, several aspects contribute to the ongoing maintenance and troubleshooting of the NETGEAR ProSAFE Smart Managed Switch.

Troubleshooting Tips:

The manual provides a dedicated section for troubleshooting common issues:

  • Power On Sequence: Always ensure the switch is powered on and stable before connecting and powering on other devices.
  • Cable Connections: Verify that all Ethernet cables are securely plugged in. The corresponding Ethernet port status LED on the switch should be lit for each active connection, indicating proper physical connectivity.
  • Network Settings: Confirm that the network settings (IP address, subnet mask, gateway) for connected computers and devices are correct and compatible with the switch's configuration.
  • Antivirus/Firewall Interference: During initial setup or when using the Smart Control Center Utility, antivirus programs or firewalls can sometimes block communication. Temporarily disabling them might be necessary to allow the utility to discover the switch. Remember to re-enable them after configuration.
  • Smart Control Center Utility Communication: The utility relies on broadcast UDP packets on specific ports (63323 and 63324). Ensure that your computer's security software allows these packets to pass through to the destination IP address 255.255.255.255.

Software Administration Guide:

For detailed information on advanced switch configuration and ongoing management, users are directed to consult the software administration guide specific to their switch model. This guide would cover features such as VLANs, QoS, security settings, and other advanced network management capabilities.

Firmware Updates:

Although not explicitly detailed in this installation guide, managed switches typically receive firmware updates to improve performance, add new features, and address security vulnerabilities. Users are encouraged to visit the NETGEAR support website (www.netgear.com/support) to access the latest downloads and user manuals, which would include information on firmware update procedures.

Resource CD:

The included resource CD contains the Smart Control Center Utility and potentially other useful documentation, serving as a valuable resource for initial setup and troubleshooting.

Online Support and Community:

NETGEAR provides online support resources, including product registration, help articles, user manuals, and a community forum. These resources are crucial for obtaining assistance, sharing knowledge, and staying informed about the product.

Regulatory Compliance:

Users are advised to consult the regulatory compliance document before connecting the power supply, ensuring adherence to local and international standards. Information on EU Declaration of Conformity and other regulatory details is available on the NETGEAR support website.

In summary, the NETGEAR ProSAFE Smart Managed Switch is designed for high-performance networking with a focus on ease of use and manageability. Its features support robust network connectivity, flexible configuration, and provide clear guidance for troubleshooting, ensuring a reliable network environment.

NETGEAR XS716T Specifications

General IconGeneral
Switch typeManaged
Switch layerL2+/L3
Quality of Service (QoS) supportYes
USB 2.0 ports quantity1
Installed SFP modules quantity0
Installed SFP+ modules quantity2
Basic switching RJ-45 Ethernet ports type10G Ethernet (100/1000/10000)
Basic switching RJ-45 Ethernet ports quantity16
Stackable-
CertificationCE, FCC Cl. A, VCCI Cl. A, Cl. A EN 55022 (CISPR 22), Cl. A C-Tick, EN 55024, CCC
Product colorBlack
LED indicatorsActivity, Link, Power
Number of fans2 fan(s)
Number of VLANs256
Networking standardsIEEE 802.1D, IEEE 802.1Q, IEEE 802.1ab, IEEE 802.1p, IEEE 802.1s, IEEE 802.1w, IEEE 802.1x, IEEE 802.3, IEEE 802.3ad, IEEE 802.3ae, IEEE 802.3an, IEEE 802.3az, IEEE 802.3u, IEEE 802.3x, IEEE 802.3z
Virtual LAN featuresPrivate VLAN, Protocol-based VLAN
Cable types supportedCat5e, Cat6, Cat6a, Cat7
Copper ethernet cabling technology10GBASE-T
Noise level27.4 dB
Flash memory256 MB
Internal memory512 MB
Processor frequency600 MHz
Mean time between failures (MTBF)276197 h
Jumbo frames9000
Number of queues8
Latency (10 Gbps)2.624 µs
MAC address table16000 entries
Packet buffer memory2 MB
Number of static routes32
DHCP featuresDHCP server, DHCP client
Security algorithms802.1x RADIUS
Access Control List (ACL) rules100
AC input voltage100 - 240 V
AC input frequency50 - 60 Hz
Power consumption (max)49.5 W
Operating altitude0 - 3000 m
Operating temperature (T-T)0 - 50 °C
Operating relative humidity (H-H)0 - 90 %
Cables includedAC
Weight and Dimensions IconWeight and Dimensions
Depth204 mm
Width440 mm
Height43 mm
Weight2610 g

Related product manuals