NEUTON CE6.3 Battery-Powered Mower -
Safety & Operating Instructions
7
Step 4: Charge the Battery before your first use.
• Risk of electric shock; do not touch the non-insulated portion of the output connector or the non-insulated Battery terminal.
• Use the NEUTON 36V Charger only with the NEUTON 36V Battery. Use of other Chargers or the NEUTON 36V Charger with
other types of Batteries may result in bursting of the Battery, which could cause personal injury and property damage.
You MUST charge the Battery for at least ten (10) to twelve (12) hours maximum before you use the Mower for the first time. If
you do not charge it before using the Mower, the Battery’s charging capacity may decrease.
NOTE: Always charge the Battery while it is out of the Mower.
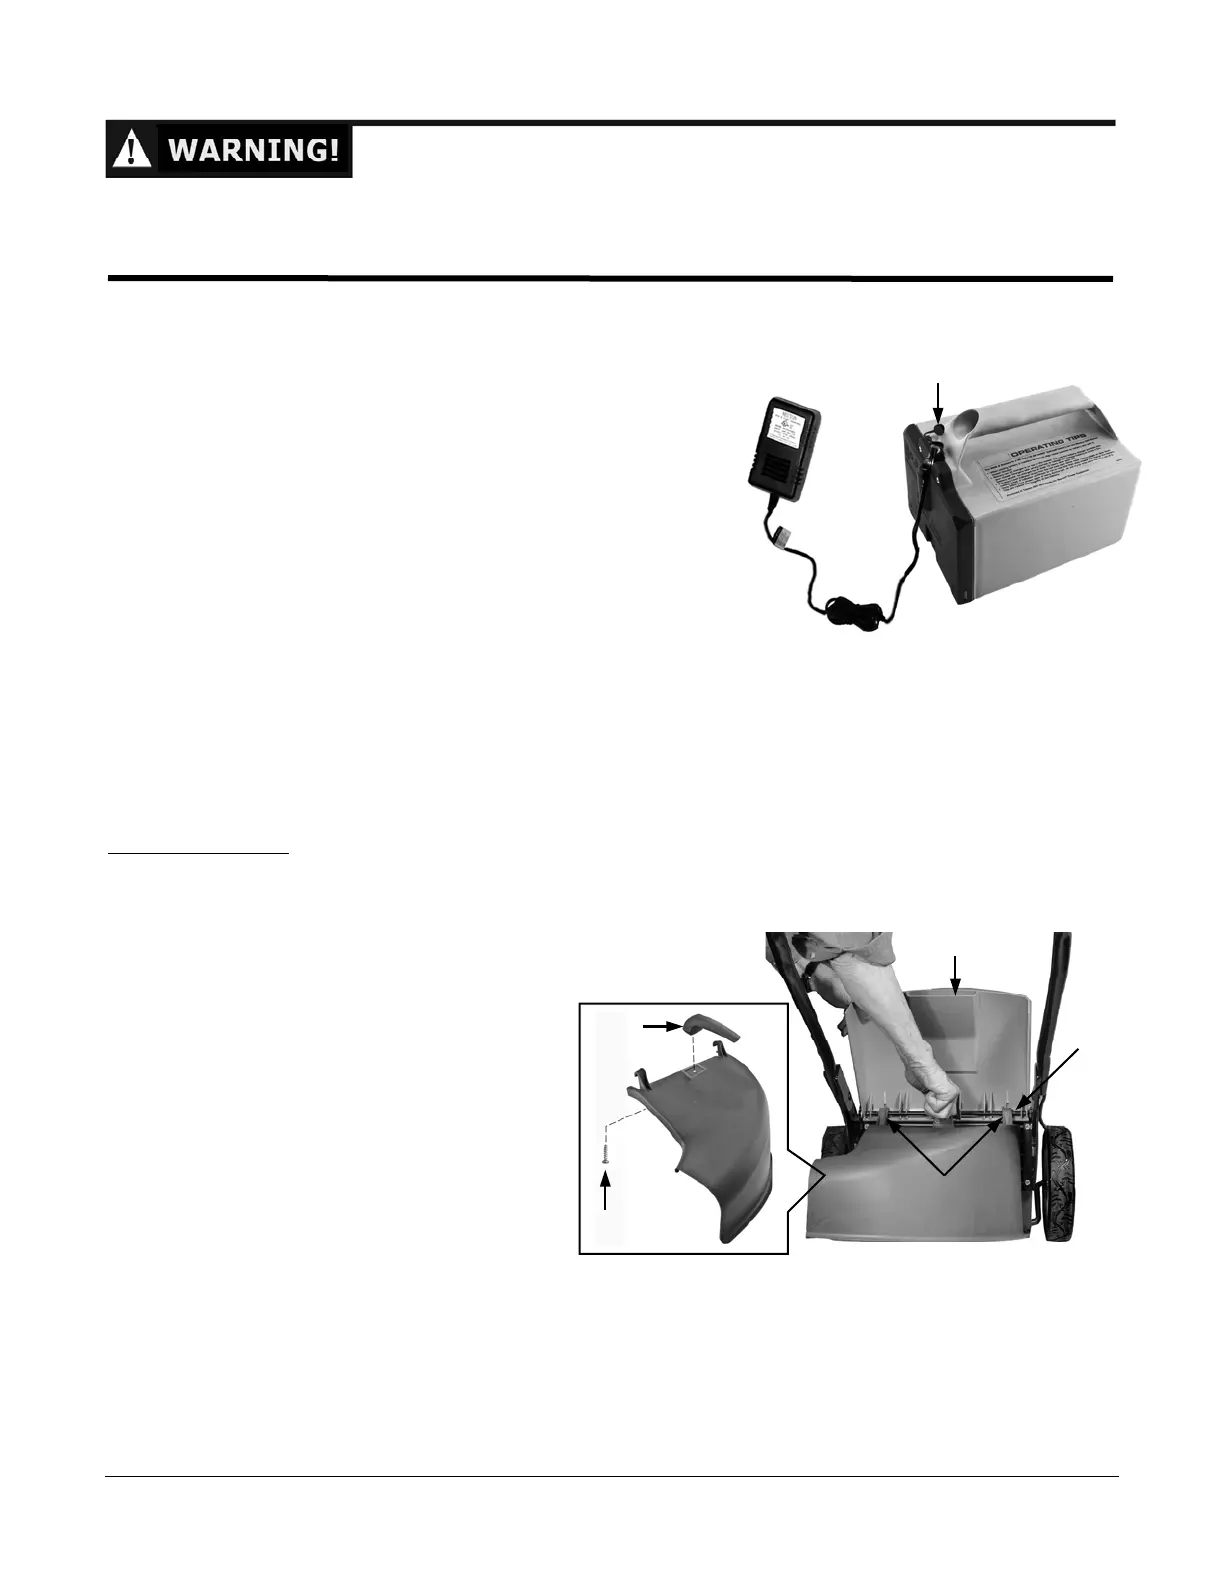
1. Remove the Protective Plug from the Charger Receptacle on the Battery and
plug in the round Charger Connector (Figure 9).
2. Plug the Charger into a standard 110V wall outlet. The RED light on the
Battery will illuminate indicating a connection between the Battery and the
Charger. The LED light on the Charger will quickly change from GREEN to
RED indicating that the Battery is charging.
3. After ten (10) to twelve (12) hours, the Battery should be completely
recharged. The LED on the Battery will not turn off or change colors.
NOTE: The LED on the Charger may not have changed to GREEN and may still be
RED after twelve (12) hours of charging. This does not mean that the
Battery is not completely charged. Do not charge any longer than 12
hours.
4. Remove the Charger from the Battery and from your standard 110-Volt wall outlet and place both the Battery and
the Charger in a DRY environment for storage until you need them again.
NOTE: For the first five (5) hours, the Charger may be warm to the touch. This is normal and does not indicate a problem.
Step 5: Attach the Side Discharge Chute, Mulching Plug, or Rear Bagger.
Side Discharge Chute
The Side Discharge Chute (Figure 10) allows for proper discharge of the grass, which prevents clogging. The Chute shipped
without the Handle so you will have to install the Handle prior to use using a small Phillips Screwdriver. The Handle and Screw
are located in the Product Pack bag that shipped with the Mower.
1. Raise the hinged Discharge Guard on the back of the Mower (Figure 10).
2. Orient the Discharge Chute as shown in Figure 10.
Position the two (2) Hangers on the Chute over the
Support Rod and lower the Chute into place
(Figure 10).
3. Lower the hinged Discharge Guard.
Support
Rod
Discharge Guard
Hangers
Side Discharge Chute
Figure 10
Figure 9
Protective Plug
Handle
Scre