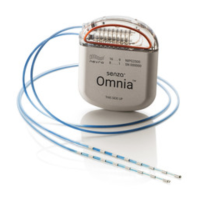
How to Charge the IPG
You can still get stimulation from your device even during charging. Follow these steps
to charge the IPG.
1. Place the Charging Coil (the big blue circle) into the mesh pouch of the
Charger Belt. The mesh pouch is the part of the Charger Belt that does not
have the Nevro logo.
WARNING: Use only the Power Adaptor, Charging Coil, and accessories from
Nevro Corp. Always recharge using the Charger Belt provided. Failure to use the
Charger Belt may result in a burn.
2. Identify the area where the IPG is implanted. When charging, the Charging
Coil in the mesh pouch of the Charger Belt should be lined up so the center of
the Charging Coil covers the top of the IPG. You do not need to remove any
clothing—you can recharge through a thin layer of fabric.
However, make
sure that there is no metal between the Charging Coil and the IPG or near
the Charging Coil because it could result in serious burns. (Metal might be in
jewelry, a belt, buttons, zipper, and so on.) Fasten the belt to hold the
Charging Coil in place; you may want to use the optional Charger Holster to
help hold the Charger.
WARNING: If you feel warmth or discomfort when recharging the device, stop
recharging and contact your doctor.
WARNING: Never charge your IPG when the Charger is plugged into a wall outlet.
Always remove the Power Adaptor before pressing the Charge Start Button.
3. Press the arrow Charge Start Button to turn on the Charger.
4. The Charger will start to look for the IPG. It beeps as it searches.
5. When the Charger finds the IPG, you will see at least two bars on the Antenna
Strength Indicator. (If you do not have at least two bars, move the Charging
Coil slightly until you get sufficient antenna strength.) You can charge
successfully with two or more bars. If the antenna strength still is 1 (the
yellow bar) or no bars, then please advance to the “Optimizing Charging.” The
more bars you see, the better the communication you have and the more
efficient the charging session will be.
6. When the Charger is in the correct position, the IPG Battery Level Indicator
and the Implanted Stimulator’s Battery Level Indicator will light up. These are
the status bars to the right and left of the Charge Start Button .
Patient Manual 11052 Rev A (2015-01-16) 32