13
15
Part # Description Quantity
14
Assembly & Mounting Instructions
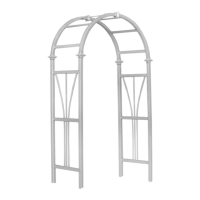
Fairfield Grande Arbor
- Read instructions through carefully before
beginning assembly.
- Identify each component from material list.
- When assembling components, place on a
non-abrasive surface to avoid scratches.
- Do not use excessive force when assembling
components.
- In the event of missing or defective parts,
please call our customer service department
General Information:
- Cordless drill & #2 Robertson bit
- Tape measure
- Level
- Shovel
- Pencil
Tools Required:
- Aussie Auger mounting kit (Sold Separately).
-
- 4” sq. treated wood posts.
- Pre-mix concrete (recommended for added stability,
especially when attaching a gate).
Materials Included:
Materials (Optional):
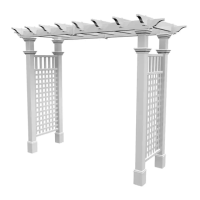
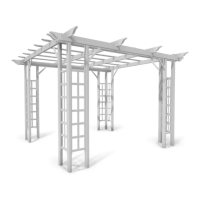
Lay the arbor down and slip the base moldings onto the bottom
of each post as illustrated. Slide each base molding up the post
until it hits the bottom rail. Each base molding will later rest at
ground level once installation is complete. If you have not purchased the
optional trim kit, please disregard this step.
If you don’t have arbor mounts, insert 4x4 treated posts inside
the vinyl posts and fasten using four screws per post (not
included). Again, we recommend a min. of 24” of ground
allowance to provide a secure footing.
If you have any questions concerning the assembly or installation of this product and require assistance, please call our Customer service
department at 1-800-282-9346 (ext.#20), Weekdays from 8:00 am. to 4:00 pm. Eastern standard time.
If you have any comments or suggestions about our product or service, please let us know! Call: 1-800-282-9346 (ext.#24). or E-mail:
info@newenglandarbors.com
To learn more about us, visit us on the web at: www.newenglandarbors.com
Questions ? :
16
With assistance, set the arbor into the holes and verify the
spacing between the posts. At this time you may need to adjust
the depths of the holes. Using a level, check the posts on each
side and adjust as needed.
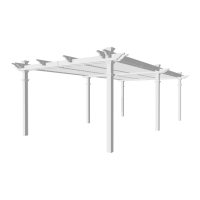
Place your arbor in the desired location and check the distances
between posts as shown in (Fig. 2) on the front cover. Mark post
locations on the ground. Note: If you have purchased our Arbor
mounts, please refer to their instructions to complete the
installation. If not, dig holes in the marked locations. For the pro
model, holes will need to be 36” deep. For the standard model,
we recommend a min. depth of 24” to provide a secure footing.
17
Use the level to check the top assembly for plum. Once you are
satisfied with the orientation, fill in the holes. We recommend
using concrete for this, especially if you have plans to attach a
gate to your arbor. Finally, slide each base molding down to
ground level if required.
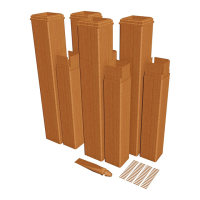
1 4” sq. x 84” (Std) or 120” (Pro) Posts
2 1 3/4” sq. x 31 5/8” Top rails
3 1 3/4” sq. x 31 5/8” Middle rails
4 1 3/4” sq. x 27” Bottom rails
5 1 1/2” x 5 1/2” x 94” Beams
6 4” sq. Post insert caps
7 4” sq. Trim caps
8 23 3/4” x 48” Square lattice
9 1 1/2” x 5 1/2” x 38” Cross filters
10 7/8” x 1 1/2” x 10 3/8” Spindles
11 45 3/8” Lattice channels
12 1 1/2” x 5 1/2” Pergola end caps
13 Hardware kit (Includes):
1 1/2” Self-tapping screws
3” Self-tapping screws
Tube of vinyl cement
- Trim kit
(sold separately).
4
2
2
2
2
4
4
2
7
10
4
18
12
30
1
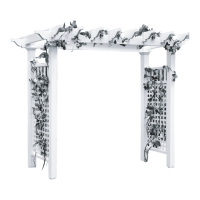
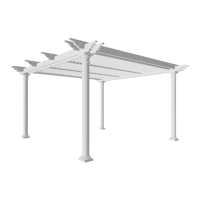
(Fig. 1)
Product dimensions & part
identification.
80”
(Fig. 2)
Post layout for installation.
24”
Opening
Ver 1.07
Part 4
Part 8
Part 2
Part 6
Part 7
Part 3
Part 9
Part 1
Part 10
Part 11
Part 5
86”
32”
55”
111”
88”
80”
78 1/2”
Part 12