Fi
. 21
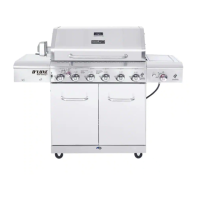
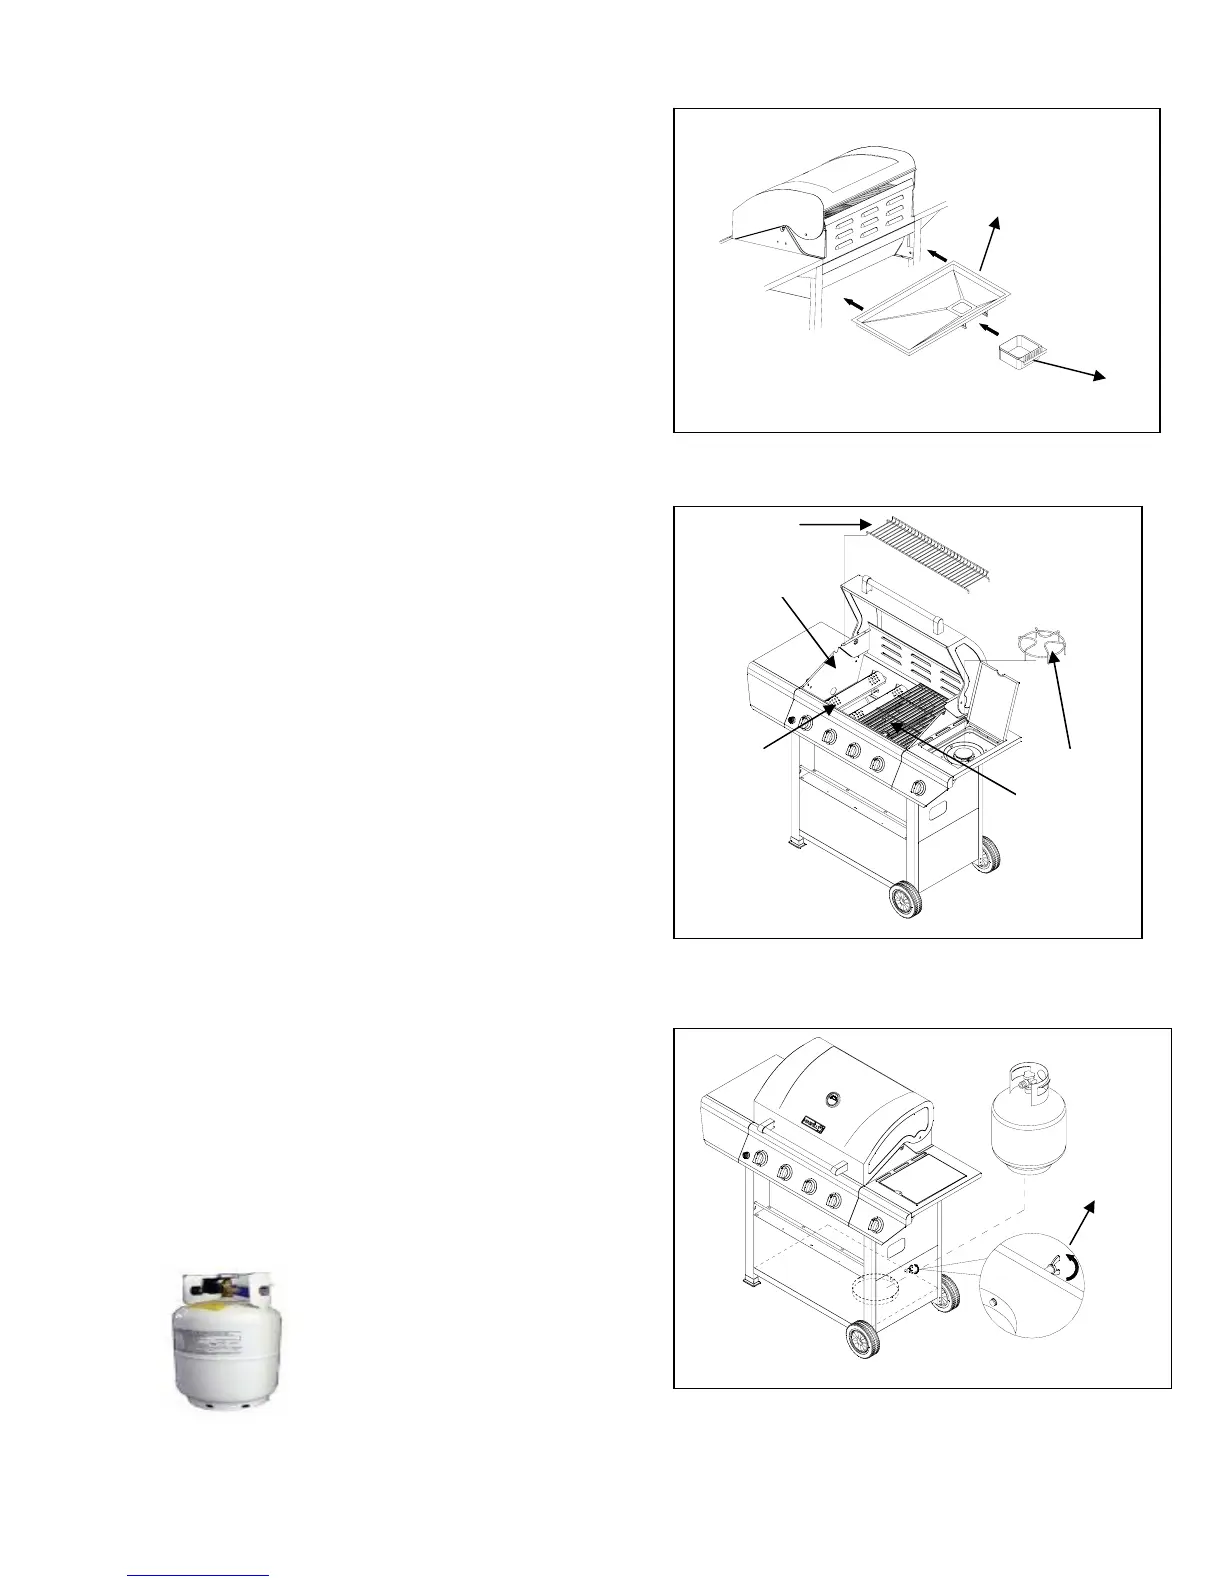
16. Install the Grease Tray
Install the Grease Tray (X) from the rear of the grill
y sliding the tray on the glides at the rear of the
grill until centered under the cooking area. Install
Grease box (W) under the grease tray. As shown
in Fig. 21.
Fig. 22
17. Position Flame Tamers and Cooking Grids
ZA
L
a) The Flame Tamers (ZA) are shipped in
the main firebox assembly. Please check
the placement of and make sure the Flame
Tamers (ZA) in the channels to ensure the
Flame Tamers (ZA) are centered over the burners.
As shown in Fig. 22.
b) The Cooking Grids (L) are also shipped
in the Firebox Assembly (A). Place the Cooking
Grids (L) in the main firebox assembly before
using your grill. The Cooking Grids (L) should
be positioned from the front of the firebox
to the rear for a proper fit. As shown in Fig. 22.
c) Place the Warming Rack (Z) on brackets. As shown
in Fig. 22.
d) Place the Side Burner Cooking Grid (ZB) in
the side burner bowl assembly. As shown in
Fi
. 23
Fig. 22.
Q
18. Liquid Propane Tank Installation
From rear of grill place the liquid propane
tank into the Bottom Panel (B) hole
and tighten the Tank Bolt (Q)
to secure. As shown in Fig. 23.
Always keep the LP cylinder at
90° (upright) orientation to
provide vapor withdraw.
16