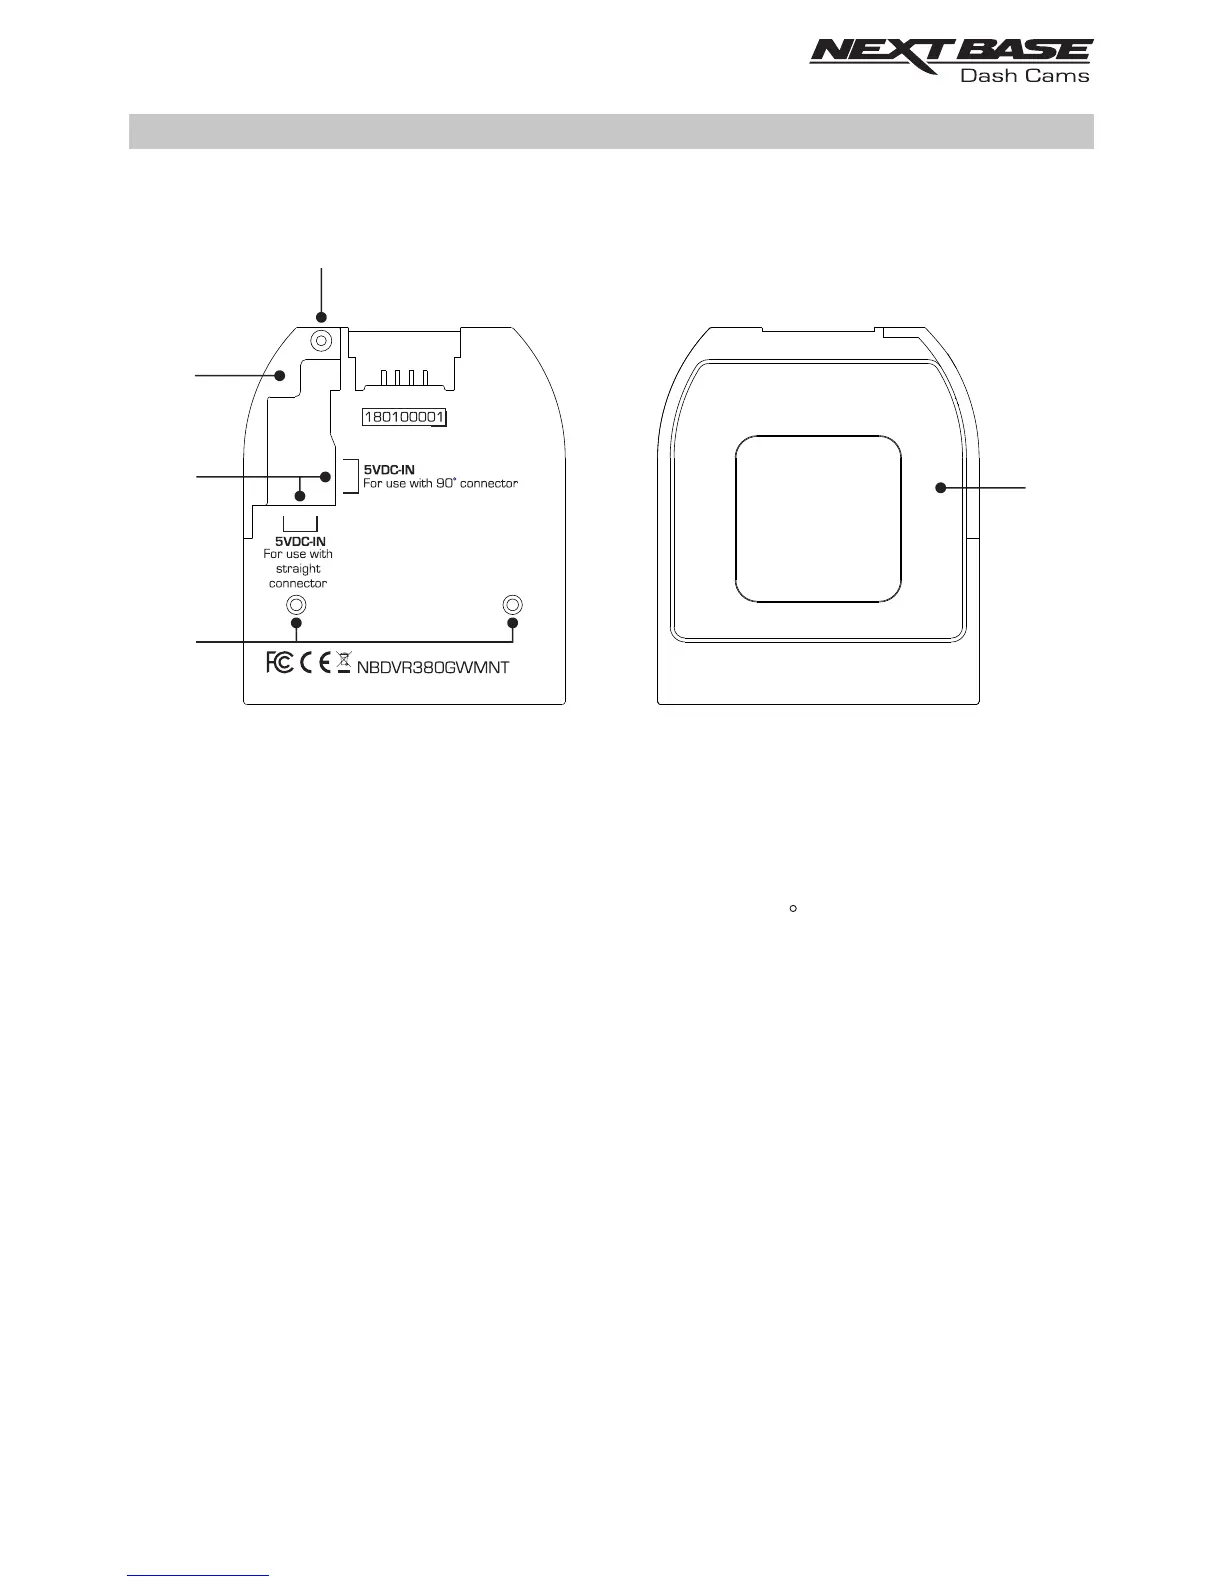
POWERED GPS MOUNT
Please see below to identify the parts of the supplied powered GPS mount.
1. Locking pins
These pins will locate and then allow the camera to be attached to the mount.
2. DC-IN sockets
There are two sockets available, one for use with the supplied 90 car adaptor, the other for
use with the Nextbase Hardwire Kit (sold separately) which uses a straight connector.
Please contact your Nextbase retailer to purchase the Nextbase Hardwire Kit.
3. Cable lock
The cable lock secures the car adaptor or hardwire kit cable to the mount.
4. Cable lock anti-tamper screw
Location of the anti-tamper screw, that can be used to secure the cable lock to the mount.
5. Adhesive pad
Once the backing tape has been removed this adhesive pad will securely adhere the mount to
your windscreen.
Note:
- Before removing the red backing tape from the adhesive pad make sure you have determined
the optimum position for the Dash Cam (see page 27) and that the windscreen is free of dust
and/or dirt.
- A spare adhesive pad has been provided, in case you wish to change the mounts location.
5
1
2
3
4
12