EasyManuals Logo

NI myDAQ User Manual

NI myDAQ
14 pages
To Next Page IconTo Next Page
To Previous Page IconTo Previous Page
Page #7 background imageLoading...
Page #7 background image
TOOLS for SMART MINDS
7
GETTING STARTED WITH MYDAQ DEVICES
This section explains how to add, configure and use myDAQ device with iDaq.
ADDING A MYDAQ DEVICE TO THE LIST OF ACTIVE DEVICES
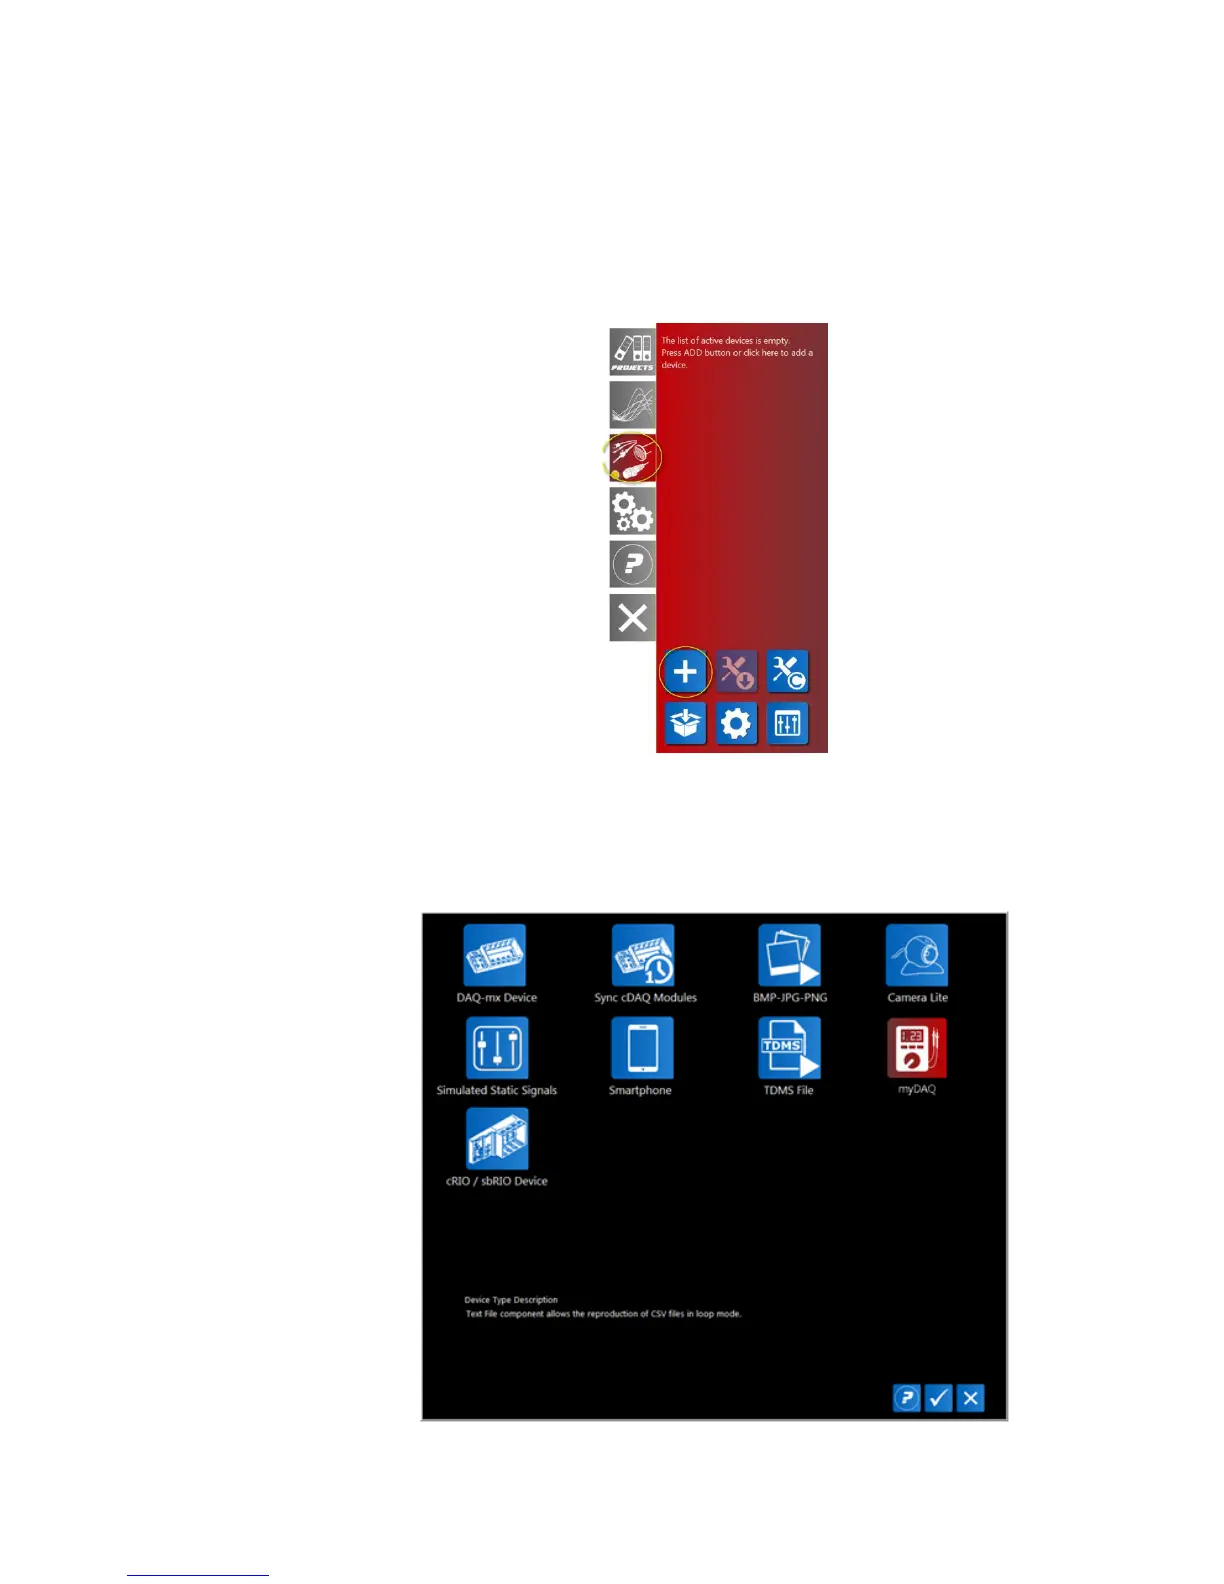
To add a new myDAQ device to the list of active devices, open Device tab from the iDaq
main window end select Add button, as shown in figure below.
FIGURE 3 INSTALLING A NEW MYDAQ IN IDAQ
A new dialog window shows the icons of available devices you can use in iDaq to acquire
signals. The list of icon in your iDaq installation may be different from the image below,
according to the number of components you have installed.
FIGURE 4 DEVICE TYPE SELECTION WINDOW.

Other manuals for NI myDAQ

Questions and Answers:

Question and Answer IconNeed help?

Do you have a question about the NI myDAQ and is the answer not in the manual?

NI myDAQ Specifications

General IconGeneral
Analog Input Channels2
Analog Input Resolution16 bits
Analog Input Range±10 V
Analog Output Channels2
Analog Output Resolution16 bits
Analog Output Max Update Rate200 kS/s
Analog Output Range±10 V
Digital I/O Channels8
Digital I/O Sample Rate1 MS/s
Counter/Timers1
Power Supply Outputs+15 V, -15 V, +5 V
ConnectivityUSB
Power SupplyUSB powered
Operating System CompatibilityWindows
Analog Input Max Sample Rate200 kS/s
Digital I/O CompatibilityTTL

Related product manuals