9
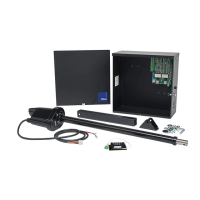
Figure 6 - APOLLO ACTUATOR MOTOR WIRING DIAGRAM
Apollo
816-1K
Red and Black
Note - If gate moves in opposite di-
rection from what is expected, re-
verse the motor power lead wiring.
(Red to pin 3, Black to pin 1)
Red
black
Connect the Apollo 816-1K actua-
tor motor leads to the 3-pin con-
nector as shown in Figure 6.
Note: If the gate moves in the
opposite direction from what is
expected, reverse the actuator
wiring from what is shown in the
figure (Red to Pin 1, Black to Pin
3).
Note: Connector is keyed. Install
connector in keyed orientation
1.5 - Apollo actuator motor wiring and connection to the controller
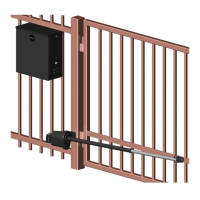
Figure 7 - APOLLO 816-1K CONNECTION AT THE CONTROLLER
Connect Apollo 816-1K actuator motor power
and control wiring as shown above for Motor
1.
Repeat for Motor 2 in dual leaf installation.
1.6 - Actuator connection at the controller
Install the 5 and 3-pin connector into the
section labeled “Motor 1” on the controller
as shown in Figure 7. Install the 5 and 3-
pin and connector into the section labeled
“Motor 2” for a dual leaf swing gate installa-
tion.
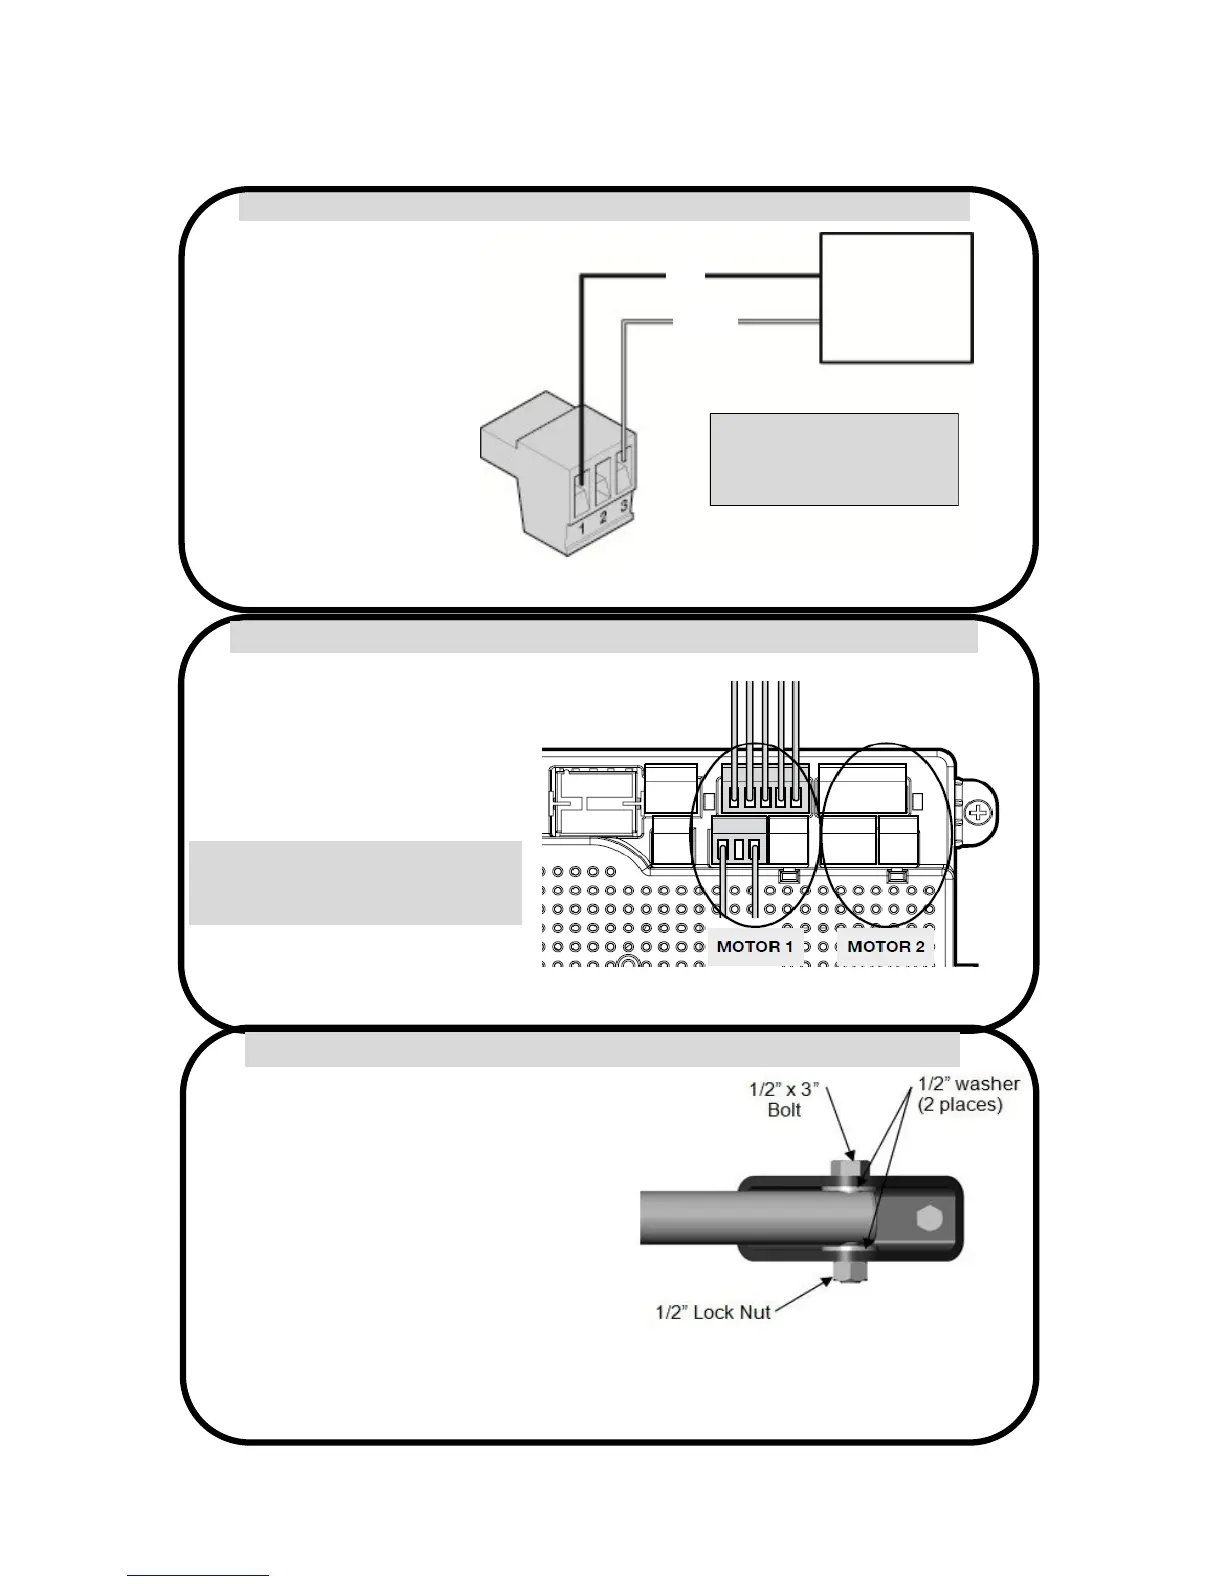
1.7 - GATE BRACKET INSTALLATION
Activate CLOSE button on the 1050 gate operator
board and extend the actuator until it stops (PULL TO
OPEN only, leave actuator retracted for PUSH TO
OPEN).
WARNING: Do not let extension tube rotate as it
extends. Do not insert fingers or tools in the hole
at the end of the extension tube
Align the hole in the end of the actuator extension
tube with the holes in the gate bracket and locate gate
bracket mounting position with the gate in the closed
position. Weld or bolt the gate bracket to the gate
using 3/8” bolts, lock washers, and nuts.
Figure 8: Bracket Installation
Tip: Tack weld or C clamp at first if uncertain about location. Run the unit through a complete cycle
to insure proper operation then mount permanently .Bolt the actuator to the gate bracket as shown.
 Loading...