3
INSTALLATION
Location:
The device should be installed indoors, at around 1.5m height above the floor where the average room temperature can be measured cor-
rectly. It should be away from direct sunlight, cover, or any heat source to avoid wrong measurements.
Note:
• A qualified electrician with the understanding of wiring diagrams and knowledge of electrical safety should complete installa
tion following the instructions.
• Before installation, please confirm the real voltage complying with the device’s specification. Cut off any power supply to
secure the safety of people and device.
• During installation, protect the device from any physical damage by dropping or bumping. If happens, please contact the
supplier for maintenance.
• Keep the device away from acid-base and other corrosive solids, liquids, gases, to avoid damage.
• Read all instructions and documentation and save it for future reference.
CAUTION! - Cut off power supply at circuit breaker or fuse before installation to avoid fire, shock or death!
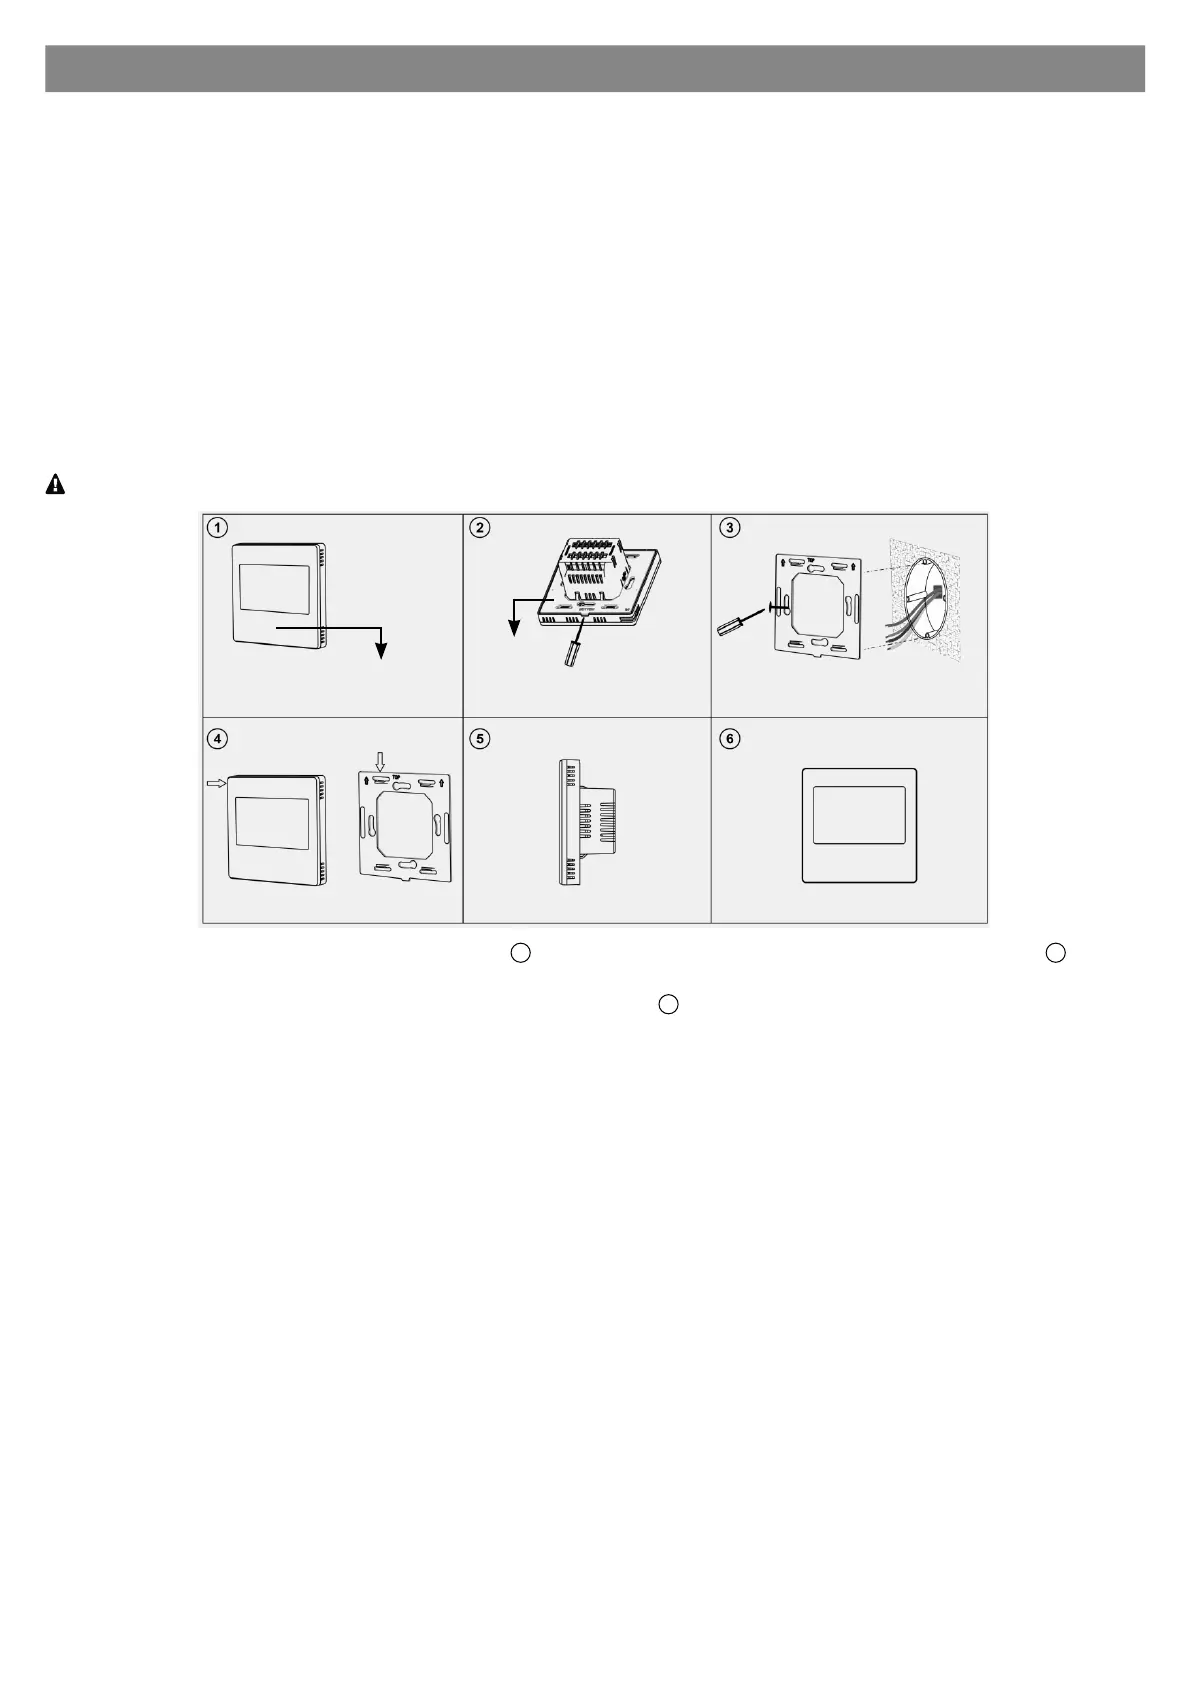
1. Remove the steel frame from the Thermostat (see picture ) and secure it onto the junction box with two screws (see picture )
2. Insert all wires into the right terminals (according to wiring diagram shown below) and tighten screws. The wiring diagram is shown below.
3. Attach the wired device on the points of the steel frame (as shown in picture ) and then push the whole device into the junction box.
4. Confirm the device is firmly mounted, and power it on, then it is ready to operate.
Thermostat
Steel frame
2 3
4