EN
English – 14
GENERAL SAFETY WARNINGS AND PRECAUTIONS
CAUTION! – All installation procedures, connections, programming and
maintenance of the product must be performed by a qualified technician!
Observe the following warnings:
– keep Oview out of the reach of children.
– for cleaning the product surfaces, use a slightly damp (not wet) cloth. Important
– Never use substances containing alcohol, benzene, diluents or other flammable
substances. Use of such substances could damage the product.
– handle the LCD screen with care, taking care to avoid scratching.
– keep this manual in a safe place to enable future consultation.
– at the end of the product lifetime, ensure that it is recycled or scrapped
according to current standards in the place of use.
DESCRIPTION OF OVIEW
The use of Oview as a fixed wall-mounted control unit enables the product to remain
active at all times as it is powered directly and permanently by the automation to
which it is connected. However, if Oview is not used for a short period of time,
the screen sets to standby (reduced brightness). In this case, to restore brightness,
press any key.
To control an automation, simply recall the name and icon of the automation on the
Oview screen and send a command by pressing a key (for further information refer to
the chapter “Using Oview as a control device”).
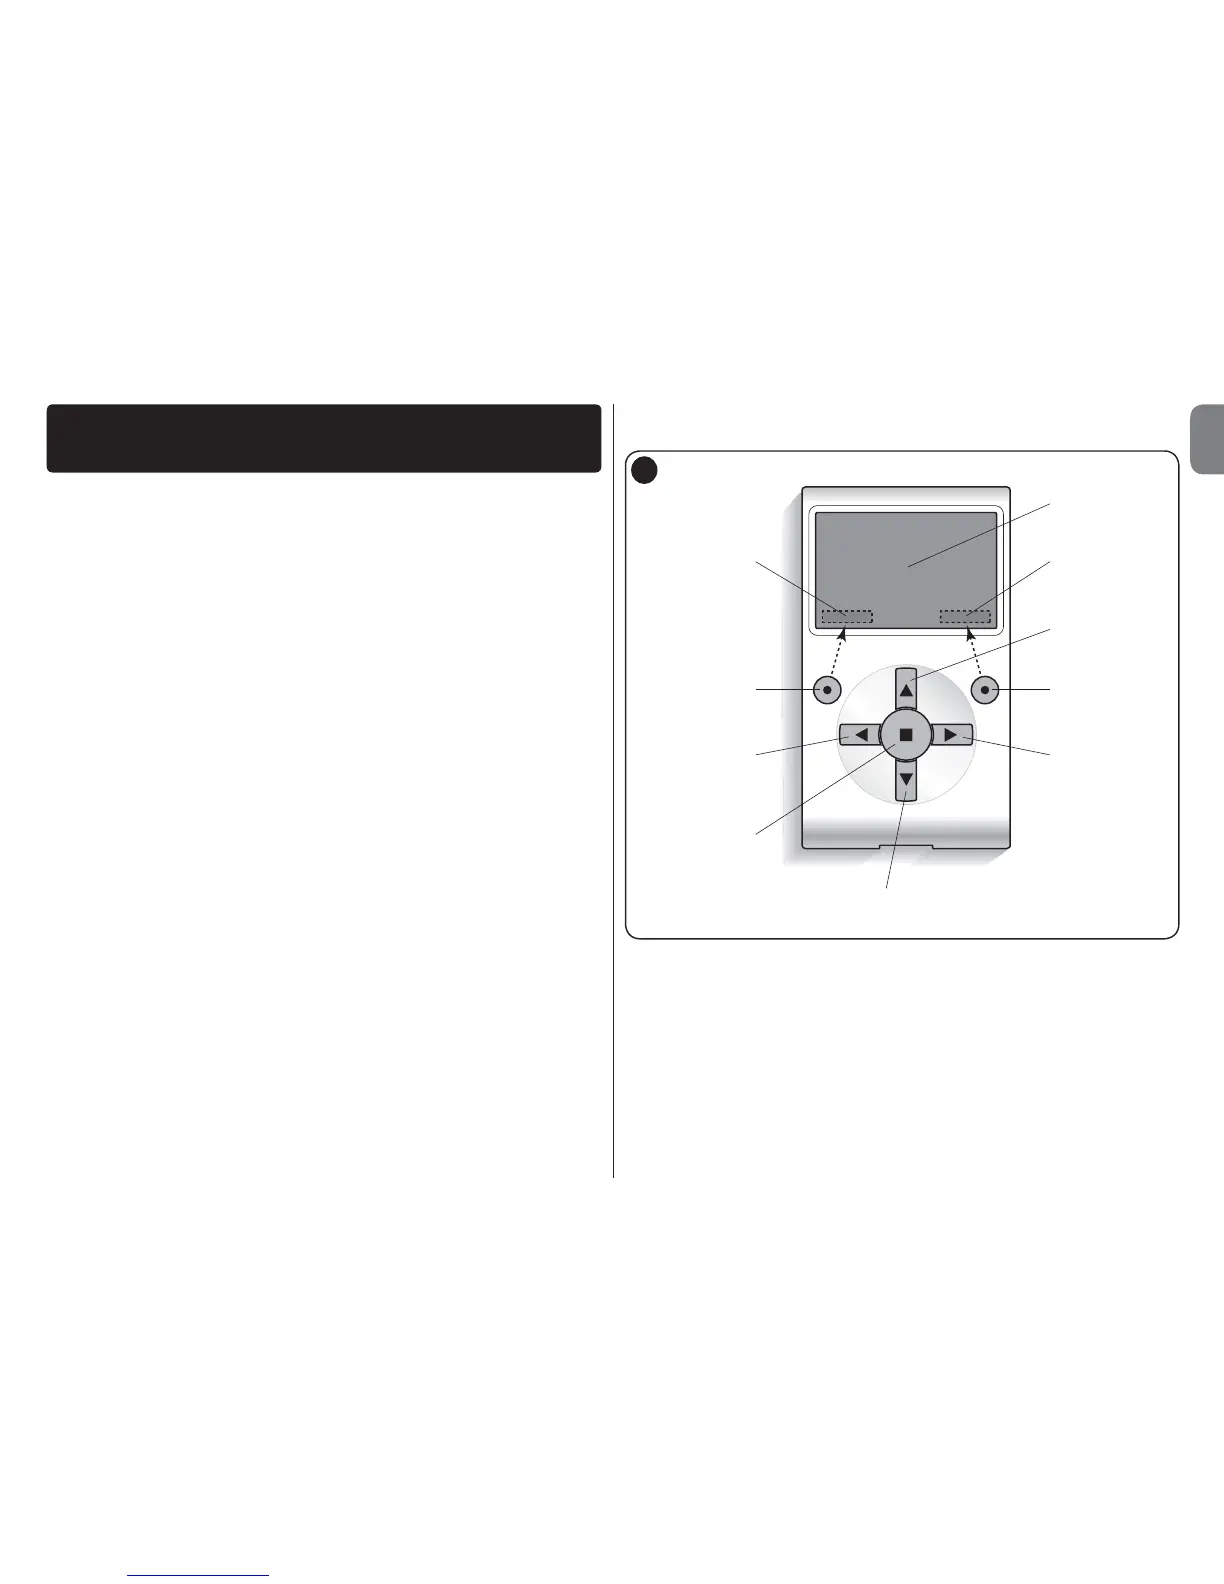
• Key to Oview keys
Oview comprises the following parts (fig. A):
1 – LCD screen;
2 / 4 – Arrow keys W and X: used to move from one field to another in a window
and to move from one window to another;
3 / 5 – Arrow keys S and T: used to modify values in a selected field or to
browse within a list;
6 – Key used to confirm a value;
7 – Key z used to select the item displayed at the bottom left of the screen (9);
USER MANUAL
8 – Key z used to select the item displayed at the bottom right of the screen
(10).
• Oview home page
After activating Oview, the application home page is displayed. This window com-
prises the following elements (see fig. B):
A – Icon defining the type of device connected; in the case of a network of devices
the screen displays the first device found automatically, belonging to specific
group.
B – Name of selected device.
C – Number indicating the series to which the selected device belongs.
D – Local date and time.
8
1
4
3
7
2
5
6
10
9
A

 Loading...


