15 – English
EN
E – “Commands”: this enables the user to access all functions available to control
one or more devices.
F – “Options”: this enables the user to access all functions available to program a
device.
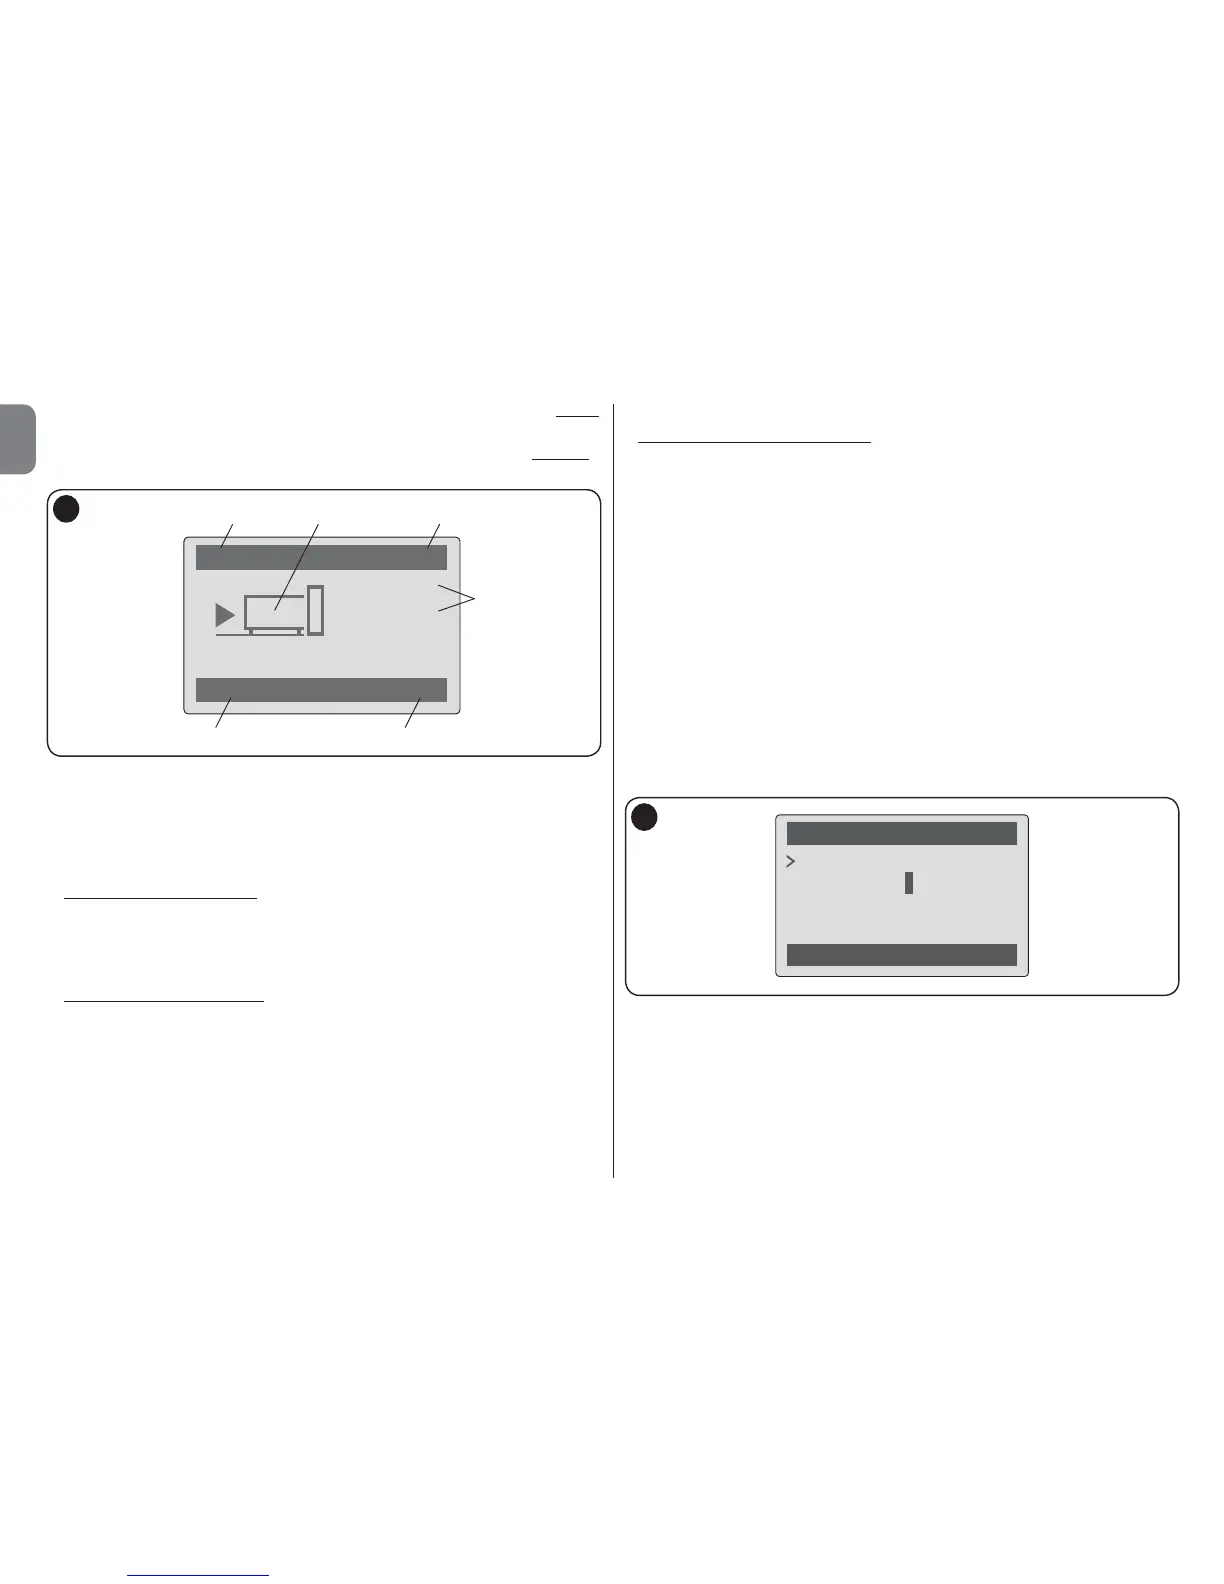
USING OVIEW AS A CONTROL DEVICE
There are two ways to control an automation. After selecting the series to which the
automation to control belongs, send the command required in one of the following
ways:
1) to send a direct command, use one of the following keys:
– OPEN = key S (3 – fig. A)
– STOP = key tasto (6 – fig. A)
– CLOSE = key T (5 – fig. A)
2) to send a special command available on the automation, in the home page (fig.
B) select “Options” by means of key z (7 – fig. A) and then select “Commands”.
Then select the required command from the list displayed.
At this point, to confirm the selected command, select “Select” by means of the key
z (8 – fig. A) or return to the previous window by selecting “Back” by means of the
key z (7 – fig. A).
Note – The type and number of commands present in this list change according to
the type of automation selected.
B
OVIEW FUNCTIONS
• Programming timed commands
Oview is equipped with an internal clock which can be used to program automatic
delivery of commands to an automation. Note – In the event of a power failure, the
clock in Oview continues to operate as normal, but if delivery of a command was
programmed during the black-out, this will not be performed.
To program automatic execution of commands on specific days and times as
required, proceed as follows:
a) select the series to which the automation to be programmed belongs;
b) in the home page (fig. B) select “Options” by means of key z (7 – fig. A) and
then select
“Timed commands”;
c) in the window displayed (fig. C) select “New” to create a new timed command
and enter the required days and times in the relative fields;
d) confirm the settings by selec ting “OK” by means of the key z (8 – fig. A).
Important – Ensure that the clock is set precisely at the local time.
Caution – The timed commands are only enabled if the “Timed command
activation” is activated (ON) under the heading “Options”.
• Setting the Oview operating parameters
To set the Oview operating parameters, enter the home page (fig. B) select
“Options” by means of key z (7 – fig. A) and then select “Oview Settings”.
The window displays the list of parameters available: “Name” - “Display bright-
ness”- “Key brightness” - “Oview Password” - “Information” - “Language” -
“Network options”.
To display and modify individual parameters, select and proceed in the window dis-
played. CAUTION! – Access to some of these parameters may have been restricted
Timed commands
Back Select
on
22:50
mtwtfss
New
C

 Loading...


