GB
7
2.2.3) Phototest
Phototest” is the best possible solution for safety devices in terms of
reliability and it puts the control unit and safety photocells in
“category 2” according to UNI EN 954-1 standard (ed. 12/1998).
Before every manoeuvre is begun, the relative safety devices are
checked and only if everything is in order will the manoeuvre start.
Should the test be unsuccessful (the photocell is blinded by the sun,
cables have short circuited, etc.) the failure is identified and the
manoeuvre is not carried out.
To obtain the Phototest function:
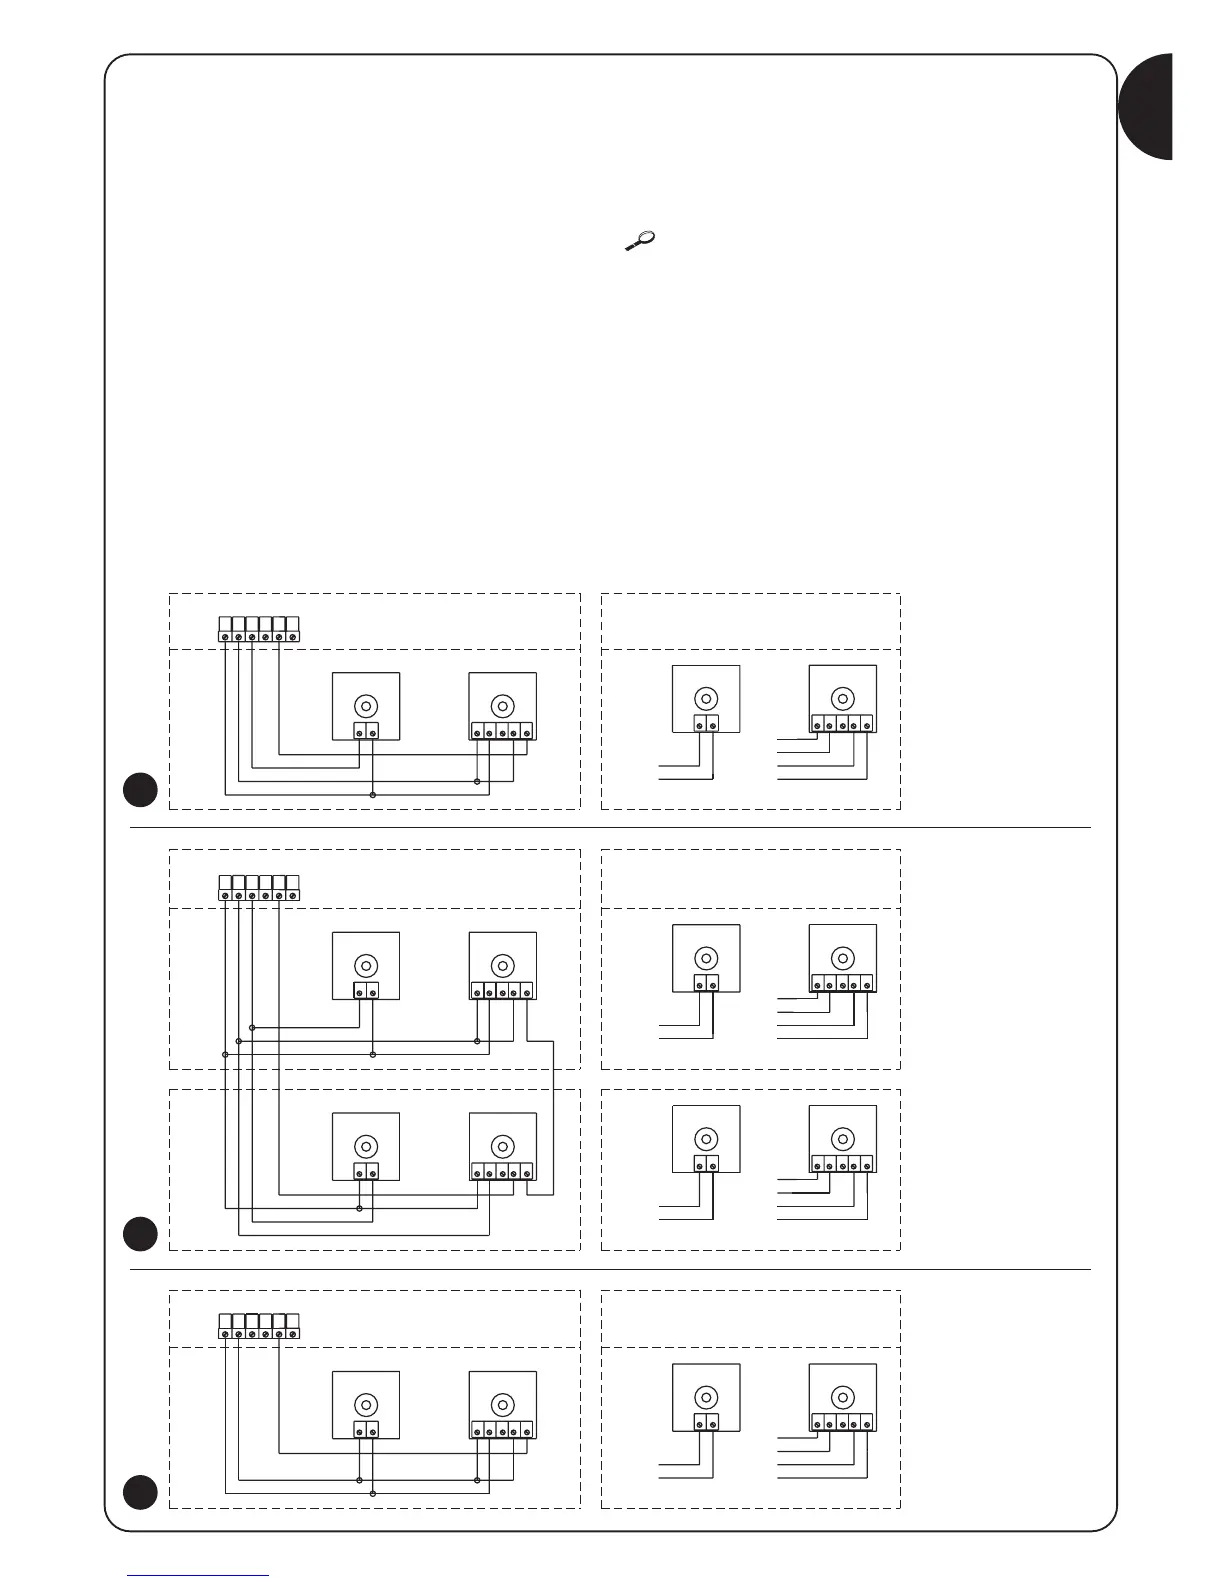
• Set Dip-Switch 10 to ON
• Connect the two photocells as shown in fig. 4a (when using a
single pair of photocells) or as shown in fig. 4b (when using two
pairs of photocells), where the power supply for the photocell
transmitters is not taken directly from the service output but from
the “Phototest” output between the terminals (8-10). The
maximum current available at the “Phototest” output is 50mA (2
pairs of Nice TX)
• Power the receivers directly from the service output of the
control unit (terminals 8-9).
When using 2 pairs of photocells which may interfere with each
other, activate the synchronisation function as described in the
photocell instructions.
If at a later time the Phototest function is no longer required, set Dip-
Switch 10 to the OFF position.
The photocells are tested as follows: when movement is required, it
is first checked that all the receivers involved in the movement give
their consent, then power to the transmitters is disconnected after
which it is checked that all the receivers signal the fact by removing
their consent; the transmitters are then powered and the consent of
all the receivers is verified once more. Only if this sequence is
successfully carried out will the manoeuvre be performed.
 Loading...