27
GB
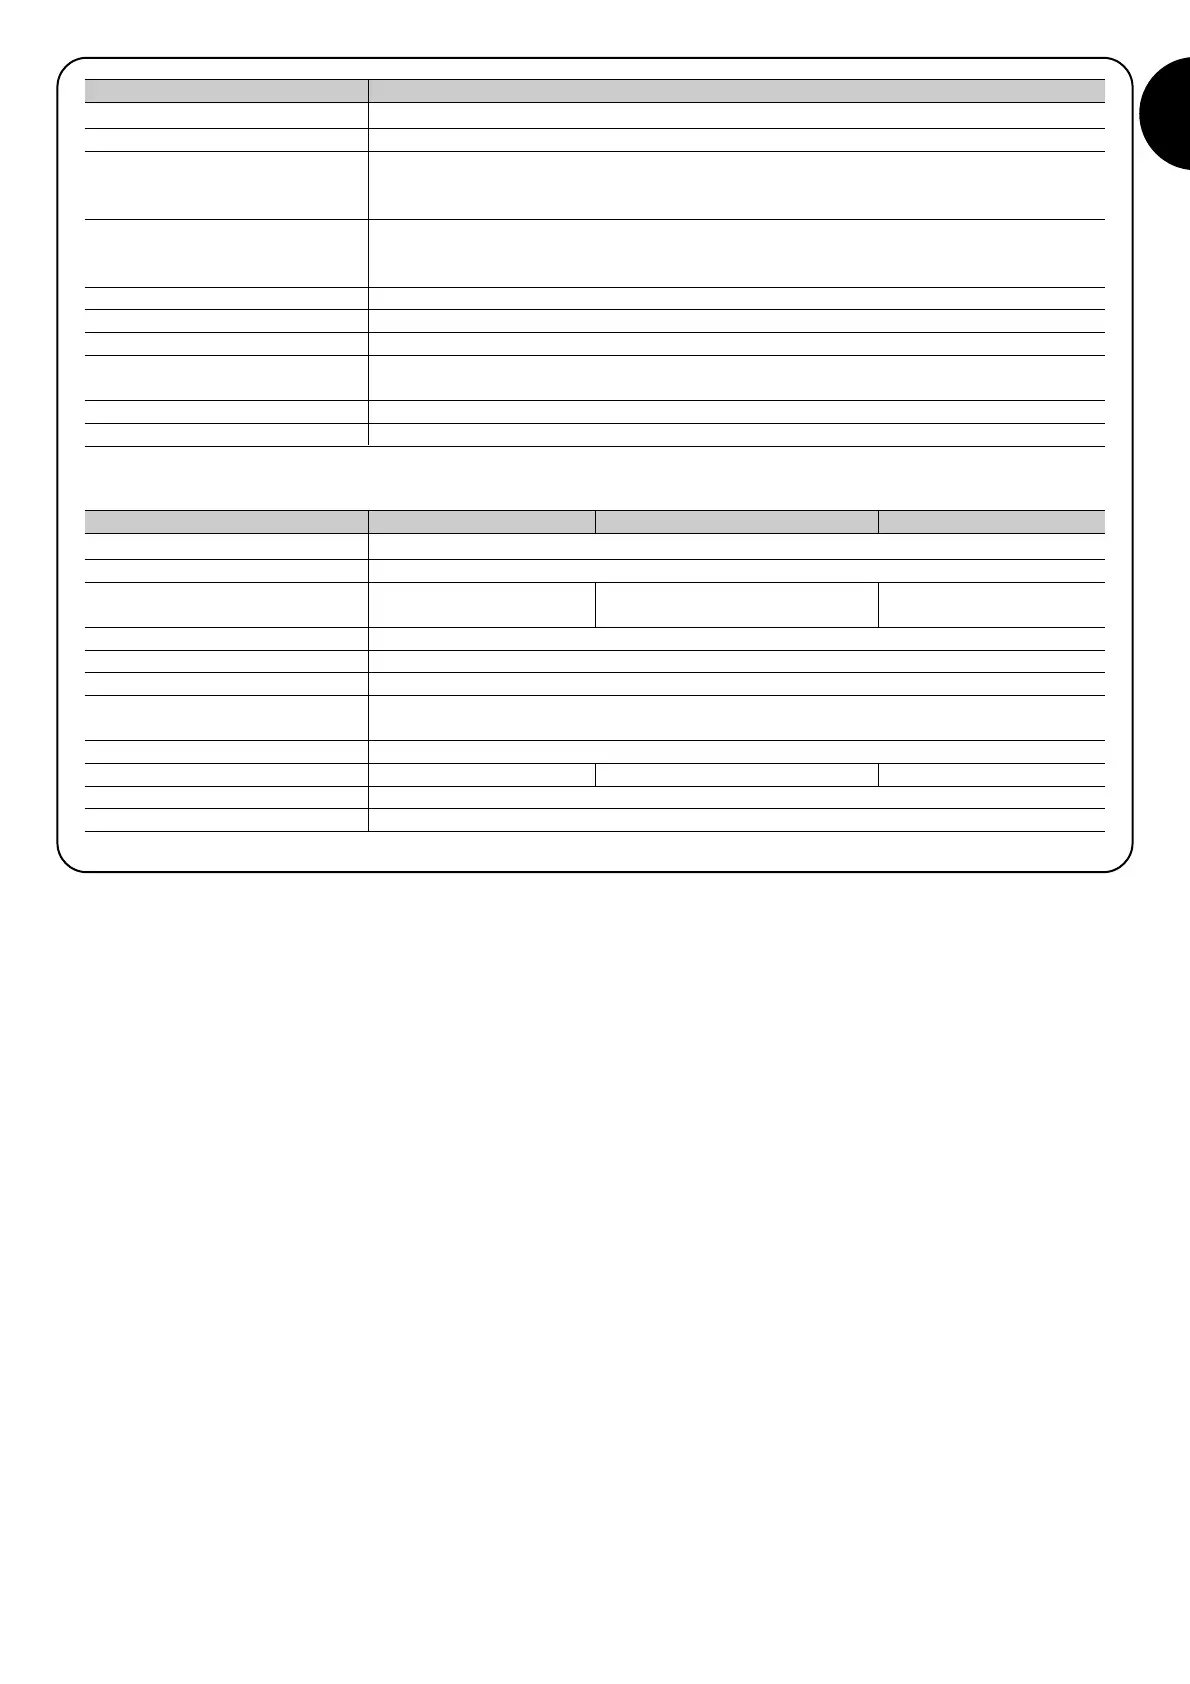
Technical characteristics incorporated radio receiver
Type 4 channel receiver for incorporated radio command
Frequency 433.92MHz
Coding Digital Fixed code with 12 Bit code, FLO type
Digital Rolling code with 52 Bit code, FLOR type
Digital Rolling code with 64 Bit code, SMILO type
Transmitter compatibility (1) FLO, VERY VE
FLOR, VERY VR; only single group: ERGO, PLANO,
SMILO
Transmitters memorized Up to 160 if memorized in mode 1
Input impedance 52Ω
Sensitivity better than 0.5µV
Range of the transmitters From 100 to 150 m. The range can vary if there are obstacles or electromagnetic disturbances,
and is affected by the position of the receiving aerial
Outputs /
Operating temperature -20°C ÷ 55°C
Note 1: the first transmitter that is introduced also determines the type introduced afterwards.
Type 2 channel transmitter for radio command
Frequency 433.92MHz
Coding Fixed Code with Digital Rolling code with Digital Rolling code with
12 Bit code, FLO type 52 Bit code, FLOR type 64 Bit code, SMILO type
Keys 2
Power supply 12Vdc with 23A battery
Absorption 25mA
Battery life 1 year, estimated on the basis of 20 commands/day, each lasting 1s at 20°C
(at low temperatures the efficiency of the batteries decreases)
Irradiated power 100µW
Dimensions and weight 72 x 40 h 18mm / 30g 72 x 40 h 18mm / 30g Diameter 48 h14mm / 19g
Protection class IP40 (suitable for use indoors or in protected environments)
Operating temperature -40°C ÷ 85°C
Technical characteristics transmitter: FLO2 transmitter: FLO2R-S transmitter: SM2