26
to the “Language” option and conrm by pressing the OK button
(4). Use button (6) to switch to the desired language for the camera
menu and conrm by pressing the OK button (4).
Use of the touch screen buttons is also permitted: press the co-
gwheel while on the standby screen, press the cogwheel again while
in the menu screen and move your nger across the screen to until
your desired “language” has been found.
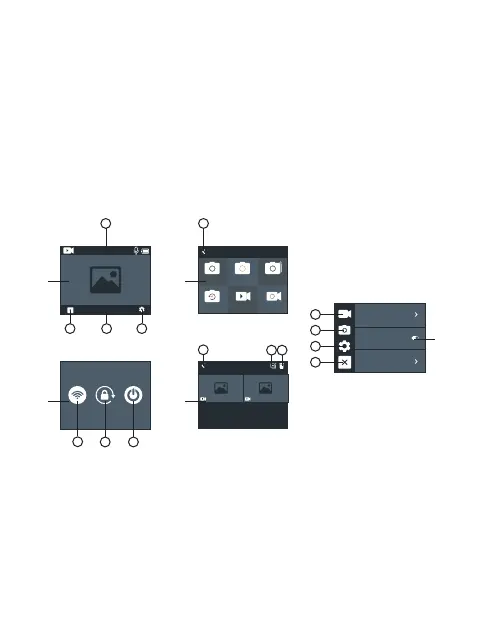
TOUCH SCREEN CONTROLS
The camera may be used via the touch screen display:
Figure A: wiping your nger from the left or right across the display
screen to choose between video and photo mode. Swipe down
from the top of the screen (point 1) to open the options to turn on
Wi-Fi, lock the display, and power o the camera (Figure C) Select
point 2 to open the options for video playback/photo taking (Figure
D). Select point 3 to open the quick menu for video/photo modes
(Figure B) Select point 4 to open the video settings, photo settings,
and camera settings (Figure E).
Resolution
Image Stabilization
Video Encode
00:00:00/00:00:00
4K 30fps
Albums
Working Mode
Photo Timelapse
Brust Photo
Self Timer Video
Slow Motion
1
1
2
3
4
2
1
3
3
2
1
4
3
2
1
A
C
B
D
E