6.4 Upload
1. Choose in EDMS software the ‘Upload Memory Data
From Gauge’ selection.
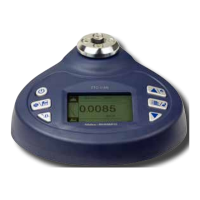
2. On the TTC screen, select Upload. The screen should display
‘Upload…’ as shown below.
3. While ‘Upload…’ is visible on the screen, click ‘Start
Acquisition’ on the EDMS software.
4. Data should populate the table on the right hand side of the
software screen.
6.5 Delete Selected
Select the range of data to be deleted. Touch “MODE/UP” to ad-
just the value. Press “SAVE/PRINT” to shift to the next position.
Touch “ZERO/EXIT” to cancel; touch “MENU/ENTER” to confirm.
6.6 Delete All
In this menu, a prompt will appear. All data will be deleted by
selecting “YES” and canceled by selecting “NO” or pressing
“ZERO/EXIT”.
7. SYSTEM
Under the System menu, several parameters may be set.
5
7.1 Display Mode
Two display modes may be selected: Digital and Graphic.
7.2 Auto Power Off
To maximize battery life, the power can be set to shutdown after
non-use. The time can be set in this menu. The range is 01-99
minutes. When set to “99” the gauge will never turn off. Touch
“MODE/UP” to adjust the value, touch “SAVE/PRINT” to shift to
the next position. Press “ZERO/EXIT” to cancel; Push “MENU/EN-
TER” to confirm and exit.
7.3 Backlight
Under this menu, the backlight can be set to ON, OFF or have an
auto shutdown time. Touch “MODE/UP” or “DOWN” keys to shift
to the next position. Press “ZERO/EXIT” to cancel. Press “MENU/
ENTER” to confirm and exit.
7.4 Key Tone
Turn the key sound ON or OFF. Touch “MODE/UP” or “DOWN”
keys to shift to the next position. Touch “LOG” to cancel; Press
“MENU/ENTER” to confirm and exit.
7.5 Language
Select between English, German and Chinese.
www.GlobalTestSupply.com
Find Quality Products Online at: sales@GlobalTestSupply.com
 Loading...