Do you have a question about the Nikon COOLPIX 2100 and is the answer not in the manual?
Lists necessary camera, cable/reader, power sources, memory card, and guide.
Steps to verify the camera's existing firmware version.
Download the firmware file and ensure it decompresses correctly.
Guide for copying firmware using a USB cable connection.
Guide for copying firmware using a CompactFlash card reader.
Insert firmware card and set mode dial to SETUP.
Power on the camera while holding the delete button.
Navigate the update dialog, handle warnings, and monitor progress.
Verify the camera's firmware version after the update.
Format the memory card after the firmware update.
Reset the camera's USB connection setting to its original state.
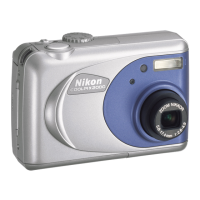
This document outlines the process for upgrading the firmware of the Nikon Coolpix 2100 digital camera, specifically for Macintosh users. The primary function of this guide is to provide step-by-step instructions to ensure a successful firmware update, which can improve camera performance, fix bugs, or add new features.
The firmware update process involves several key stages, starting with preparation. Users need to gather specific items before beginning the upgrade. These include the Coolpix 2100 digital camera itself, a UC-E6 USB cable or a CompactFlash card reader for connecting the camera or memory card to a computer, and a reliable power source. For power, options include an EH-61 AC adapter, a new CRV3 battery, or two fully-charged EN-MH1 rechargeable batteries. A Nikon-approved CompactFlash memory card, which must be formatted in the Coolpix 2100 prior to the update, is also essential. Finally, users are advised to have the "Nikon Guide to Digital Photography for the Coolpix 2100" on hand, as it contains supplementary information referenced throughout the update process, particularly regarding memory card formatting, USB options, and camera connections.
Before proceeding with the actual update, it's crucial to check the current firmware version installed on the camera. This is done by rotating the mode dial to "SETUP." Then, while pressing and holding the MENU button, the camera should be turned on. The camera's monitor will display "E2100 V" followed by the current version number. If the display shows "E2100 V1.0," it indicates that the current firmware is version 1.0, and this upgrade is compatible with versions 1.0 or earlier. After checking the version, the camera should be turned off.
The next major step involves downloading and extracting the new firmware. Users are instructed to download a file named "CP2100fw11.sit." Upon successful download, this file should automatically decompress, creating a folder named "CP2100fw11." This folder contains the necessary firmware files, specifically a "firmware" folder which holds the camera firmware, and within that, a "firmware.bin" file. This structured organization ensures that the correct files are easily identifiable for the subsequent steps.
Once the firmware is downloaded and extracted, it needs to be copied to the memory card. This can be achieved through two methods: direct USB connection to the camera or by using a CompactFlash card reader.
For the direct USB connection method, the camera must first be turned off, and the formatted memory card inserted into the Coolpix 2100. Users should refer to the "Nikon Guide to Digital Photography" for details on formatting memory cards. The USB option in the camera's setup menu must be set to "Mass Storage." After setting the USB option and referring to the guide for connecting the camera to a computer, the camera is turned off, and the UC-E6 USB cable is connected as illustrated in the manual. Then, the mode dial is rotated to "auto" or "manual," and the camera is turned on. If Nikon View software is installed on the computer, Nikon Transfer might launch automatically, displaying a message about no selected transfer image. Users should click "OK" to exit Nikon Transfer. The "firmware" folder (not just the ".bin" file) from the "CP2100fw11" folder is then copied to the top directory of the untitled volume that appears on the desktop, corresponding to the connected camera. This volume might be labeled "NO_NAME" (for OS X) or "UNTITLED" (for OS 8 or 9 disks). After copying, it's important to verify the contents of the untitled volume by opening the "firmware" folder and confirming the presence of "firmware.bin." Finally, the camera must be safely disconnected from the computer, following the guidelines in the "Nikon Guide to Digital Photography."
Alternatively, for the CompactFlash card reader method, the card reader is connected to the computer, and the formatted memory card is inserted into it. Similar to the USB method, if Nikon View is installed, Nikon Transfer might launch, and users should exit it. The "firmware" folder (again, not just the ".bin" file) is then copied from the "CP2100fw11" folder to the top directory of the untitled volume that corresponds to the mounted memory card. After copying, the contents of the untitled volume should be checked to ensure "firmware.bin" is present within the "firmware" folder. The memory card is then safely removed from the card reader by dragging the untitled volume to the Trash (on Macintosh) and physically removing the card. The card reader is then disconnected.
The final stage is updating the camera firmware. This step requires careful attention to avoid potential issues that could render the camera inoperable. Critical warnings are provided: the memory card should not be removed, the camera should not be turned off, the AC adapter should not be unplugged or disconnected, the battery should not be removed, and the camera should not be subjected to powerful electromagnetic noise during the update. If users are unsure about performing the update successfully, they are advised to contact a Nikon service representative.
To initiate the update, the memory card containing the firmware is inserted into the Coolpix 2100. The mode dial is rotated to "SETUP." The camera is then turned on while simultaneously pressing the delete button. This action will display a firmware update dialog. Users must highlight "YES" and press the multi selector to the right. A crucial check here is for battery status; if a "WARNING!! BATTERY EXHAUSTED" message appears, the batteries must be replaced with a fresh CRV3 lithium battery before restarting the update process. Once confirmed, a message indicating "UPDATING..." will be displayed, along with a warning not to turn off the camera, as the update typically takes 2-3 minutes. Upon successful completion, a "Done" message will appear.
To confirm the update's success, the camera is turned off. Then, the camera firmware version is checked again, following the same procedure as in the initial check (Step 2). If "E2100 V1.1" is displayed in the monitor, the update was successful. If the update was not successful, users are instructed to contact a Nikon service representative.
After a successful firmware update, two maintenance steps are recommended. First, the memory card should be formatted. Information on formatting memory cards can be found in the "Nikon Guide to Digital Photography." Second, if the USB setting was changed from PTP (Picture Transfer Protocol) to Mass Storage for the firmware update, it should be restored to its original PTP setting. Details on how to do this are also available in the "Nikon Guide to Digital Photography." These steps complete the firmware update process, ensuring the camera is ready for normal use with its updated software.
| Megapixel | 2 MP |
|---|---|
| Sensor type | - |
| Digital zoom | 4 x |
| Optical zoom | 3 x |
| Focal length range | 4.7 - 14.1 mm |
| Internal memory | 8 MB |
| Display diagonal | 1.5 \ |
| Digital SLR | No |
| Minimum RAM | 64 MB |
| Dimensions (WxDxH) | 87.5 x 65 x 38 mm |
| Minimum storage drive space | 60 MB |
| Weight | 150 g |
|---|