Do you have a question about the Nikon COOLPIX A and is the answer not in the manual?
Explains the symbols and conventions used in the manual for easier information retrieval.
Instructions for charging the camera's battery before first use.
Steps for inserting the battery and memory card into the camera.
Procedure for powering on the camera for the first time.
Guidance on focusing and capturing a photograph with the camera.
Critical warnings to prevent injury or damage when using the camera.
Caution regarding storing the camera away from direct sunlight to prevent fire.
Precautions for safe handling of the camera's battery.
Safety guidelines for using the battery charger to prevent hazards.
How to check the battery level and remaining card capacity on the monitor.
Guide to using the camera's automatic shooting mode for simple photography.
Explanation of various scene modes for specific shooting situations.
Details on controlling shutter speed and aperture in different exposure modes.
Instructions on how to save custom camera settings to U1/U2 modes.
Description of various shooting drive modes available on the camera.
Explanation of file formats and compression ratios for image quality.
Details on choosing different resolutions for image files.
Overview of the camera's autofocus system and its modes.
Explanation of different metering methods for exposure calculation.
How to adjust exposure levels to make pictures brighter or darker.
Selection of white balance presets to match light source conditions.
Using Picture Controls to adjust image processing settings like sharpening and contrast.
Instructions for raising and using the camera's built-in flash unit.
Procedure to reset camera settings to their factory default values.
Details on controlling shutter speed and aperture in different exposure modes.
Instructions on how to save custom camera settings to U1/U2 modes.
Description of various shooting drive modes available on the camera.
Explanation of file formats and compression ratios for image quality.
Details on choosing different resolutions for image files.
Overview of the camera's autofocus system and its modes.
Selection of specific autofocus modes like AF-S and AF-F.
Choosing how the focus area for autofocus is selected.
Technique to lock focus on a subject for recomposition.
Instructions for manually adjusting focus using the focus ring.
Setting the camera to automatically adjust ISO sensitivity.
Explanation of different metering methods for exposure calculation.
How to adjust exposure levels to make pictures brighter or darker.
Selection of white balance presets to match light source conditions.
Using Picture Controls to adjust image processing settings like sharpening and contrast.
Instructions for raising and using the camera's built-in flash unit.
Procedure to reset camera settings to their factory default values.
Overview of the in-camera retouching features.
Guidelines for cleaning and maintaining the camera body, lens, and monitor.
Important precautions for handling the camera and battery safely.
Solutions for problems related to the battery and camera display.
Troubleshooting common issues encountered during shooting.
List of camera indicators and error messages with their solutions.
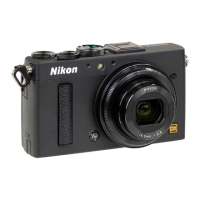
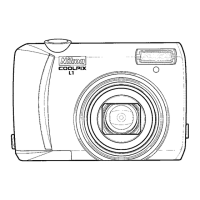
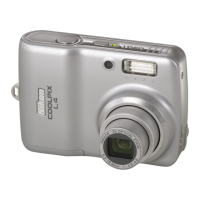
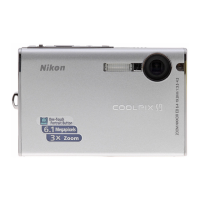
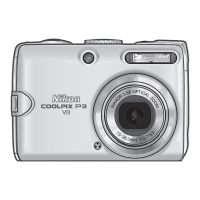
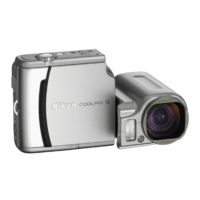
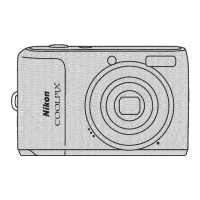
Identification of the main physical components of the camera body.
Explanation of the information displayed on the camera's monitor screen.
Details on the on-screen information display and how to adjust it.
Guide to using the automatic mode for simple point-and-shoot photography.
Explanation of manual and semi-automatic exposure modes.
Instructions for saving and recalling custom shooting settings.
Description of various scene modes for specific photographic situations.
Overview of the different menu tabs available: Playback, Shooting, Setup, Retouch.
List of options available in the Playback menu for managing images.
List of options available in the Shooting menu for camera settings.
Instructions for charging the camera's battery before first use.
Steps for correctly inserting the battery into the camera.
Procedure for inserting a memory card into the camera correctly.
Procedure for powering on the camera and initiating setup.
Steps for selecting the menu language and setting the camera's time and date.
Instruction to select the automatic shooting mode on the mode dial.
Guidance on holding the camera for stable shooting.
Instructions on composing the shot before taking the picture.
Procedure for half-pressing the shutter to focus the camera.
Instructions on fully pressing the shutter to take the photograph.
Action to initiate photo playback mode on the camera.
How to navigate through photos during playback.
Instruction to display the photo intended for deletion.
Procedure for deleting the currently displayed photograph.
Instructions for selecting and using various scene modes.
Description of the Portrait scene mode settings and usage.
Description of the Landscape scene mode settings and usage.
Description of the Child scene mode settings and usage.
Step-by-step guide on how to record movies with sound on the camera.
Instructions on how to trim movie clips to create edited copies.
Steps to select a specific frame from a movie for saving.
Action to select the option for saving a frame as a still image.
Details on controlling shutter speed and aperture in different exposure modes.
Instructions on how to save custom camera settings to U1/U2 modes.
Description of various shooting drive modes available on the camera.
Guidance on setting up the camera on a tripod for remote operation.
Steps to select self-timer or remote control modes.
Explanation of file formats and compression ratios for image quality.
Accessing white balance options within the shooting menu.
Procedure for adjusting white balance using the multi selector.
Steps to measure and set a custom white balance value.
Action to perform the white balance measurement.
Guide to choosing from the camera's preset Picture Control profiles.
Accessing the menu to modify existing Picture Controls.
Choosing a specific Picture Control to modify.
Comparison between Active D-Lighting (pre-shooting) and D-Lighting (post-shooting).
Instructions for raising and using the camera's built-in flash unit.
Action to display shooting information and access settings.
Accessing the flash compensation settings on the monitor.
Setting the desired flash compensation level using the command dial.
Step-by-step instructions for utilizing the FV Lock feature.
Procedure to reset camera settings to their factory default values.
Selecting the type of bracketing: AE, WB, or ADL.
Choosing the step value for exposure or white balance bracketing.
Executing the bracketing sequence for the chosen method.
Accessing the interval timer shooting function in the menu.
Setting the time for the interval shooting to begin.
Configuration options for the GPS unit within the setup menu.
Viewing individual photographs in full-screen playback.
Setting to automatically rotate portrait-oriented images.
Displaying basic file details like name, quality, and size.
Viewing highlight data for image exposure analysis.
Displaying RGB channel histograms for image tonal analysis.
Displaying detailed shooting parameters like aperture, shutter speed, and ISO.
Steps to select a photograph for protection.
Action to apply or remove protection from a selected photograph.
Procedure to remove protection from all images in the current folder.
Methods for deleting photos in different playback views.
Instructions for deleting specific photographs selected during playback.
Procedure for deleting all photos taken on a specific date.
Overview of Nikon's imaging software for viewing, retouching, and sharing photos.
Step-by-step guide for installing the ViewNX 2 software.
Options for transferring images: direct USB or memory card.
Reference to online help for further details on using ViewNX 2.
Procedure for connecting the camera to a PictBridge printer.
Steps to select a single photograph for printing.
Accessing the print settings menu for a selected photo.
Setting parameters like page size, number of copies, and border.
Accessing the PictBridge menu for batch printing options.
Selecting print methods like Print select, Select date, or Index print.
Accessing the DPOF print order function in the playback menu.
Choosing photos and specifying the number of prints for a DPOF order.
Step to turn off the camera before connecting HDMI.
Procedure for connecting the camera to a TV via HDMI cable.
Action to start playback on the TV after connection.
Setting the folder for image playback.
Customizing the information displayed during playback.
Setting whether images are displayed automatically after shooting.
Procedure to reset all shooting menu options to default values.
Selecting the folder for saving subsequent photographs.
Setting the file format and compression ratio for images.
Choosing the resolution for image files.
Adjusting the color balance to match the light source.
Selecting preset image processing profiles.
Creating, saving, and managing custom Picture Controls.
Setting the color gamut for image reproduction.
Enhancing detail in highlights and shadows for better contrast.
Reducing noise in images taken at slow shutter speeds.
Reducing noise in images taken at high ISO sensitivities.
Adjusting the camera's sensitivity to light.
Selecting the shooting drive mode (e.g., single, continuous).
Enabling the AF-assist illuminator for low-light focusing.
Adjusting exposure compensation specifically for flash.
Controlling the built-in flash mode (e.g., TTL, Manual).
Configuring settings for automatic bracketing (exposure, WB, ADL).
Setting up the camera for automatic shooting at preset intervals.
Adjusting parameters for movie recording like frame size and quality.
Instructions for formatting the memory card before use.
Reducing flicker and banding in images shot under fluorescent lighting.
Setting to automatically rotate portrait-oriented images in playback.
Accessing the retouch menu to select editing functions.
Choosing the photograph to be retouched.
Selecting the specific retouching effect to apply.
Finalizing the retouching process to create a new copy.
Information on the image quality and size of cropped copies.
Descriptions of various filter effects like Skylight and Warm filter.
Accessing the image overlay function from the retouch menu.
Accessing the function to convert NEF (RAW) files to JPEG.
Choosing the NEF (RAW) image to process.
Accessing the image resizing function.
Selecting the desired dimensions for the resized image.
Information on attaching and using external flash units.
Instructions for cleaning the camera body, lens, and monitor.
General precautions for handling the camera to prevent damage.
Solutions for problems related to the battery and camera display.
Troubleshooting common issues encountered during shooting.
Troubleshooting specific issues in P, S, A, and M shooting modes.
Troubleshooting common problems encountered during photo playback.
Solutions for various other camera operational issues.
Technical specifications of the camera, including sensor, lens, and monitor.
| Sensor | CMOS |
|---|---|
| Effective Pixels | 16.2 million |
| Image Sensor | CMOS |
| Lens | NIKKOR lens |
| Maximum Aperture | f/2.8 |
| Video Resolution | 1920 x 1080 (Full HD) |
| Storage | SD/SDHC/SDXC memory cards |
| Storage Media | SD/SDHC/SDXC memory cards |
| Battery | EN-EL20 Rechargeable Li-ion Battery |
| Sensor Size | 23.6 x 15.6 mm |
| Focal Length | 18.5 mm (angle of view equivalent to that of 28 mm lens in 35mm [135] format) |
| ISO Sensitivity | ISO 100-6400 (expandable to 25600) |
| Monitor Size | 3.0-inch |
| Monitor Type | TFT LCD with anti-reflection coating |
| LCD Screen | 3-in. TFT LCD with anti-reflection coating |
| Video Recording | Full HD 1920 x 1080, 30p |
| File Formats | JPEG, RAW (NEF), MOV |
| Weight | 299 g (10.6 oz) |
| Weight with Battery and Memory Card | 299 g (10.6 oz) with battery and memory card |
| Shutter Speed | 1/2000 to 30 s |
| Continuous Shooting | 4 fps |
| Dimensions | 111 x 64.3 x 40.3 mm |
| Display | 3-in. TFT LCD with anti-reflection coating |