C
Charles PayneAug 31, 2025
How to improve monitor readability on Nikon Digital Camera?
- AAustin SanchezAug 31, 2025
If your Nikon Digital Camera monitor is hard to read, try adjusting the monitor brightness or cleaning the monitor if it's dirty.
How to improve monitor readability on Nikon Digital Camera?
If your Nikon Digital Camera monitor is hard to read, try adjusting the monitor brightness or cleaning the monitor if it's dirty.
Why are there bright spots in my Nikon Digital Camera flash photos?
If bright specks appear in images captured with flash on your Nikon Digital Camera, the flash is likely reflecting off particles in the air. Set the flash mode to W (off).
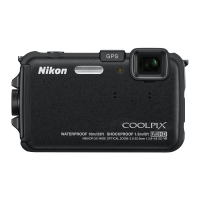
Why are my photos too dark on my Nikon COOLPIX AW120 Digital Camera?
If your Nikon Digital Camera images are too dark (underexposed), check if the flash mode is set to W (off) or if the flash window is blocked. The subject might also be beyond the flash range. You can also adjust exposure compensation, increase ISO sensitivity, or, if the subject is backlit, set the scene mode to Backlighting with HDR set to k, or set the flash mode to X (fill flash).
Why doesn't the flash work on my Nikon Digital Camera?
If your Nikon Digital Camera flash does not fire, check if the flash mode is set to W (off), or if a shooting mode that restricts the flash is selected. Also, verify if 'On' is selected for 'Blink proof' or 'Smile timer' in the smart portrait menu, or if any other function that restricts the flash is enabled.
How to correct date and time on Nikon COOLPIX AW120 Digital Camera?
If the date and time of recording are not correct on your Nikon Digital Camera, set the correct time and date in the Time zone and date option in the setup menu. Note that the camera clock may not be as accurate as ordinary watches or clocks, so periodically compare and reset as needed. If the camera clock has not been set, the “Date not set” indicator flashes during shooting and movie recording. Images and movies saved before the clock is set are dated “00/00/0000 00:00” or “01/01/2014 00:00” respectively.
How to fix blurred images on Nikon COOLPIX AW120 Digital Camera?
If your Nikon Digital Camera images are blurred, consider the following solutions: * Use the flash. * Increase the ISO sensitivity value. * Enable vibration reduction or motion detection. * Use j (Best Shot Selector). * Use a tripod to stabilize the camera, using the self-timer at the same time is more effective.
Why is the screen blank on my Nikon COOLPIX AW120 Digital Camera?
If your Nikon Digital Camera monitor is blank, it could be due to several reasons: * The camera might be off. * The camera may have entered standby mode; press the power switch, shutter-release button, A button, c button, or b (e movie-record) button. * The flash lamp is charging; wait for it to complete. * The camera is connected to a computer via USB or to a TV via HDMI cable. * The camera is connected to a smart device using Wi-Fi and is being controlled remotely.
Why does my Nikon COOLPIX AW120 keep turning off?
If your Nikon Digital Camera turns off unexpectedly, it could be due to several reasons: * The camera's auto-off function is activated to save power. * The camera or battery might be too cold. * The inside of the camera may have become too hot; let it cool before trying again. * The USB cable connecting the camera to a computer or printer may have been disconnected; reconnect the USB cable.
Why won't my Nikon Digital Camera battery charge?
If the battery inserted in your Nikon Digital Camera cannot be charged, ensure all connections are secure. When connected to a computer, charging may be affected if 'Off' is selected for 'Charge by computer' in the setup menu, if the camera is turned off, or if the camera’s display language and date/time haven't been set or were reset. Charging may also stop if the computer is in sleep mode or depending on the computer's specifications. Use the charging AC adapter to charge the battery.
Why my Nikon Digital Camera cannot be turned on?
If your Nikon Digital Camera cannot be turned on, it is likely that the battery is exhausted. The power switch becomes enabled a few seconds after inserting the battery, so wait a few moments before pressing the power switch.
| Sensor | CMOS |
|---|---|
| Effective Pixels | 16.0 million |
| Image Sensor Size | 1/2.3 in. |
| Optical Zoom | 5x |
| Maximum Aperture | f/2.8-4.9 |
| Dustproof | Yes |
| GPS | Yes |
| Wi-Fi | Yes |
| Digital Zoom | Up to 4x |
| Lens Construction | 12 elements in 10 groups |
| Vibration Reduction | Lens shift |
| ISO Sensitivity | 125-1600 |
| Monitor Features | Anti-reflection coating |
| Storage Media | SD, SDHC, SDXC memory cards |
| Waterproof | Up to 18m (59 ft) |
| Shockproof | Yes (up to 2.0m/6.6ft) |
| Freezeproof | -10°C (14°F) |
| Battery | Rechargeable Li-ion Battery EN-EL12 |
| Battery Life | Approx. 350 shots |
| Dimensions | 110.1 x 66.0 x 25.5 mm |
| Weight | Approx. 213 g |
| Lens Focal Length | 5.0-25.0 mm (angle of view equivalent to that of 24-120 mm lens in 35mm [135] format) |
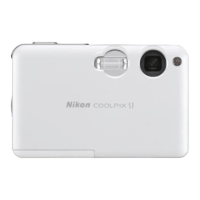
Diagram and list of external parts of the Nikon COOLPIX AW120 camera.
Instructions on how to attach the camera strap for land use.
Guide to inserting the battery and memory card into the camera.
Steps for charging the camera's battery using the included AC adapter.
Procedure for turning on the Nikon COOLPIX AW120 digital camera.
Initial camera setup for language selection and setting the date/time.
How to check battery status and remaining shots on the camera monitor.
Basic instructions on how to hold the camera and frame a shot.
Guidance on focusing and taking a picture with the camera.
How to enter playback mode and view captured images.
Steps for deleting images from the camera's memory.
Instructions for downloading and installing the ViewNX 2 software.
Methods for copying images from the camera to a computer.
How to start and view images using ViewNX 2 software.
Overview of flash modes, self-timer, macro mode, and exposure compensation settings.
Guide to selecting different shooting modes available on the camera.
Instructions on how to record videos using the camera.
How to navigate and use the camera's menu system for settings.
Explanation of the action button for camera control via shaking.
Crucial safety warnings to prevent damage or injury during camera use.
Regulatory and safety information specific to US customers.
FCC compliance statement regarding radio frequency interference.
Specific warning for California customers regarding product cords.
General advice for maintaining the camera's condition.
Details on the camera's shock resistance test results and limitations.
Information on the camera's JIS/IEC waterproof and dustproof ratings.
Essential steps to take before using the camera for underwater photography.
Precautions to prevent water from seeping into the camera during underwater use.
Procedure for cleaning the camera after it has been used underwater.
Information on how temperature and humidity affect camera operation and condensation.
Information on the camera's map and location name data features.
Details on recording location data, its functions, and log recording.
Information on the camera's measurement functions like direction and altitude.
Considerations for using location data functions when traveling internationally.
Limitations and regulations concerning the product's wireless transceiver.
FCC and Industry Canada compliance statements for US and Canadian users.
Statement regarding radio frequency (RF) exposure limits and safety.
Important precautions regarding data transmission and potential leaks.
Identification of external parts and components of the camera body.
Instructions for attaching the camera strap for land use.
How to use the action button for camera control via motion gestures.
Important notes regarding the playback action control feature.
Step-by-step guide to navigating and using the camera's menu system.
Explanation of information displayed on the monitor during shooting mode.
Detailed steps for inserting the battery into the camera.
Instructions on how to safely remove the battery from the camera.
Guide to charging the camera battery using the AC adapter or computer.
Steps for inserting a memory card into the camera.
Procedure for formatting a memory card for use with the camera.
Information about using the camera's internal memory and memory cards.
Initial setup for camera language and setting the date and time.
Instructions on how to power on the camera and check indicators.
Guide to selecting and changing the camera's shooting mode.
Guidance on holding the camera steady and framing a photograph.
How to operate the zoom control for framing and magnification.
Steps for focusing on the subject and capturing an image.
Instructions on how to playback captured images on the camera.
Procedure for deleting images from the camera's memory.
Description of the Easy Auto mode for automatic scene selection.
Explanation of various scene modes for optimized photography.
Guide to applying creative effects to images during shooting.
How to use Smart Portrait mode for automatic smile detection and capture.
Details on using the Auto mode for general shooting and adjustable settings.
Instructions for applying quick effects to images after shooting.
Overview of functions adjustable via the multi selector in different shooting modes.
Guide to selecting and using different flash modes for photography.
How to use the self-timer for delayed shutter release.
Instructions for using macro mode for close-up photography.
How to adjust the overall image brightness using exposure compensation.
List of functions that have restrictions when used together.
Explanation of focusing methods including Target Finding AF and Face Detection.
How to apply skin softening effect to human faces in images.
Situations where autofocus may not perform as expected.
Procedure for using focus lock to maintain focus on a specific subject.
How to zoom in and out of images during playback.
Methods for viewing images as thumbnails or by calendar date.
Overview of adjustable settings available in the playback menu.
Step-by-step guide to recording movies with the camera.
How to capture still images while recording a movie.
Adjustable settings for movie recording via the MENU button.
Instructions on how to play back recorded movie files.
Controls and operations available during movie playback.
Procedure for deleting movie files from the camera.
Overview of settings configurable through the camera's setup menu.
Steps to enable and start recording location data using GPS/GLONASS.
How to record location data while shooting underwater.
How to display current position and image shooting locations on maps.
How to display and use the altimeter and depth gauge functions.
Recording and managing logs for altitude and water depth data.
Configurable settings within the Location Data Options menu.
Overview of capabilities when using Wi-Fi with a smart device.
Guide to downloading and installing the 'Wireless Mobile Utility' app.
Steps for establishing a Wi-Fi connection between the camera and smart device.
Procedures for disconnecting the Wi-Fi connection.
Overview of physical connection methods for external devices.
How to view images and movies on a TV using an HDMI connection.
Transferring images to a computer for management and editing.
How to print images directly from the camera to a PictBridge printer.
Instructions for installing and using the ViewNX 2 software.
Detailed steps for transferring images to a computer via USB or card reader.
How to view transferred images using ViewNX 2.
Detailed information and hints on various shooting techniques.
Information and hints related to image playback features.
Guides to accessing and using different camera menus.
Sections covering error messages, file names, and optional accessories.
Step-by-step guide to capturing easy panorama images.
How to view and scroll panorama images after capture.
Instructions for adding images to favorite picture albums.
How to playback images that have been added to albums.
Steps for removing images from favorite picture albums.
How to customize the icon for favorite picture albums.
How to view images captured continuously as a sequence.
Procedure for deleting images captured in a sequence.
Information and restrictions regarding image editing.
How to apply various quick effects to change image hue or mood.
Using quick retouch to improve image contrast and saturation.
Using D-Lighting to improve image brightness and contrast.
How to correct red-eye effect in images captured with flash.
Using glamour retouch to enhance facial features in portraits.
Adding recorded data like altitude and compass direction to images.
How to create a smaller copy of an image.
Procedure for cropping an image to create a new copy.
Steps for printing single images directly from the camera.
Guide to printing multiple images and setting print options.
How to trim a movie and save the selected portion as a new file.
Procedure for extracting a single frame from a movie as a still image.
How to select image size and quality for saving images.
Adjusting white balance to suit lighting conditions for accurate colors.
Guide to using continuous shooting modes for capturing sequences.
How to adjust ISO sensitivity for capturing images in different lighting.
Determining how the camera selects focus areas for autofocus.
Selecting how the camera focuses in still image and movie modes.
Enabling or disabling the quick effects function for immediate image adjustments.
How to soften facial skin tones in portraits using the camera.
Using the smile timer for automatic shutter release when a smile is detected.
How the camera detects and corrects blinking eyes in portraits.
Setting up print orders for batch printing images.
How to create and play back an automated slide show of images.
Protecting selected images from accidental deletion.
How to rotate saved images for correct display orientation.
Recording and attaching voice memos to images.
Copying images between the camera's internal memory and a memory card.
Selecting how images captured in sequence are displayed.
Changing the key picture used to represent a sequence of images.
Selecting movie recording options including normal and HS speeds.
How to record and play back movies in slow or fast motion.
Setting whether to record HS movies or normal speed movies.
Determining focus area selection for autofocus during movie recording.
Selecting autofocus behavior for movie recording.
Reducing the effects of camera shake while recording movies.
Enabling or disabling the movie light for dark scene recording.
Reducing wind noise during movie recording.
Selecting the frame rate for movie recording.
Configuring the welcome screen displayed when the camera turns on.
Setting the camera's internal clock for time zone and date.
Adjusting monitor settings like photo info, image review, and brightness.
Imprinting shooting date and time onto images.
Reducing camera shake effects while shooting still images.
Enabling motion detection to reduce blur from subject or camera movement.
Enabling or disabling the AF-assist illuminator for autofocus.
Enabling or disabling the digital zoom function.
Adjusting camera sound settings like button and shutter sounds.
Setting the sensitivity for camera operations performed by shaking.
Enabling or disabling image selection by shaking the camera in playback.
Configuring map zoom and pan actions using camera gestures.
Setting the time delay before the camera enters standby mode.
Formatting the internal memory or memory card to delete all data.
Selecting the display language for camera menus and messages.
Adjusting settings for connecting the camera to a TV.
Setting whether the camera charges when connected to a computer.
Enabling detection of blinking eyes in captured human subjects.
Configuring image upload from the camera using an Eye-Fi card.
Restoring camera settings to their default values.
Viewing the current firmware version of the camera.
Enabling location data functions and updating A-GPS file.
Procedure for downloading and updating the A-GPS file.
Selecting units for map display (km or miles).
Calculating the linear distance between positions or images.
Configuring settings for recording and displaying location name information.
Recording logs for location, altitude, and water depth data.
Checking or erasing log data stored on the memory card.
Using satellite signals to set the camera's internal clock.
Setting whether to display the electronic compass and how to correct it.
Setting whether to display altimeter or depth gauge and correcting data.
Selecting to wirelessly connect the camera to a smart device.
Terminating the wireless connection between the camera and smart device.
Configuring Wi-Fi settings like SSID, encryption, password, and channel.
Displaying the current Wi-Fi connection settings.
Restoring Wi-Fi settings to their original default values.
Guidelines for maintaining the camera's condition and performance.
Instructions for cleaning camera parts and proper storage procedures.
Common problems and their solutions for power, display, and settings issues.
Legal agreement for the use of map and location name data.
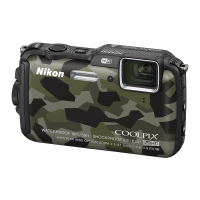
Technical specifications of the Nikon COOLPIX AW120 digital camera.
List of tested and approved SD, SDHC, and SDXC memory cards.
Alphabetical index of topics covered in the manual.
Information on Nikon's USA Limited Warranty for cameras and accessories.
Details of the Nikon Inc. one-year limited warranty for USA customers.