14 15
En En
Operational Summary
Caution—use of controls or adjustments or
performance of procedures other than those
specified herein may result in hazardous radiation
exposure
1. Install a battery in the battery chamber. (See "Changing
Batteries")
2. Rubber eyepiece cup
Eyeglass wearer: Collapse the eyepiece cups.
Non-eyeglass wearer: Do not collapse the eyepiece cups.
3. Diopter adjustment
Adjust diopter to obtain a clear image in the LCD.
First, rotate the diopter adjustment ring counterclockwise
until it comes to a complete stop. Next, turn on the power
to activate the LCD when you look through the Nikon Laser
Forestry Pro. Rotate the diopter adjustment ring clockwise
until the display comes into focus.
If the diopter is not adjusted to correspond to your
eyesight, you may not be able to clearly focus your subject.
4. Measuring
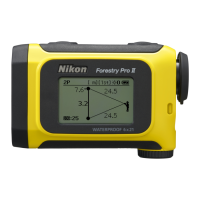
Note: See the chapter "External and Internal display" for external
LCD panel.
Note:DepressingandholdingdownthePOWERbuttoncauses
all symbols to be displayed in the internal LCD panel. After
youremoveyourfingerfromthePOWERbutton,thelast-
usedsettingisdisplayed.(IfyoubrieflypressthePOWER
button then remove your finger, the LCD panel may
display the last-used setting without displaying all of the
symbols. This is not a malfunction or other problem.)
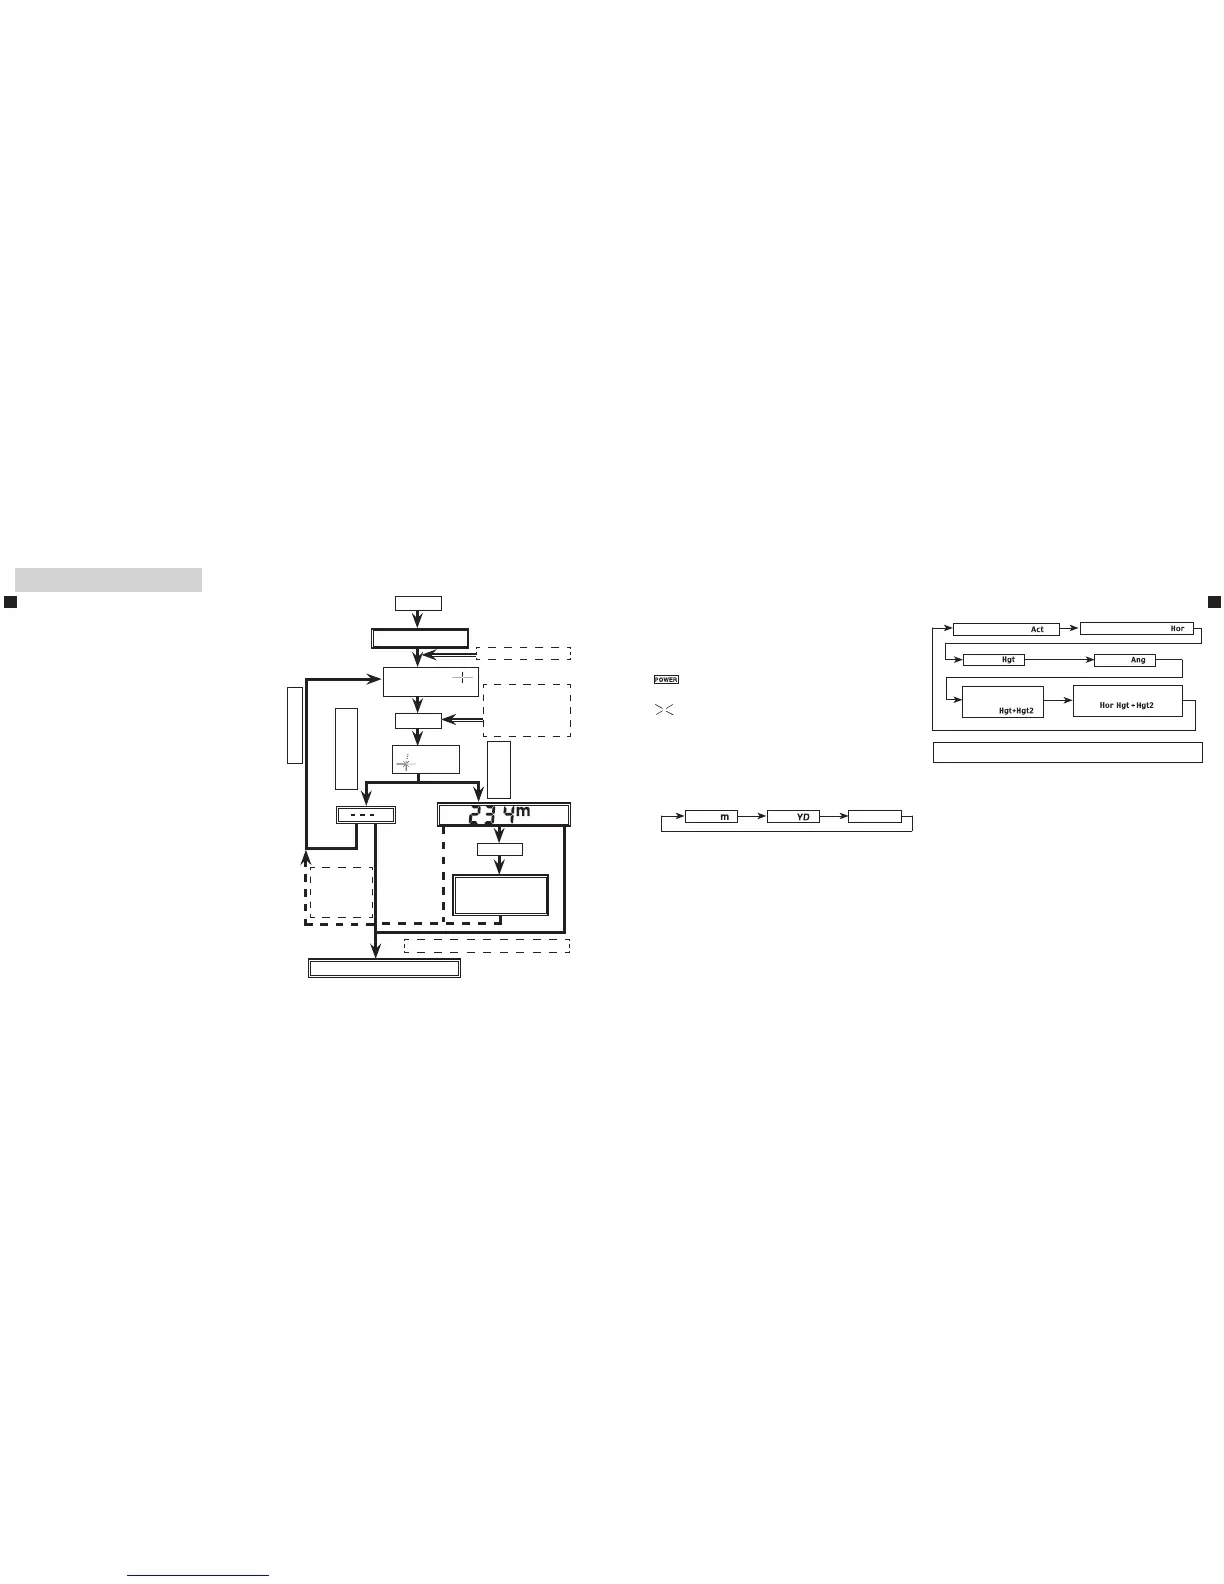
Before measuring, be sure to confirm settings, such as unit,
measurement/display mode and priority mode.
◎: See the relevant mode section in this manual for setting.
POWER
LCD is illuminated
Set your desired modes
◎
Align the reticle
with the target
POWER
appears
Results are converted
to the mode set and
displayed.
MODE
Indication
remains
illuminated for
30 sec.
30 seconds pass without operation *
Power off: LCD indications disappear
Measureagain
Fail to measure
Cannot measure
Successfully
measured
For continuous
distance and angle
measurement (up
to 20 seconds), keep
button depressed.
※
or
☆
☆【Continuous measurement mode】
KeepingthePOWERbuttondepressedallowsyouto
perform continuous measurement for 20 seconds.
Blinks while performing measurements.
Whenmeasuringapinatagolfcourse,forexample,useFirst
Target Priority and Continuous measurement mode for easy
measurement.Withnoobjectsbetweenyouandthepin,the
smallest number is the distance to your targeted pin.
※ See the the chapter "External and Internal display" for
details regarding the operations and results display of the
various modes.“
* Power turns off 30 seconds after the last operation.
5. Selecting display unit (Factory default setting is feet.)
1. Confirm the LCD panel is on.
2. Press and hold the
MODE
button for approx. two seconds.
3.Whendisplayunithasswitched,releasethe
MODE
button.
4. Repeat steps 2 and 3 until your desired mode is displayed.
5.Whenyouhavecompletedsetting,resultswillbeconverted
and displayed in the your selected measurement unit.
BypressingtheMODEbutton,modeswillchangeintheorder
indicated above.
1. Confirm the LCD panel is on.
2. Press MODE button within 0.5 seconds.
3. Release MODE button to switch the mode.
4. Repeat steps 2 and 3 until your desire mode is displayed.
5. Switching the mode after measurement converts the
results to the new mode.
6. After the mode is set, measurements are performed in the
new mode.
6. Switching measurement/display modes (Factory default
setting is linear distance measurement mode)
Meter[ ]
Yard
[ ]
Feet
[
]
Linear Distance [ ]
Horizontal Distance [ ]
Angle [ ]
Height [ ]
Vertical Separation
(height between 2
points )
[ ]
Three-point measurement
[ ]