N.ASSEI\4BLY
O
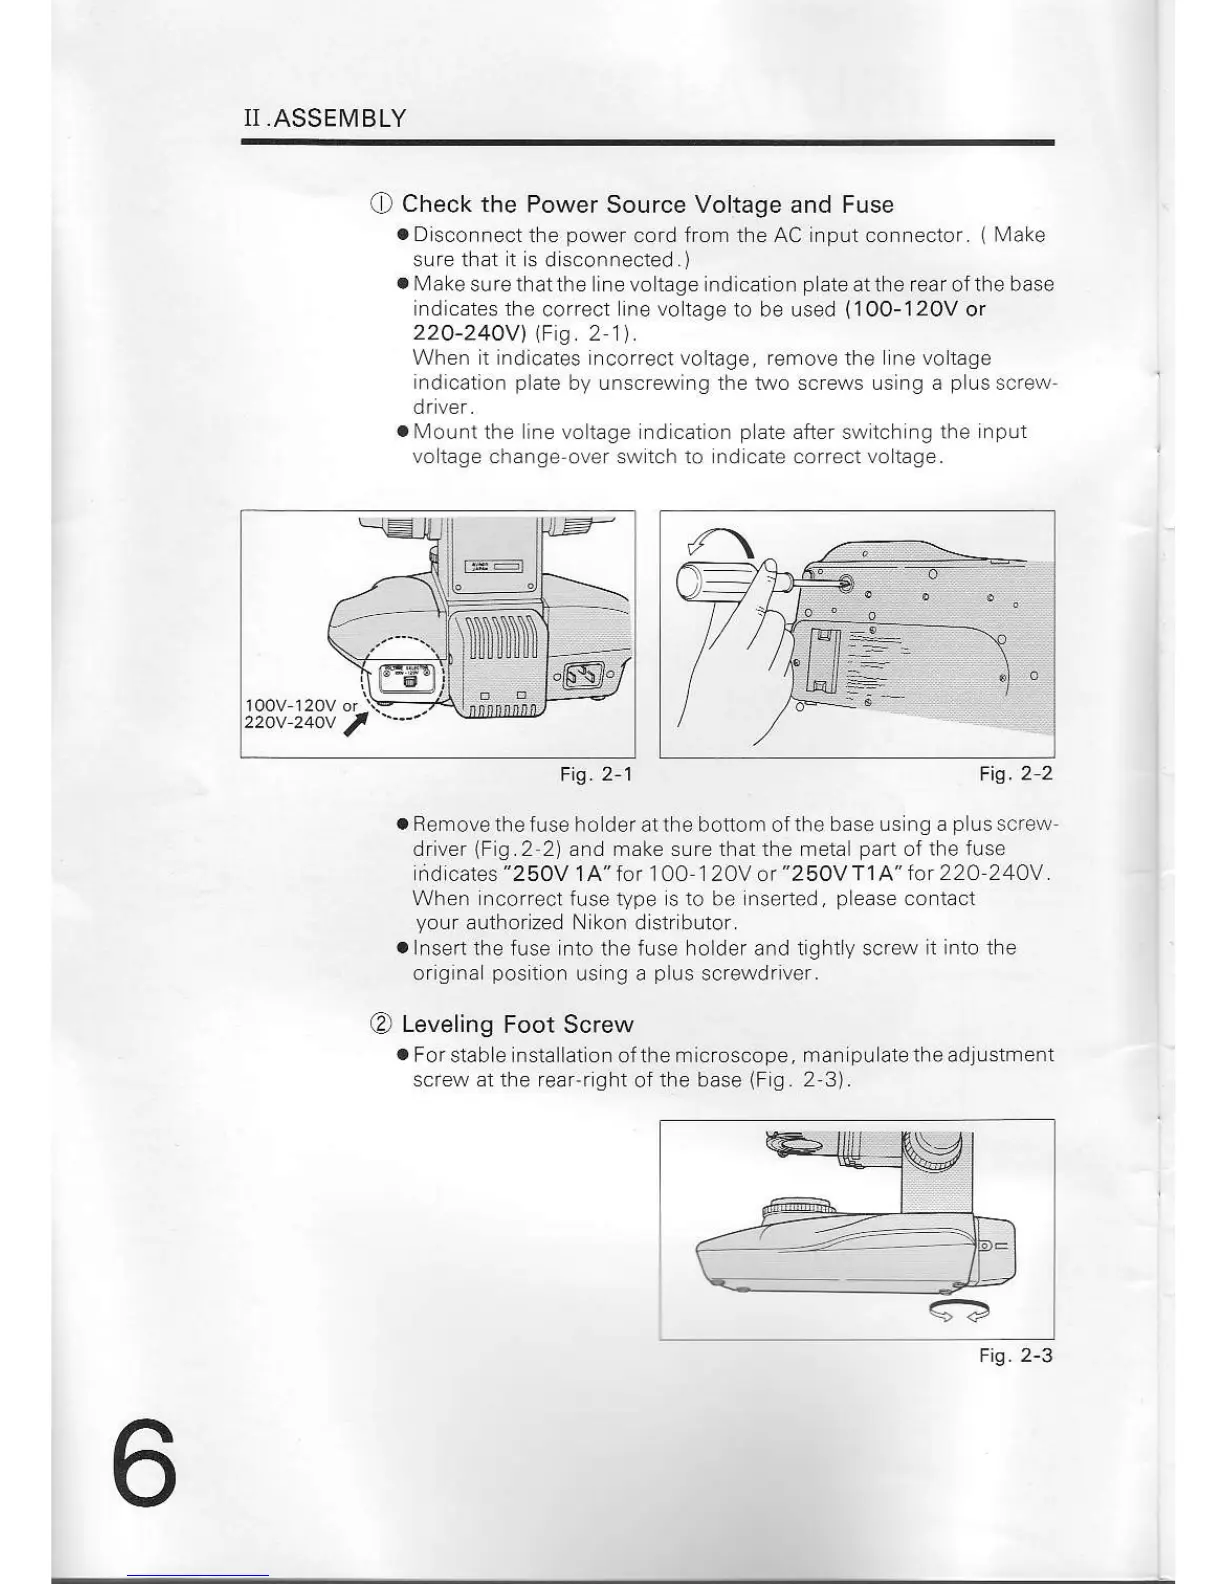
Check the
Power Source Voltage and Fuse
o
Dlsconnect
the
power
cord from the AC input connector.
(Make
sure that t rs
disconnected.)
.
Make
sure thatthe line voltage indication
plate
atthe rear ofthe base
indicates the
correct
ine vo
tage to be used
(1OO-120V
or
22O-24OV)
\Fis.21).
When t indicates Lncorrecl voliage, rerriove the ne voltage
indication plate
by unscrewing the two screws using a
plus
screw
driver.
.
Mount
the ine voltage ndication
p
ate after swltch ng lhe
input
vo tage change
over
sw tch to lndlcate correct vo tage.
a
Remove
the fuse holder at the boitom ofthe
base us ng a
plus
screw
driver
(Fig.2
2) and nrake sure that the metal
part
of the
fuse
nd cales
"250V
1 A' for 1 0O 1 20V or
"250V
T1
A'
tot 224 244V.
When ncorreci fuse type
s
to
be
nserted,
please
contact
your
aulhorized Nikon disir bulor.
.Insert
ihe fuse into the fuse holder and iightly screw
it into the
origina
positon
using a
plus
screwdriver.
O
Leveling
Foot Screw
.
Forstable installation of the microscope, man
pulatetheadjustment
screw at lhe rear-righi
ofthe base
(F
g.
2 3).
F
g.
2-1 Fis.2
2
Fig. 2-3