Do you have a question about the Nikon SC and is the answer not in the manual?
Remove lock screw; handle gently to avoid knocks.
Turn off power and unplug before replacing bulb or fuse.
Avoid dusty, high temp, moisture; keep lenses clean.
Use only SC type objectives and eyepieces.
Use brush for dust, alcohol for grease; avoid solvents on paint.
Cover when not in use; periodic checks recommended.
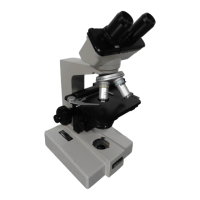
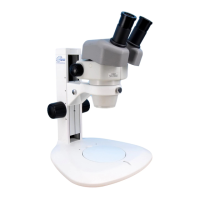
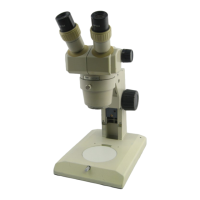
Identifies main parts like eyepiece, nosepiece, stage, and focus knobs.
Securing the eyepiece tube and inserting eyepieces.
Installing the mechanical stage and objectives.
Attaching the condenser and replacing lamp bulbs.
Placing specimen, adjusting light source and brightness.
Aligning eyepieces and using focus knobs.
Using objectives, understanding working distance.
Adjusting condenser, diaphragm, and oil-immersion technique.
Explains magnification, N.A., resolving power, working distance, etc.
Diagnosing and fixing problems with the optics.
Resolving problems with stage and focus controls.
Troubleshooting lamp, fuse, and power problems.
The Nikon Microscope Model SC is a versatile instrument designed for various observational purposes, offering both binocular and monocular eyepiece tube types. This manual primarily covers the binocular type, with most instructions applicable to the monocular version as well.
The microscope allows for detailed observation of specimens through a combination of objectives and eyepieces, providing adjustable magnification and illumination. Key components include:
| Brand | Nikon |
|---|---|
| Model | SC |
| Category | Microscope |
| Language | English |