ELECTRICAL SYSTEM
FORM NO. 56043088 / Advenger
™
/ BR 600S, 650S, 700S, 800S - 49
FRONT
C
E
Pin Pocket
D
FIGURE 4
FIGURE 5
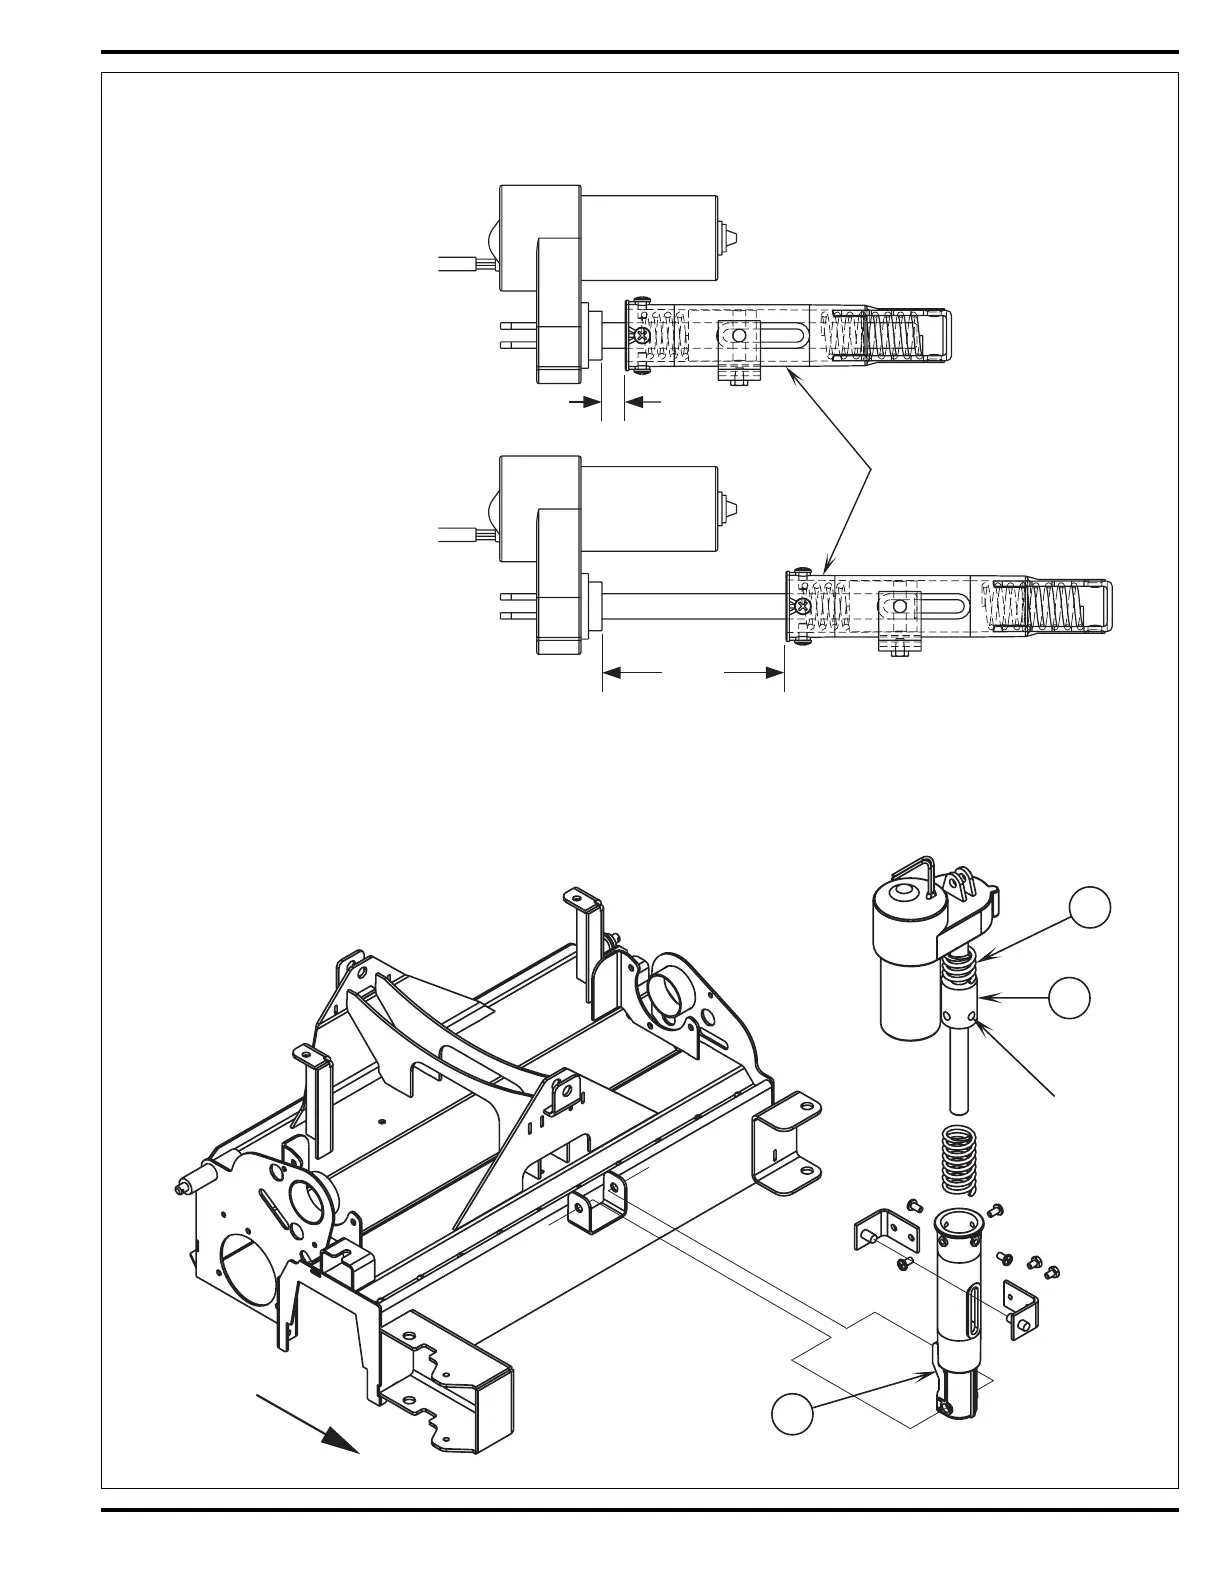
Instructions for Scrub Brush Lift Actuator Drive Nut Adjustment
1 See Figures 4 and 5. On a new scrub
lift actuator motor remove (spin-off)
the Drive Nut (C) and install the
short compression Spring (D) onto
the actuator (lead screw) shaft fi rst.
Next reinstall the plastic drive nut as
shown (with the nut pin pocket away
from the motor).
2 Follow steps 1-7 in the section
labeled Instructions for Squeegee
Lift Actuator Drive Nut Adjustment
(reference previous page).
3 After adjusting the actuator drive
nut (dimensions) follow step 10 (in
the Brush Deck Actuator Removal
manual section) to reassemble.
Service Tip: See Figure 5. Note the
correct orientation of the Spring Housing
(E) when installing the complete motor
assembly and also run the spring housing
assembly to the OUT (extended) position
for machine installation.
OUT
3-5/8" (92mm)
IN
Spring Housing
Assembly
 Loading...