9/2015 A - 11 56091181 - EX40 16ST, EX40 18LX
ENGLISH - AINSTRUCTIONS FOR USE
PREPARING THE MACHINE FOR USE
FILLING THE SOLUTION TANK
1 Turn the power switch to off (O) and then unplug the machine.
2 Open the Recovery Tank Dome Lid (13). Use the Recovery Tank Handle (20) and lift the recovery tank from the machine then set it off to the
side.
3 Read the dilution instructions on the detergent container. Then calculate the proper amount of detergent to mix with your machine’s solution
tank capacity of water; 9 Gallons (34 Liters) for EX40 16ST or 12 Gallons (45 Liters) for EX40 18LX.
BEFORE USING THE MACHINE
Thoroughly vacuum the carpet to be cleaned before using the automatic extractor.
PRE-SPRAYING THE CARPET
Pre-spray spots and heavy traffi c areas before extracting. Use a hand-held bottle sprayer or a pressurized “Hudson” type sprayer. Mix the pre-spray
according to the detergent manufacturer’s directions.
PLAN FOR CLEANING
Before you begin extracting, look at the area to be cleaned and plan your work. Divide the space into sections. Overlap each pass 2 inches (5 cm).
CAUTION!
Use low-sudsing, liquid detergents designed for
carpet extraction.
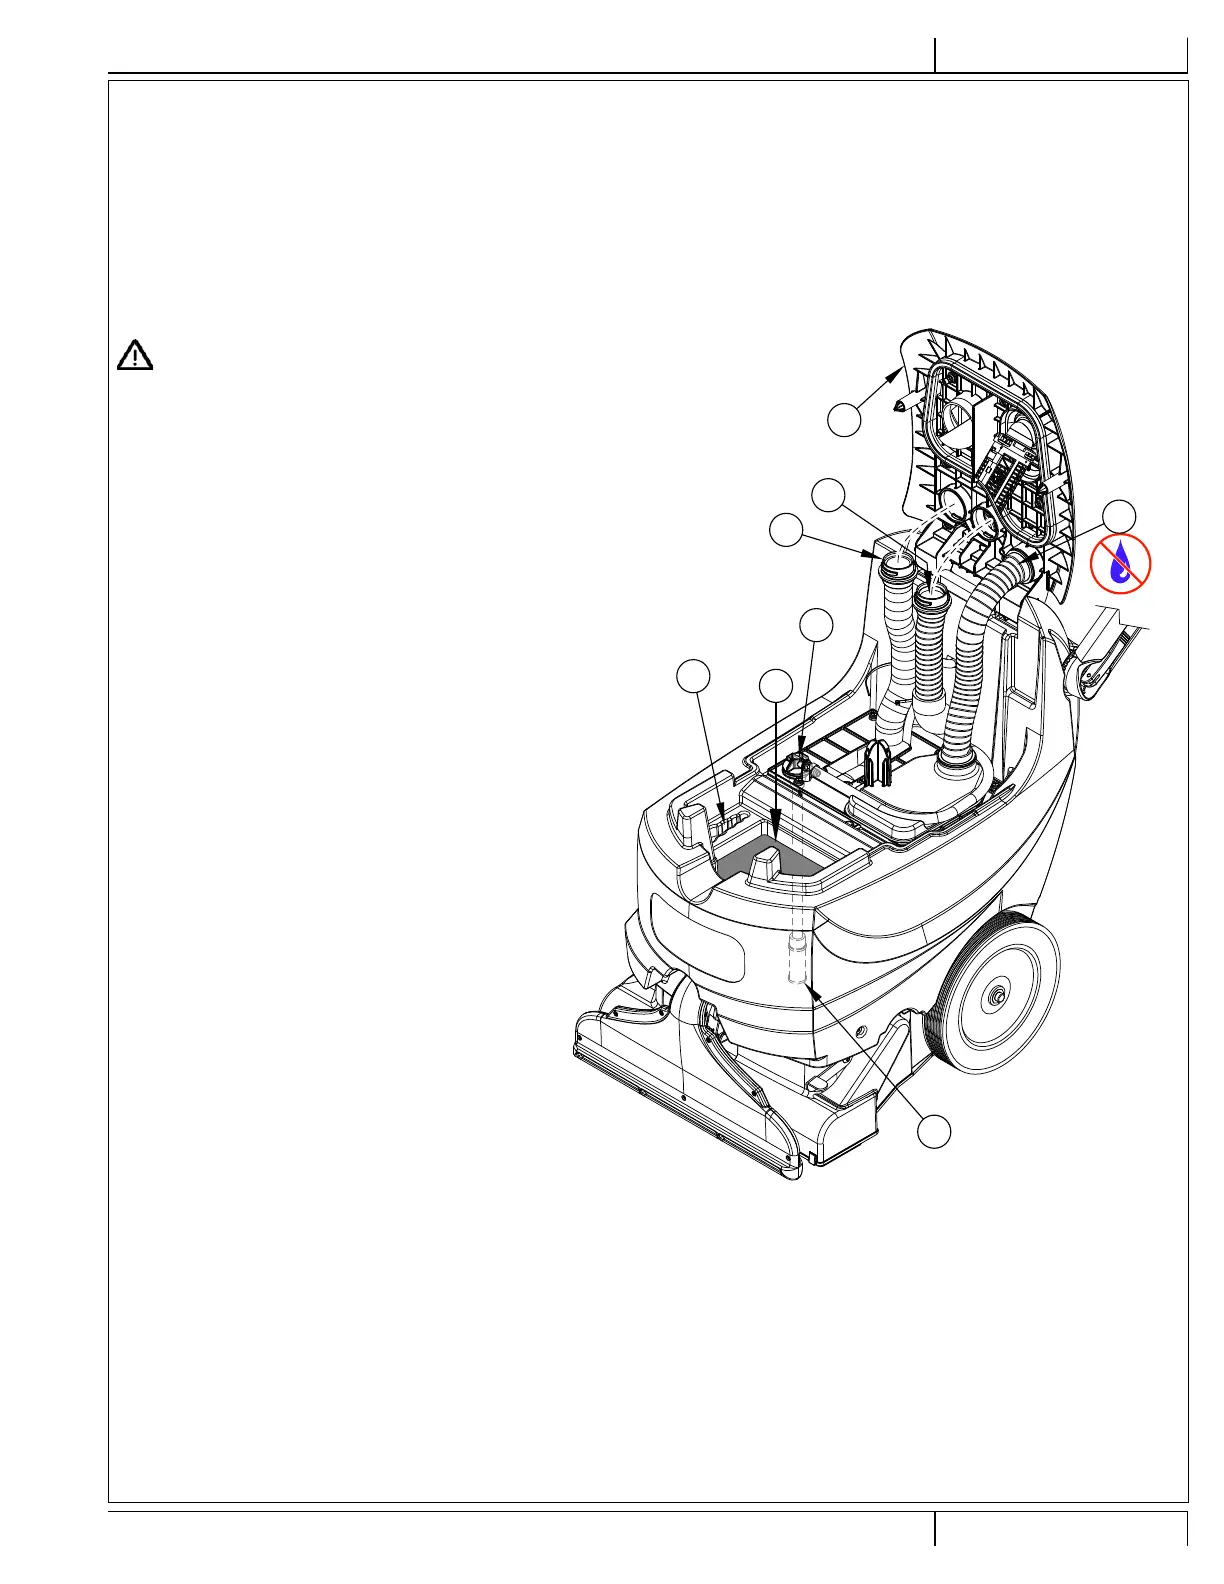
4 See Figure 4. Pour the detergent into the solution tank
and fi ll the tank with hot water (maximum temperature
54°C/130°F). Do not overfi ll the solution tank. The
maximum fi ll point is when the solution level reaches
the bottom of the lip on the tank opening (A).
NOTE: The Solution Tank has a built in Hose Holder
(B) which can be used to secure the end of the hose
while fi lling the tank.
5 Put the Recovery Tank back on the machine. Make
sure the Recovery Tank is properly seated on the
Solution Tank.
6 Place the Dome Lid (13) back down onto the recovery
tank.
NOTE: The hoses (C1, C2 & C3) that connect to the
dome lid attach by pushing the hose into the dome
lid opening and turning 1/4 turn clockwise to lock in.
Hose C1 = Vacuum Shoe Hose
Hose C2 = Accessory (wand or hand tool) Hose
Hose C3 = Vacuum Motor Hose (Do Not allow water
or foam to enter this hose)
FIGURE 4
A
B
E
10
C1
C3
C2
13
 Loading...