3 Moving the hanger
The hanger is mounted on the right side in the factory.
To move the hanger to the other side, proceed as follows:
See pictures B, C, D and E
A Upper hanger stop
B Lower bracket
C Mounting screw
D Screw
E Bushing
F Washer
G Spring locking
1 Loosen the upper hanger stop (A). See g.
2 Remove the hanger by lifting it up and pulling it
outwards. Rotate the hanger and put it aside.
3 Loosen the lower bracket (B) by removing the
screws (C) from the inside.
4 Turn the bracket upside down and mount it on the
other side. Loosen the screw (D) and mount the
bushing (E) and the washer (F) on the other side.
Be very careful not to damage the surface of the
bushing when you turn it.
5 Mount and t the hanger bracket on the left side.
There are pre-drilled holes in place.
6 Loosen the spring bracket (G) according to the -
gure and move it to the other side. There is a bracket
with pre-drilled holes in place.
7 Rotate the hanger and place it in its new location.
8 Fit the hanger stop (A) in its new location. There are
pre-drilled holes for the screws.
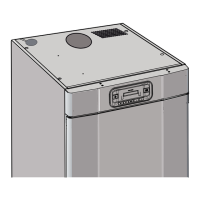
4 Dehumidifying unit
See picture F
The dehumidifying unit is placed and integrated in the
top part of the drying cabinet.
To access the unit, loosen the front plate with its insula-
tion. The front plate is attached with four screws from the
top (A) and four screws along the bottom edge (B). See
g. Disconnect the cable to the control panel before
removing the front plate.
The dehumidifying unit will now be accessible to con-
nect a pressure sensor for function control etc.
5 Condensed water
See pictures G and H
The cabinet has a factory-tted outlet connection for
condensed water on the left side. The connection can
easily be moved to the other side by following the
instructions below.
1 Pull out the elbow coupling (A) and the plug with
the hole (B) on the left side of the drying cabinet.
2 Loosen the whole plug at the same time (C) and
the plug (D) on the right side. The hose part with
the plug can be accessed from inside the cabinet
if the lint lter is removed.
3 Change sides for the parts.
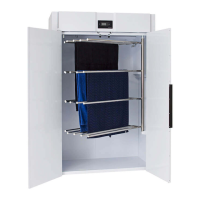
1 Drying cabinet FL120VP
See picture A
A Condensation water
B Wall mount
C Dehumidifying unit
D Control panel
E Swingable hanger
2 Electrical circuit diagram
See picture L
28 ENGLISH