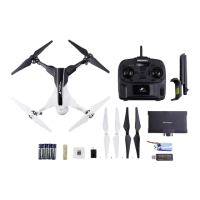
1III
.HOW
TO USE CAMERA
(1'
Installation
of
camera
O.Fix rubber
plug
on
the screw column
in
the bottom
of
the aircraft (As shown
in
picture
I)
8.lnstall
camera
on
the column with screw.( As shown
in
picture J)
@).Plug
the camera's connection wire into the connector
on
the bottom
of
the aircraft.
(As shown
in
picture K)
(Picture
I)
(Picture
J)
(Picture
K)
(2'
Use
of
photo
and
video
shooting
function
O .Ensure
to
plug
the
SD
card
into
the
camera.
8 .
Turn
on
the transmitter, then power
on
the aircraft.
@).Press
the
button
'
PICTURE
'
on
the
transmitter,
then
the
camera will take a photo.
O.Press the button 'VIDEO'
on
the transmitter, then the
camera is
in
video shooting status, the indicator light
on the camera flashes constantly. Press again the
button, the indicator
light is solid
on
, that means it has
quit the video shooting mode.(As shown
in
picture
L)
O.Before
taking
out
the
SD
card,ensure
to
quit
the
camera mode,then
cut
off
the
power
supply
.
----t:"""
(Picture
L)
M"q
...
t.n,O.
Ensure
to
operate like above,otherwise some functions may perform
abnormity.
8.For
storage
need, you should
make
the interval between making
two pictures no
less than 2 seconds.
@).Ifthe
SD
card
can
not
store data,plug
it
into
the
computer
to
format
it
before use
it
again.
For
detailed control methods, please refer
to
video website:
http://www.nineeagle.com
10.
Setting
picture/video
function
on
other
transmitters
t.ijltiUt."'When you
are
using other transmitters,
the"
headless mode
(controller dominated
mode)"
and
"auto-return
function" etc
will
not
work on Galaxy Visitor
2.
'iur.titn.J.iWhen you are using other transmitters, the Aircraft Type must
be set
as
ACRO,
never set mix-control mode.
When you are self-defining the picture/video button on the transmitter,
it
must be
in
5CH,
6CH,
7CH
or
8CH.
The self-define order: video function
button
first, picture function button second.
t.ij1t§iUt."'Galaxy
Visitor 2 supports the picture/video setting
for
below
equipment:
O.NE
J5
and
J6
which
is
of
same protocol
as
Galaxy Visitor 2.
8.0ther
brands
of
transmitters above
6CH
which
use
NE
general link same
protocol
as
Galaxy Visitor 2.
Mil9
iU
(.JiiWhen you are using the General Link, because
of
the difference
between different brands and types
of
transmitters,
the
transmitter model data needs reset.
Operating
process:
(1,Step
into
set
mode
O.Power on the Galaxy Visitor 2 through connecting the Li-Po battery
to
the receiver.
8.Turn on the
J5
or
J6
transmitter,
or
connect the General Link
to
the
transmitter in normal way.Ensure
it
in
normal work.
8.
Push
the
throttle
bar
to
OCto
the
bottom)
.
O.
Push
the aileron bar rightmost.
0.Ensure the Galaxy Visitor 2
has
successfully bound with the
transmitter(When they are
off
binding, the
red
indicator
light
on the
aircraft' s tail will flash like
~---
,
~, ~,
~,
~.After
successful binding,
it
will
turn solid on);
0.After
about 2 seconds, loosen the aileron bar
to
middle position. At this
time, Galaxy Visitor 2
is
in self-define mode.
II
II