9
1-877-646-5288
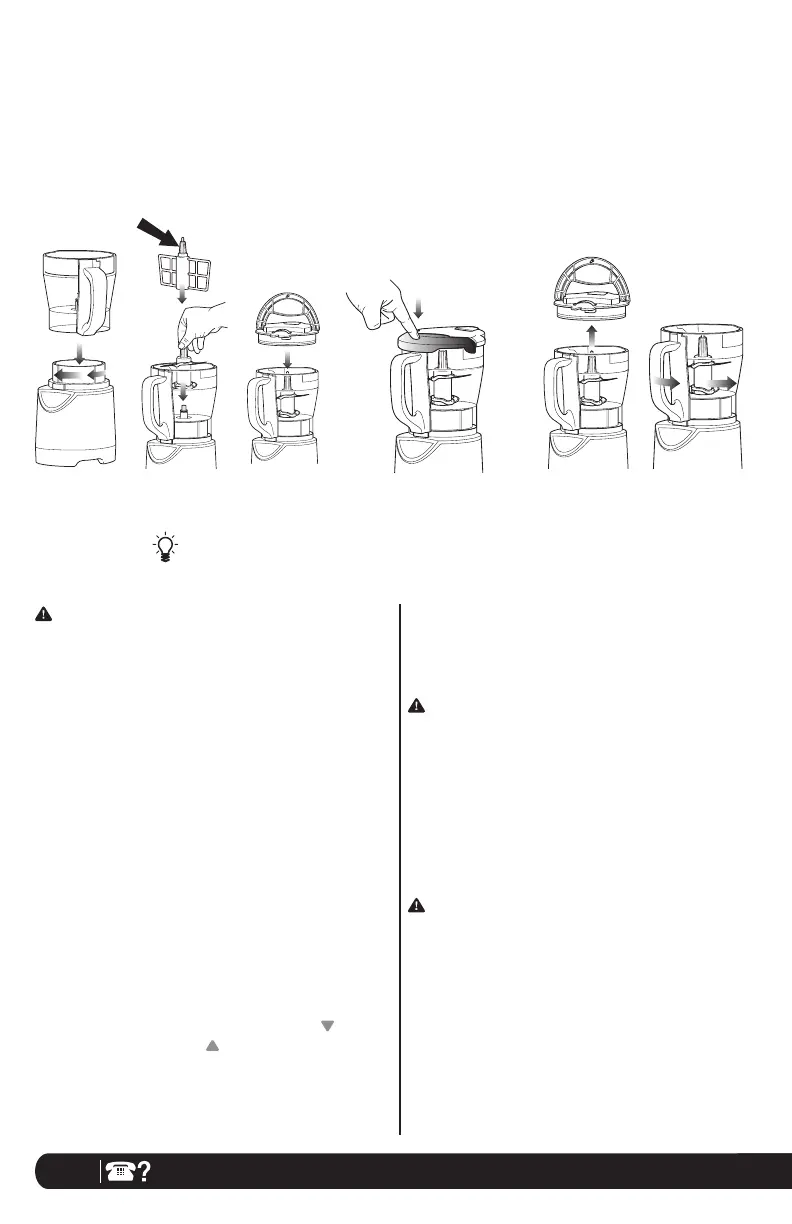
7 Push down on the “PULSE” on the handle to start the
appliance. (Fig. 9)
NOTE: Pulse ingredients for even chopping by pressing
down in short intervals.
IMPORTANT: When using the dough blade or cookie
paddle hold the appliance to secure the appliance to the
counter or table top.
8 When you have reached your desired consistency, stop
pressing the lid handle and wait for the attachment to
stopturning.
9 To remove the lid, pull the lid handle up to a 90° angle.
Turn the bowl anti-clockwise to lift off the base.
(Fig. 10, Fig. 11)
CAUTION: Never insert your hands in the pitcher as the
blades are sharp. Always use a spatula to dislodge food
that has stuck to the sides of the pitcher.
10 Make sure that the unit is unplugged when not in use.
IMPORTANT: Make sure that the motor base is plugged
in for use.
1 Place the motor base on a clean, dry, level surface such
as a counter or table top.
2 Align and lower the bowl onto the motor base.
(Fig. 6) Handle should be aligned slightly to the left of
the “LOCK” symbol on the motor base.
3 Rotate the container to the left as far as it will go to lock
in place. (Fig. 6)
4 Holding the desired attachment by the shaft, place it
onto the drive gear inside the container. Ensure that the
attachment is seated properly and is standing upright.
(Fig. 7)
NOTE: The blade will fit loosely on the drive gear.
5 Add the ingredients to the bowl, making sure that they
do not exceed the highest measured marking line on the
side of the bowl.
6 Holding the lid by the handle in the upright position,
place it on top of the bowl aligning the arrow (
) located
on the lid with the arrow ( ) located on the bowl’s
handle. (Fig. 8)
Assembly and Use for the 1L Bowl
Fig. 9
Fig. 10
Fig. 11
ASSEMBLY PULSE REMOVAL
Fig. 7
Fig. 6
Shaft
Fig. 8
Or
It’s best to add the liquid ingredients first and then the dry ingredients.
 Loading...