10
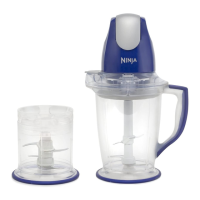
TRADITIONAL BLENDING MODE WITH THE SINGLE-SERVE FRESHVAC™ CUP
3 Select any of the illuminated
programs to begin blending.
4 When blending is complete,
turn cup counterclockwise
and lift to remove.
2 Flip cup upside down and
lower it onto base.
Turn cup clockwise to lock
in place.
5 Turn blade assembly
counterclockwise to remove.
6 Place spout lid on top of cup and
turn clockwise to lock in place.
1 Fill the cup with desired contents,
making sure to not exceed the
MAX LIQUID line. Then place Pro
Extractor Blades® Assembly on
cup and rotate clockwise until
tightly sealed.
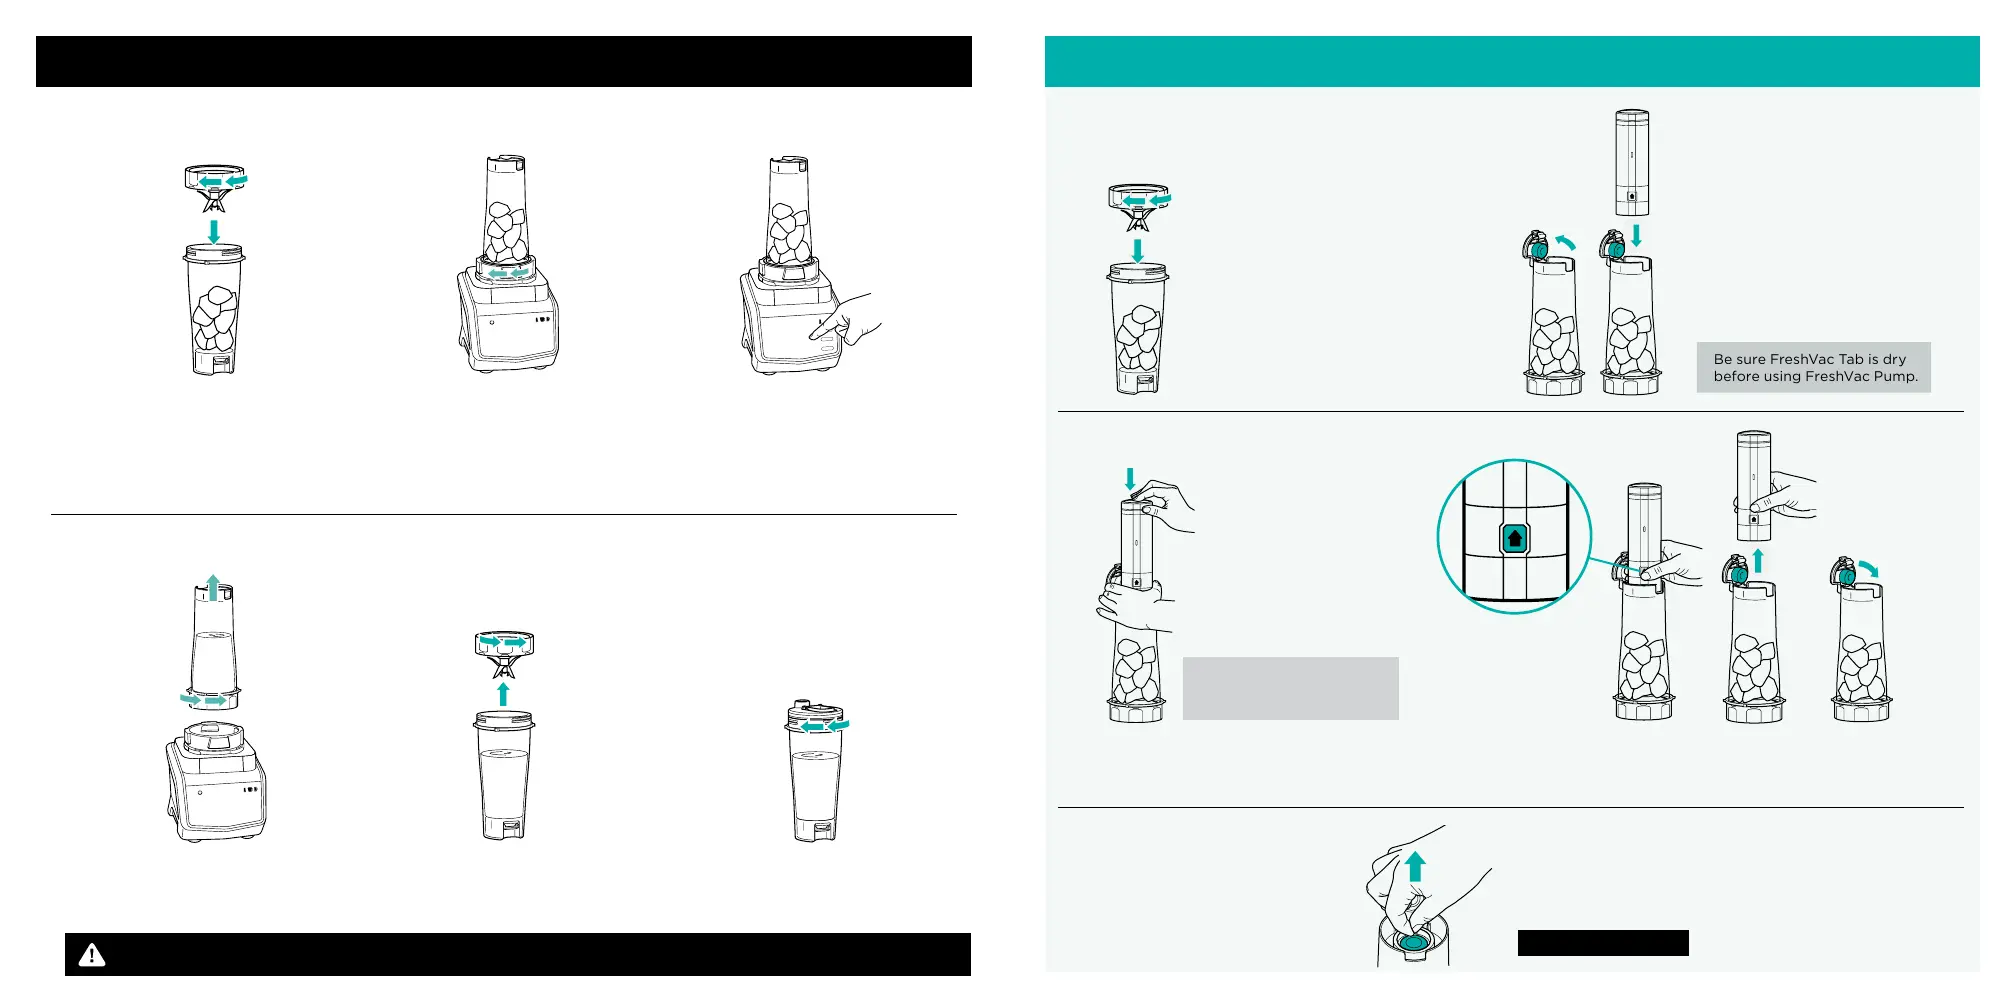
Be sure FreshVac Tab is dry
before using FreshVac Pump.
Do not use FreshVac Pump
after blending, as this could
damage the pump.
OXYGEN REMOVAL BLENDING WITH THE SINGLE-SERVE FRESHVAC™ CUP
WARNING: Handle the blade assembly with care when washing, as the blades are sharp. Contact with the blades’ edges can result in laceration.
5 To release the pump from the cup, press
the pump release button on the bottom front of
the pump and lift. Click the Flip & Seal Lid closed.
1 Fill the cup with desired contents,
making sure to not exceed MAX
LIQUID line. Then place Pro
Extractor Blades® Assembly on
cup and rotate clockwise until
tightly sealed.
3 Open the Flip & Seal Lid by
pressing and lifting the latch.
Set the FreshVac Pump on top
of the FreshVac Tab.
The pump DOES NOT lock in
place on the lid.
4 Press the power button on top of the pump to begin
vacuum sealing. The pump will shut o automatically
once vacuum sealing is complete.
2 Turn cup upside down so the
Flip & Seal Lid is on top and the
bottom of the blade assembly is
flat on the counter.
7 Gently pull up on the
FreshVac Tab until hissing
sound stops to release
the vacuum seal, then
close the Flip & Seal Lid.
6 Lock cup in place on base and
blend as desired. Once blending
is complete, remove the cup
from the base and place the
cup flat on the counter.
DO NOT PULL TAB OUT
8 Remove the blade
assembly and screw
the spout lid clockwise
onto the cup.
Visit ninjakitchen.com to learn more.
11