IMPORTANTE
Por favor, referele al dorso de la caja del reloj
para verificar su nivel de estanqueidad, o en nuestro
sitio internet: www.nixonnow.com
WICHTIG
Bitte beachte das wasserfestigkeitsniveau, das auf der
ruecken deiner uhr steht, oder check unsere website:
www.nixonnow.com
IMPORTANT
Reportez-vous au dos du boîtier de la montre pour
vérifier son niveau d'étanchéité, ou sur notre site
internet: www.nixonnow.com
IMPORTANT
Please refer to the watch case back for your watch’s
water resistancy rating, or our website: www.
nixonnow.com
PRESS and HOLD MODE / SET to enter Time Setting
(3A)
SETTING SEQUENCE IS: Hour, Minute, Second, 12/24
Hour Format.
PRESS MODE / SET button to advance through the
setting sequence. (3B)
PRESS START / STOP or RESET buttons to increase or
decrease current value. (3C)
PRESS and HOLD MODE / SET to return to TIME MODE.
(3D)
Changing time will only effect the active timezone.
3
SETTING THE TIME
4
TIMER MODE
5
CHRONO MODE
PRESS MODE / SET to advance to Chrono Mode. (5A)
PRESS START / STOP button to start and stop the
chrono. (5B/5C)
PRESS and HOLD RESET button to reset the Chrono.
(5D)
For the first hour the displayed resolution is 1/100th
seconds. After the first hour, the resolution changes
to 1 second.
When the time runs out after 24hrs of operation the
display stops at 23h:59m:59sec:99ms
8
PRESS and HOLD MODE / SET to go the compass
settings.
PRESS MODE / SET to move from the DCL to the
calibration setting. (8A)
PRESS the START/STOP Button to Calibrate. (8B)
The watch will then tell you to turn. Hold the watch
flat and turn around slowly for 2 full rotations. (8C)
Press the START/STOP Button to confirm you are done
turning around and the display will read DONE. (8D)
*Note: Your compass only needs to be Calibrated
if you notice that it is noticeably incorrect, when
changing batteries, or when you move to a new
location. It is not advisable to use the compass when
you are exposed to highly magnetic fields which distort
the compass readings.
If you know that the true NORTH is slightly off from
where your watch points to at North, you may manually
adjust the Declination of the watch to be perfectly
accurate. This will never need to be adjusted in most
areas of the world.
PRESS and HOLD MODE / SET to enter compass
adjustment mode. (9A)
PRESS START / STOP to move the Declination Degree
towards the East. (9B)
PRESS RESET to to move the Declination Degree
towards the West (9B)
PRESS and HOLD MODE / SET to exit back to compass
mode. (9C)
9
CALIBRATE THE COMPASS DECLINATION
2
TIME MODE
21
7
3 4 5
9
MODES: PRESS MODE/SET Button to advance
through modes.
TIME
TIMER
CHRONO
ALARM
COMPASS
1
MODES
NEVER PUSH A LIGHT
BUTTON OR SET THE WATCH
WHEN IT IS SUBMERGED.
OPERATIONS MANUAL
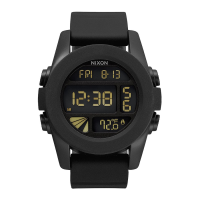
THE OUTSIDER
www.nixonnow.com
HOLA.
Acabas de adquirir un reloj
NIXON. Bienvenido a NIXON, productos
customizados, calidad y durabilidad.
Estamos encant ado de que hayas escogido
uno de nuestros relojes. El hecho de que hayas
adquirido un NIXON significa que podras
saber la hora pero quizas no estes. familiarizado
con todas las funciones de nuestros relojes, si
es así lee estas instrucciones. O consigue a un
amigo para que se las lea por ti te pueda explicar
como va todo.
WELCOME.
You just bought a NIXON watch.
How about that. Welcome to the NIXON
side, a side that’s about custom-built
product, quality, and durability. We’re
stoked you selected one of our watches. The
fact that you bought a NIXON means you
can probably tell time, but you may not be
familiar with all the doo-dads and features
of our watches. So if you’re stuck, read
through these instructions. Or get your
friends to read them and then they can tell
you what’s up.
WILKOMMEN.
Sie haben sich soeben eine NIXON uhr
Gekauft. Herzlichen gluckwunsch und
willkomen auf der NIXON seite. Hier dreht
sich alles um massgeschneiderte produkte,
qualitat und haltbarkeit. Wir freuen uns, dass
sie eine unserer uhren ausgewahlt haben. Die
tatsache, dass sie eine NIXON gekauft haben.
Bedeutet, dass sie vermutlich jetzt jemandem
die aktuelle uhrzeit sagen koennen. Aber
wahrscheinlich sind sie nocht nicht mit
all den features und funktionen unserer
uhren vertraut. Falls sie also mal nicht mehr
weiterkommen, lesen sie sich einfach diese
anleitung durch. Oder ihre freunde sollen
sie lesen. Dann konnen die ihnen sagen wie’s
funktionert.
BIENVENUE.
Vous venez d´acheter une montre NIXON!
Alors quoi?! Bienvenue chez NIXON, oU vous
ne trouverez que des montres de longue durÈe
et de qualitÈ, faites sur mesure. Nous sommes
trËs heureux que vous ayez choisi une de nos
montres. Si vous avez une NIXON, cela veut
probablement dire que vous savez lire l’heure,
mais vous ne saurez peut-Être pas toutes
les petites astuces et caractÈristiques de nos
montres. Alors, si vous ne savez pas quoi faire,
jetez donc un coup D´œUil a u mode d´emploi,
ou demandez un de vos copains de vous le lire
afin de vous mettre au jus.
PRESS MODE / SET to advance to Alarm Mode. (6A)
PRESS START / STOP to turn the Alarm on and off. (6B)
The alarm is automatically turned on when the alarm
time is changed.
PRESS and HOLD MODE / SET to enter alarm setting.
(6C)
SETTING SEQUENCE IS: Hour, Minute
PRESS and HOLD MODE / SET to scroll through the
setting sequence. (6C)
PRESS START / STOP and RESET to increase/ decrease
current value. (6D)
PRESS and HOLD MODE / SET to confirm alarm and exit
alarm setting. (6C)
Your set alarm time will correspond to the active
displayed time zone that you selected in time mode.
*RINSE WATCH WITH SOAP AND WATER AFTER
EXPOSURE TO SALT WATER OR SAND.
Replace the battery at least every two years. Dead or low
batteries left in a watch may leak and destroy the movement
of your watch. If you have a water resistant watch, know that
the water resistancy is attained using rubber or plastic seals
which will deteriorate under normal conditions and reduce
the water resistancy of your watch. These seals should be
checked by an authorized jeweler at least every two years to
ensure the rated water resistancy. Do not expose your watch
to extreme temperatures (over 60ºC or 140ºF, under -10ºC or
14ºF). No hot tubs or saunas. Sorry, but do you really need to
know the time when you’re tubbing?
Avoid extreme shocks.
30 METER
50 METER
100-200
METER
CASE
RATING
RAIN,
SPLASHES,
ETC.
SHALLOW
SWIMMING,
SUBMERSION*
SURFING,
SNORKELING,
SPEAR FISHING*
A FEW OF OUR WATCHES ARE GEARED
TOWARDS PURE STYLE AND ARE NOT
DESIGNED FOR SURF OR SWIM. THIS IS
INDICATED BY THE “NO WATER” ICON.
WATER RESISTANCY RATINGS
AND WATCH CARE
6
ALARM MODE
7
COMPASS MODE
8
6
*DIE UHR NACH KONTAKT MIT SALZWASSER
ODER SAND MIT WASSER UND SEIFE
ABWASCHEN.
Wechsel die Batterie alle zwei Jahr. Eine leere Batterie
kann das Uhrwerk beschaedigen oder zerstoeren. Wenn
Du eine wasserdichte Uhr hast, solltest du wissen, dass
Gummidichtingen Deine Uhr wasserdicht machen. Diese
Dichtungen koennen sproede werden und die wasserfestigkeit
deiner Uhr beeintraechtigen. Diese Dichtungen sollten alle
zwei Jahre von einem uhrmacher geprueft werden. Setze deine
Uhr keinen extremen Temperaturen aus (ueber 60 °C, oder
unter –10° C). Keine Whirlpools oder Sauna, oder musst du
wirklich die Zeit wissen, wenn du badest? Vermeide extreme
Erschuetterungen.
30 METER
50 METER
100-200
METER
GEHAUSE
EINTEILUNGEN
REGEN,
SPRITZER,
ECT.
SCHWIMMEN,
EINTAUCHEN*
SURFEN,
SCHNORCHELN,
SPEERFISCHEN*
EIN PAAR UNSERER MODELLE SIND UM
DES REINEN STYLES WILLEN DESIGNT UND
NICHT ZUM SURFEN, SCHWIMMEN ODER
WHIRLPOOLEN. DIESES ZEICHEN WEISST
DARAUF HIN. IST IST AUF DER INFO KARTE
ODER IM KATALOG ZU FINDEN.
WASSERFESTIGKEITSNIVEAU UND
PFLEGEHINWEISE
3 4 5
7 9
2
EINSTELLUNGEN / BETRIEBSART: Druecke den
MODE/SET Knopf um durch die Funktionen zu
schalten.
ZEIT
COUNTDOWN
STOPUHR
WECKZEIT
KOMPASS
1
LEGENDE
DRÜNCKE NIEMALS DEN
LICHTKNOPF ODER STELLE
DIE UHRZEIT EIN, WENN DIE
UHR IM WASSER IST.
6
8
PRESS MODE / SET to advance to Timer Mode. (4A)
PRESS RESET button to scroll through the preset timer
values. Preset timer values are 5 mins, 10 mins, 20
mins, 30 mins, 45 mins and 1 hr. (4B)
PRESS START / STOP button to start and stop the
countdown timer. TM icon will flash when timer is
running even when timer mode has been exited. (4C)
PRESS and HOLD RESET to reset the countdown
timer. (4D)
Timer will continue to countdown after exiting timer
mode. When timer expires a single beep alarm will be
heard for 10 seconds followed by a faster single beep
alarm for 20 seconds.
PRESS COMPASS to enter Compass Mode. (7A)
In this mode, your current direction is shown in the
middle of the display. In addition an Arrow (7B)
located along the outer edge of the display will always
be pointing towards North as reference.
After 30 seconds without pressing a button in Compass
Mode, the watch will go into Sleep Mode. (7C).
To wake up the watch, press any button other than the
LIGHT Button. The sleep mode is designed to help
save your watch’s battery life!
If you notice that your compass is reading slightly
incorrect it may be one of two things. You can
re-calibrate your compass or you can manually set the
declination.
PRESS LIGHT button to activate the light (2A)
PRESS START/ STOP button to see Time 2 (2B)
PRESS and HOLD START/ STOP button to make Time 2
active. When Time 2 is active the T2 icon will be on. (2B)
PRESS RESET to turn the hourly chime setting on/off.
(2C) The hourly Chime setting only refers to the active
timezone.
PRESS and HOLD RESET until it beeps to turn keytone
setting on/off. (2C) When keytone is on, a tone can be
heard any time a button is pressed.
LIGHT
MODE/
SET
START/
STOP/
[+]
RESET/
[-]
WELCOME.
www.nixonnow.com
DRY
NO
DRY
NO
DRY
NO
(2A) (3A)
(8A)
(7A)
(4A)
(5A) (6A)
(3B)
(8B) (9B)
(7B)
(4B)
(5B) (6B)
(3C)
(8C) (9C)
(7C)
(4C) (5C) (6C)
(3D)
(8D) (9D)
(4D) (5D) (6D)
(2B)
(2C)
+
-
+
-
PULSAR y MANTENER MODE / SET para entrar en Ajustar
la Hora (3A)
LA SECUENCIA DE AJUSTE ES: Hora, Minuto, Segundo,
Formato hora 12/24 .
PULSAR el botón MODE / SET para avanzar por la secuencia
de ajuste. (3B)
PULSAR los botones START / STOP o RESET para aumentar o
disminuir el valor indicado. (3C)
PULSAR y MANTENER MODE / SET para regresar a TIME
MODE. (3D)
El cambio de la hora sólo afectará al uso horario activo.
DRÜCKE und HALTE MODE/SET um zur Zeiteinstellung zu
kommen (3A)
EINSTELLUNGSREIHENFOLGE: Stunde, Minute, Sekunde,
12/24 Stundenformat.
DRÜCKE MODE/SET um durch die Einstellungsreihenfolge
zu schalten. (3B)
DRÜCKE START/STOP oder RESET um den aktuellen Wert zu
erhöhen bzw. zu verringern. (3C)
DRÜCKE und HALTE MODE/SET um zum TIME MODE
zurückzukehren. (3D)
Änderungen der Zeit beziehen sich nur auf die aktiv
geschaltete Zeit.
3
AJUSTAR LA HORA
EINSTELLUNGEN DER ZEIT
4
MODO TIMER
COUNTDOWN FUNKTION
5
MODO CRONO
STOPUHRFUNKTION
8
PULSAR y MANTENER MODE / SET para ir a ajustes
de brújula.
PULSAR MODE / SET para mover del DCL al ajuste del
calibrado. (8A)
PULSAR el botón START/STOP para Calibrar. (8B)
Entonces el reloj te pedirá que te gires. Mantén el reloj
en plano y gira lentamente 2 rotaciones completas.
(8C)
Pulsa el botón START/STOP para confirmar que has
terminado de girar y en la pantalla aparecerá DONE.
(8D)
*Nota: Tu brújula solo necesita ser Calibrada si
percibes errores notables, al cambiar la pila, o
cuando te desplazas a una nueva localización. No es
recomendable usar la brújula cuando estás expuesto
a campos magnéticos intensos que distorsionan la
lectura de la brújula.
DRÜCKE und HALTE MODE/SET um zu den
Kompasseinstellungen zu gelangen.
DRÜCKE MODE/SET um von den DCL zu den
Eichungseinstellungen zu gelangen. (8A)
DRÜCKE START/STOP um zu eichen. (8B)
Die Uhr wird dir dann Anweisung geben dich zu
drehen. Halte die Uhr waagerecht und drehe dich
langsam für zwei volle Umdrehungen. (8C)
DRÜCKE START/STOP um zu bestätigen das du die
Drehung beendet hast und das Display wird DONE
anzeigen. (8D)
*Anmerkung: Dein Kompass muss nur geeicht werden
wenn du bemerkst das er merklich unkorrekt arbeitet,
du die Batterien wechselst oder du einen Ortswechsel
vornimmst. Es ist nicht ratsam den Kompass zu
gebrauchen wenn du starken Magnetfeldern
ausgesetzt bist die die Kompassanzeige stören
können.
Si sabes que el NORTE real está ligeramente desviado
del punto indicado por tu reloj como Norte, puedes
ajustar la Declinación manualmente para que sea
exacta. En muchas partes del mundo no necesitarás
ajustarlo.
PULSAR y MANTENER MODE / SET para acceder al
modo de ajuste de brújula. (9A)
PULSAR START / STOP para desplazar el Grado de
Declinación Magnética hacia el Este. (9B)
PULSAR RESET para desplazar el Grado de Declinación
Magnética hacia el Oeste (9B)
PULSAR y MANTENER MODE / SET para volver al
modo brújula. (9C)
Wenn NORD von den Richtungsangaben der Uhr
abweicht, kannst du manuell die Missweisung
einstellen um ganz genau zu sein. Dies wird in den
meisten Teilen der Welt nicht nötig sein.
DRÜCKE und HALTE MODE/SET um zu den
Kompasseinstellungen zu gelangen. (9A)
DRÜCKE START/STOP um den Grad der Missweisung
Richtung Osten einzustellen. (9B)
DRÜCKE RESET um den Grad der Missweisung
Richtung Westen einzustellen. (9B)
DRÜCKE und HALTE MODE/SET um zurück zu den
Kompasseinstellungen zu gelangen. (9C)
PULSAR COMPASS para acceder al Modo Brújula. (7A)
En este modo, tu dirección actual aparece en el medio
de la pantalla. Además, una Flecha (7B) situada a
lo largo del borde exterior de la pantalla señalará
siempre al Norte como referencia.
Después de 30 segundos sin pulsar ningún botón
en el Modo Brújula, el reloj pasará al Modo Sleep,
inactivo. (7C).
Para reactivar el reloj, pulsar cualquier botón excepto
el botón LIGHT. ¡El modo sleep es para ahorrar la
batería de tu reloj!
Si percibes que tu brújula indica datos incorrectos
puede ser por dos razones.
Puedes volver a calibrar la brújula o regularla de forma
manual.
DRÜCKE Kompass um zur Kompasseintellung zu
gelangen. (7A)
In dieser Funktion, wird deine momentane Ausrichtung
in der Mitte des Displays angezeigt. Als Anhaltspunkt
wird zusätzlich ein Pfeil am äusseren Rand des Displays
in Richtung Norden zeigen.
Wird 30 Sekunden lang im Kompassmodus kein Knopf
bedient wird die Uhr in den Schlafmodus schalten. (7C)
Um den Schlafmodus zu beenden drücke einen
beliebigen Knopf, ausser den LIGHT Knopf. Der
Schlafmodus ist dafür konzipiert die Batterielebigkeit
zu verlängern.
Wenn du feststellst das dein Kompass ungenau
arbeitet kannst du ihn neu eichen oder die
Kompassmissweisung manuell einstellen.
9
CALIBRAR LA BRÚJULA
EICHEN DES KOMPASS
DECLINACIÓN
MISSWEISUNG
2
MODO HORA
ZEITMODUS
MODOS: PULSAR EL BOTON MODO/AJUSTAR para ir
en los diferentes modos
HORA
TIMER
CRONO
ALARMA
BRUJULA
1
MODES
NUNCA EMPUJE UN BOTÓN
LIGERO O FIJE EL RELOJ
CUANDO SE SUMERGE
PULSAR MODE / SET para avanzar a Modo Alarma.
(6A)
PULSAR START / STOP para activar o desactivar la
Alarma. (6B) La alarma se activa automáticamente
cuando se cambia la hora de la alarma.
PULSAR y MANTENER MODE / SET para ajustar la
alarma. (6C)
SETTING SEQUENCE IS: Hora, Minuto
PULSAR y MANTENER MODE / SET para ver la
secuencia de ajuste. (6C)
PULSAR START / STOP y RESET para reducir/aumentar
el valor actual. (6D)
PULSAR y MANTENER MODE / SET para confirmar la
alarma y salir del ajuste de alarma. (6C)
La hora de la alarma seleccionada corresponde con el
uso horario activo que has seleccionado en el modo
hora.
DRÜCKE MODE/SET um zur Weckzeitfunktion zu
gelangen. (6A)
DRÜCKE START/STOP um die Weckzeit an- bzw.
auszuschalten. (6B) Die Weckzeit ist automatisch
aktiviert wenn die Weckzeit verstellt wird.
DRÜCKE und HALTE MODE/SET um zu den
Weckzeiteinstellungen zu gelangen. (6C)
EINSTELLUNGSREIHENFOLGE: Stunde, Minute
DRÜCKE und HALTE MODE/SET um durch die
Einstellungsreihenfolge zu schalten. (6C)
DRÜCKE START/STOP oder RESET um den aktuellen
Wert zu erhöhen bzw. zu verringern. (6D)
DRÜCKE und HALTE MODE/SET um den Alarm zu
bestätigen und die Weckzeiteinstellung zu verlassen.
(6C)
Deine Weckzeit wird mit der aktiv angezeigten
Zeitzone, die du im Zeitmodus gewählt hast,
übereinstimmen.
*RINSE WATCH WITH SOAP AND WATER AFTER
EXPOSURE TO SALT WATER OR SAND.
Replace the battery at least every two years. Dead or low
batteries left in a watch may leak and destroy the movement
of your watch. If you have a water resistant watch, know that
the water resistancy is attained using rubber or plastic seals
which will deteriorate under normal conditions and reduce
the water resistancy of your watch. These seals should be
checked by an authorized jeweler at least every two years to
ensure the rated water resistancy. Do not expose your watch
to extreme temperatures (over 60ºC or 140ºF, under -10ºC or
14ºF). No hot tubs or saunas. Sorry, but do you really need to
know the time when you’re tubbing?
Avoid extreme shocks.
30 METER
50 METER
100-200
METER
CASE
RATING
RAIN,
SPLASHES,
ETC.
SHALLOW
SWIMMING,
SUBMERSION*
SURFING,
SNORKELING,
SPEAR FISHING*
A FEW OF OUR WATCHES ARE GEARED
TOWARDS PURE STYLE AND ARE NOT
DESIGNED FOR SURF OR SWIM. THIS IS
INDICATED BY THE “NO WATER” ICON.
WATER RESISTANCY RATINGS
AND WATCH CARE
6
MODO ALARMA
WECKZEITFUNKTION
7
MODO BRÚJULA
KOMPASSFUNKTION
PULSAR MODE / SET para avanzar hasta el Modo
Timer. (4A)
PULSAR el botón RESET para ir a los valores
preestablecidos. Los valores preestablecidos del
timer son 5 mins, 10 mins, 20 mins, 30 mins, 45 mins
y 1 hr. (4B)
PULSAR START / STOP para activar o parar la cuenta
atrás. Cuando el timer esté funcionando se encenderá
el icono TM aunque hayas salido del modo timer (4C)
PULSAR y MANTENER RESET para ajustar la cuenta
atrás. (4D)
El Timer continuará la cuenta atrás aunque hayas salido
del modo timer. Cuando el timer termine la cuenta
se escuchará un bip de alarma durante 10 segundos,
seguido de un bip más rápido durante 20 segundos.
DRÜCKE MODE/SET um zum Countdown-Modus zu
gelangen. (4A)
DRÜCKE RESET um durch die vorgegebenen Zeitwerte
zu schalten. Die vorgegebenen Zeitwerte sind 5 min,
10 min, 20 min, 30 min, 45 min und 1 Stunde. (4B)
DRÜCKE START/STOP um den Countdown zu starten
oder anzuhalten. Das TM Symbol wird blinken wenn
der Countdown läuft – auch wenn der Countdown-
Modus verlassen wurde. (4C)
DRÜCKE und HALTE RESET um den Countdown
zurückzustellen. (4D)
Der Countdown wird automatisch weiterlaufen
auch wenn der Countdown-Modus verlassen wurde.
Wenn die Zeit abgelaufen ist ertönt für 10 sek. eine
Alarmeinzeltonreihe gefolgt von einer schneller
werdenden Alarmeinzeltonreihe für 20 sek. !
PULSAR MODE / SET para avanzar al Modo Crono. (5A)
PULSAR el botón START / STOP para activar y parar el
Crono. (5B/5C)
PULSAR y MANTENER el botón RESET para reajustar
el Crono. (5D)
Durante la primera hora, la resolución mostrada es
de 1/100 de segundo. Después de la primera hora, la
resolución cambia a 1 segundo.
Cuando se termina el tiempo tras operar durante 24h,
la pantalla se para en 23h:59m:59sec:99ms
DRÜCKE MODE/SET um zur Stopuhrfuntion zu
kommen. (5A)
DRÜCKE START/STOP um die Zeitnahme zu starten
bzw. anzuhalten. (5B/5C)
DRÜCKE HOLD/RESET um die Stoppuhr
zurückzustellen. (5D)
Während der ersten Stunde wird bis zur 1/100
Sekunde genau angezeigt. Nach der ersten Stunde
wird auf 1 Sekunde genau angezeigt.
Läuft die Zeit länger als 24h stoppt die Anzeige bei
23h:59m:59sec:99ms.
PULSAR el botón LIGHT para activar la luz (2A)
PULSAR el botón START/ STOP para ver la Hora 2 (2B)
PULSAR y MANTENER el botón START/ STOP para
activar la Hora 2. Cuando la Hora 2 esté activada, el
icono T2 estará activo. (2B)
PULSAR RESET para activar/desactivar la campanilla
de la hora en punto. (2C) La Campanilla de la hora en
punto sólo se refiere al uso horario activado.
PULSAR y MANTENER RESET hasta que haga bip
para activar/desactivar el sonido de los botones. (2C)
Cuando el sonido esté activo, sonará un tono cada vez
que pulses un botón.
DRÜCKE LIGHT um das Licht zu aktivieren (2A)
DRÜCKE START/STOP um die Zeit 2 anzuzeigen (2B)
DRÜCKE und HALTE START/STOP um Zeit 2 zu
aktivieren. Wenn Zeit 2 aktiv ist wird das T2 Symbol
angezeigt. (2B)
DRÜCKE RESET um das Stundensignal ein- oder
auszuschalten. (2C) Die Stundensignaleinstellung
bezieht sich nur auf die aktive Zeitzone.
DRÜCKE und HALTE RESET bis es piept um die
Tastentoneinstellung ein- oder auszuschalten. (2C)
Wenn die Tastentöne an sind ertönt, bei Betätigen der
Tasten ein Ton.