Note: The window appearance may differ depending on the
Nokia Care Suite
and
Testing And Tuning
Tool
versions
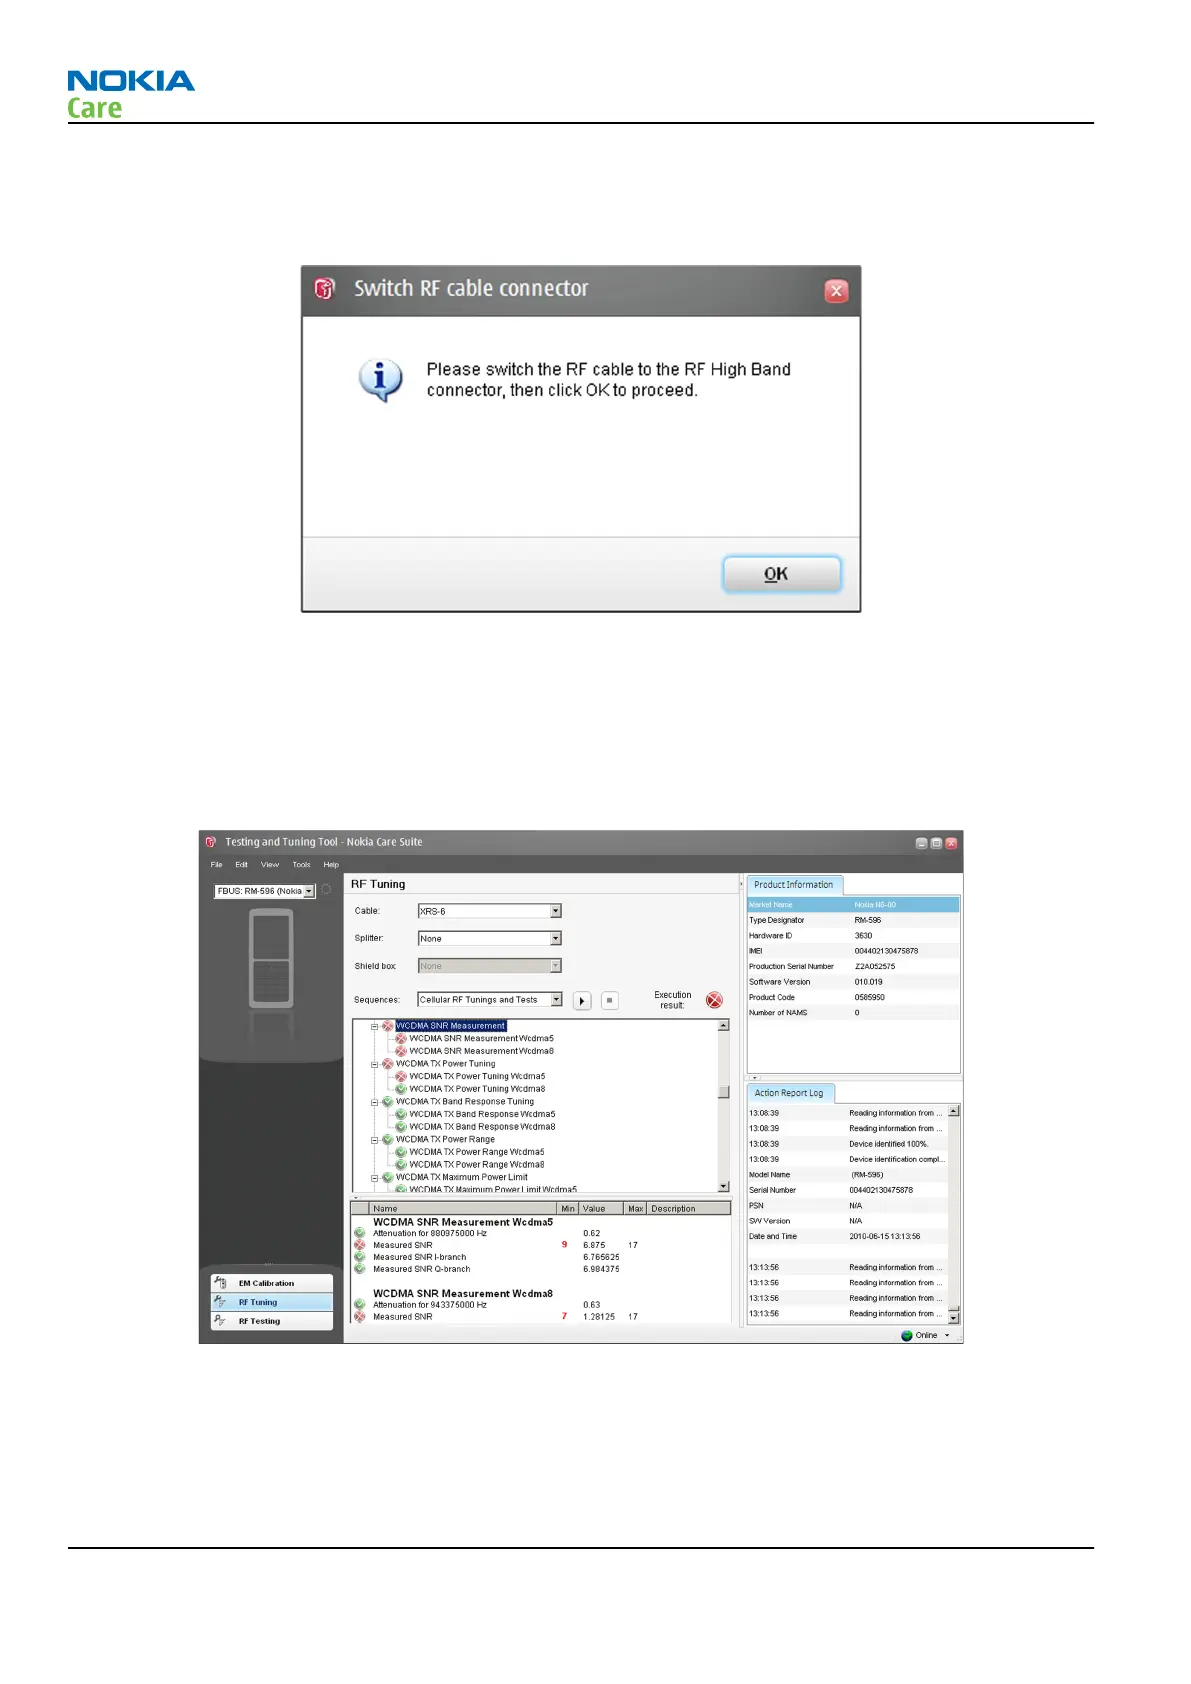
10 If no critical errors happen during the low band RF tuning procedure, the following window will pop up:
11 Change the CA-158RS cable to the high band RF connector on the phone PWB.
12 Click OK and RF tunings will automatically be performed for high cellular bands.
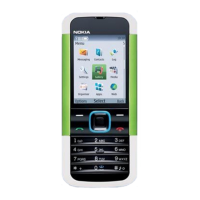
13 RF tunings will be ready when all the tunings and measurements are green in the tool window and no
errors occur.
14 If errors do happen, failed tuning/testing steps are marked with a red color and more detailed results
are shown on the screen. An example fail case is shown below:
Note: The window appearance may differ depending on the
Nokia Care Suite
and
Testing And Tuning
Tool
versions
RM-781
Cellular RF troubleshooting
Page 4 – 16 COMPANY CONFIDENTIAL Issue 1
Copyright © 2011 Nokia. All rights reserved.