nokia
CONNECTING PEOPLE
PAGE 12 (23) Approved 4.0
CMO Operations & Logistics
MGR
WW Service Solutions & Development
Bochum / Germany CONFIDENTIAL 14.7.2005
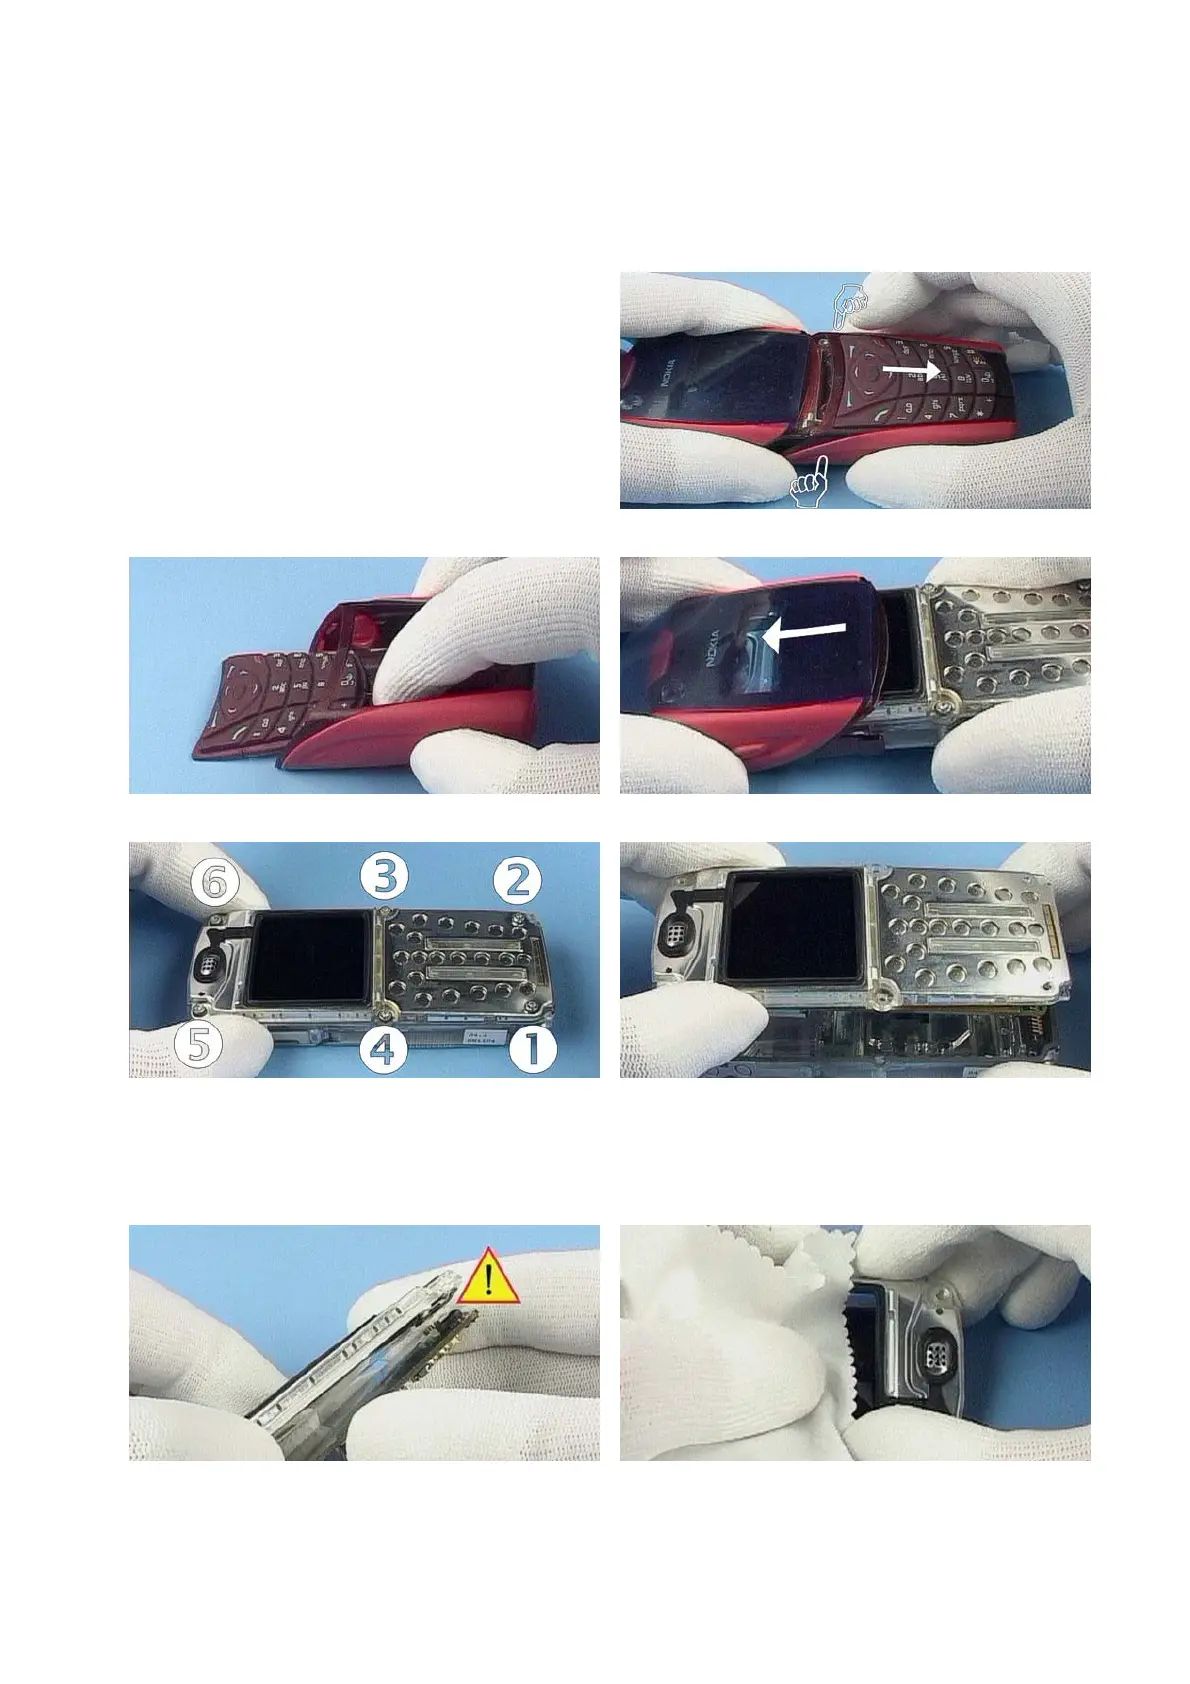
9. DISASSEMBLY INSTRUCTIONS
Attention!
It is not allowed to open the unit more than once,
otherwise the unit is not splash proofed any more and
has to be sent to the appropriate
service supplier with higher service level. Always use
new screws for assembly.
1.) Press the grip markings on both sides of the B-Shell
and remove B-Shell.
2.) Remove the Keymat.
3.) Remove the A-Shell.
4.) Unscrew the four, Torx Plus
®
size 6 screws in the
shown order. Always use new screws when re-
assembling! For assembly, reverse the order and use a
Torx Plus
®
size 6 driver with a torque setting of
32Ncm.
5.) Take away the UI Module Assy with Engine Module.
6.) Separate the UI-Module Assy from Engine Module
carefully, because of the board-to board-connector.
7.) Push out the LCD by using a clean cloth.
Service Manual 5140/5140i Level 1&2 Copyright © 2004-2005 NOKIA Corporation. All rights reserved.
 Loading...