Data Network Terminal Single-port and Multiport Operating Instructions
28 (128) © Nokia Corporation DN01145897
Nokia Proprietary and Confidential Issue2-0en
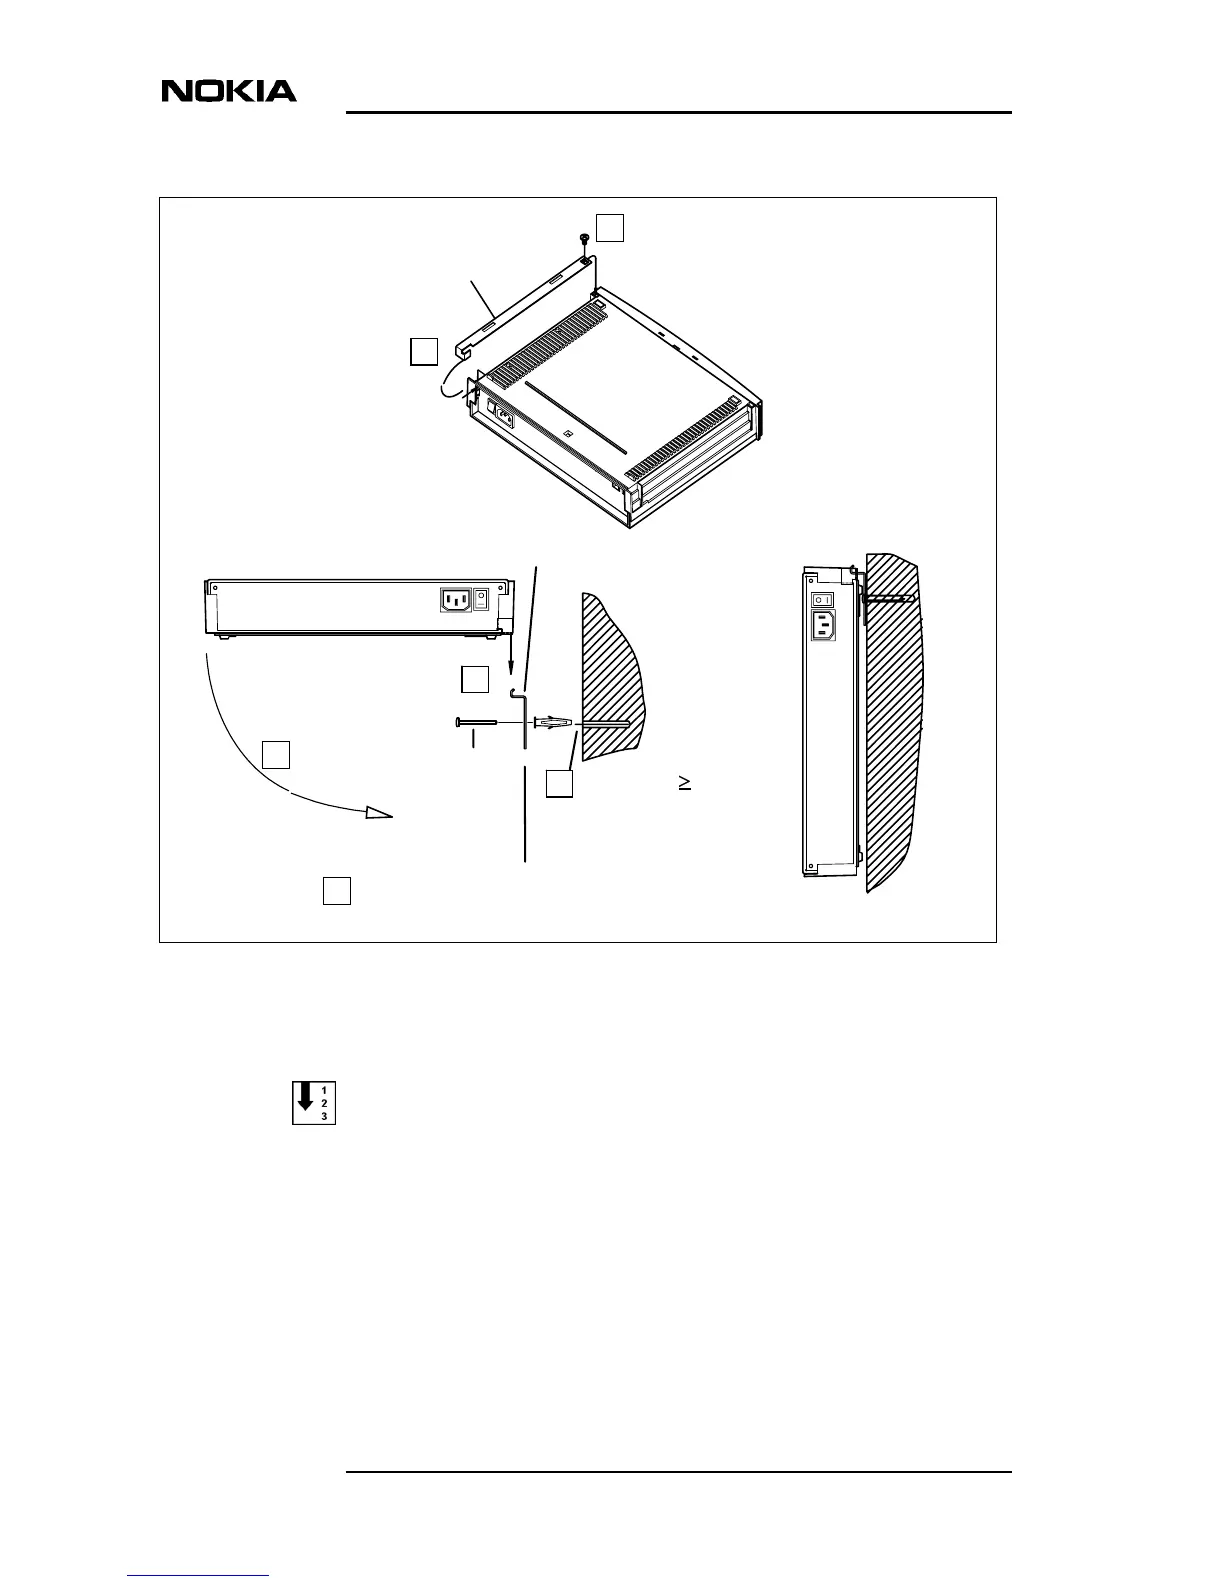
Figure 13. Installation of DNT2Mi on a wall
To install DNT2Mi on a wall:
1. Position the mounting bar onto DNT2Mi.
• Place DNT2Mi bottom-side up and slide the angled end of the
mounting bar towards the rear panel.
• Ensure that the pin in the other end of the mounting bar locks into
the opening in the bottom of DNT2Mi.
Wall-mounting bracket
Mounting bar
6
1
2
3
4
5
Slide angled end of
the mounting bar
towards the rear panel
Fasten to DNT2Mi with
the screw included
Mark fixing points on the wall using
the bracket as schema
Drill holes ( 45 mm,
Lift DNT2Mi on
the bracket
Fasten the bracket into
wall with screws
ø 6 mm drill bit) into
the wall