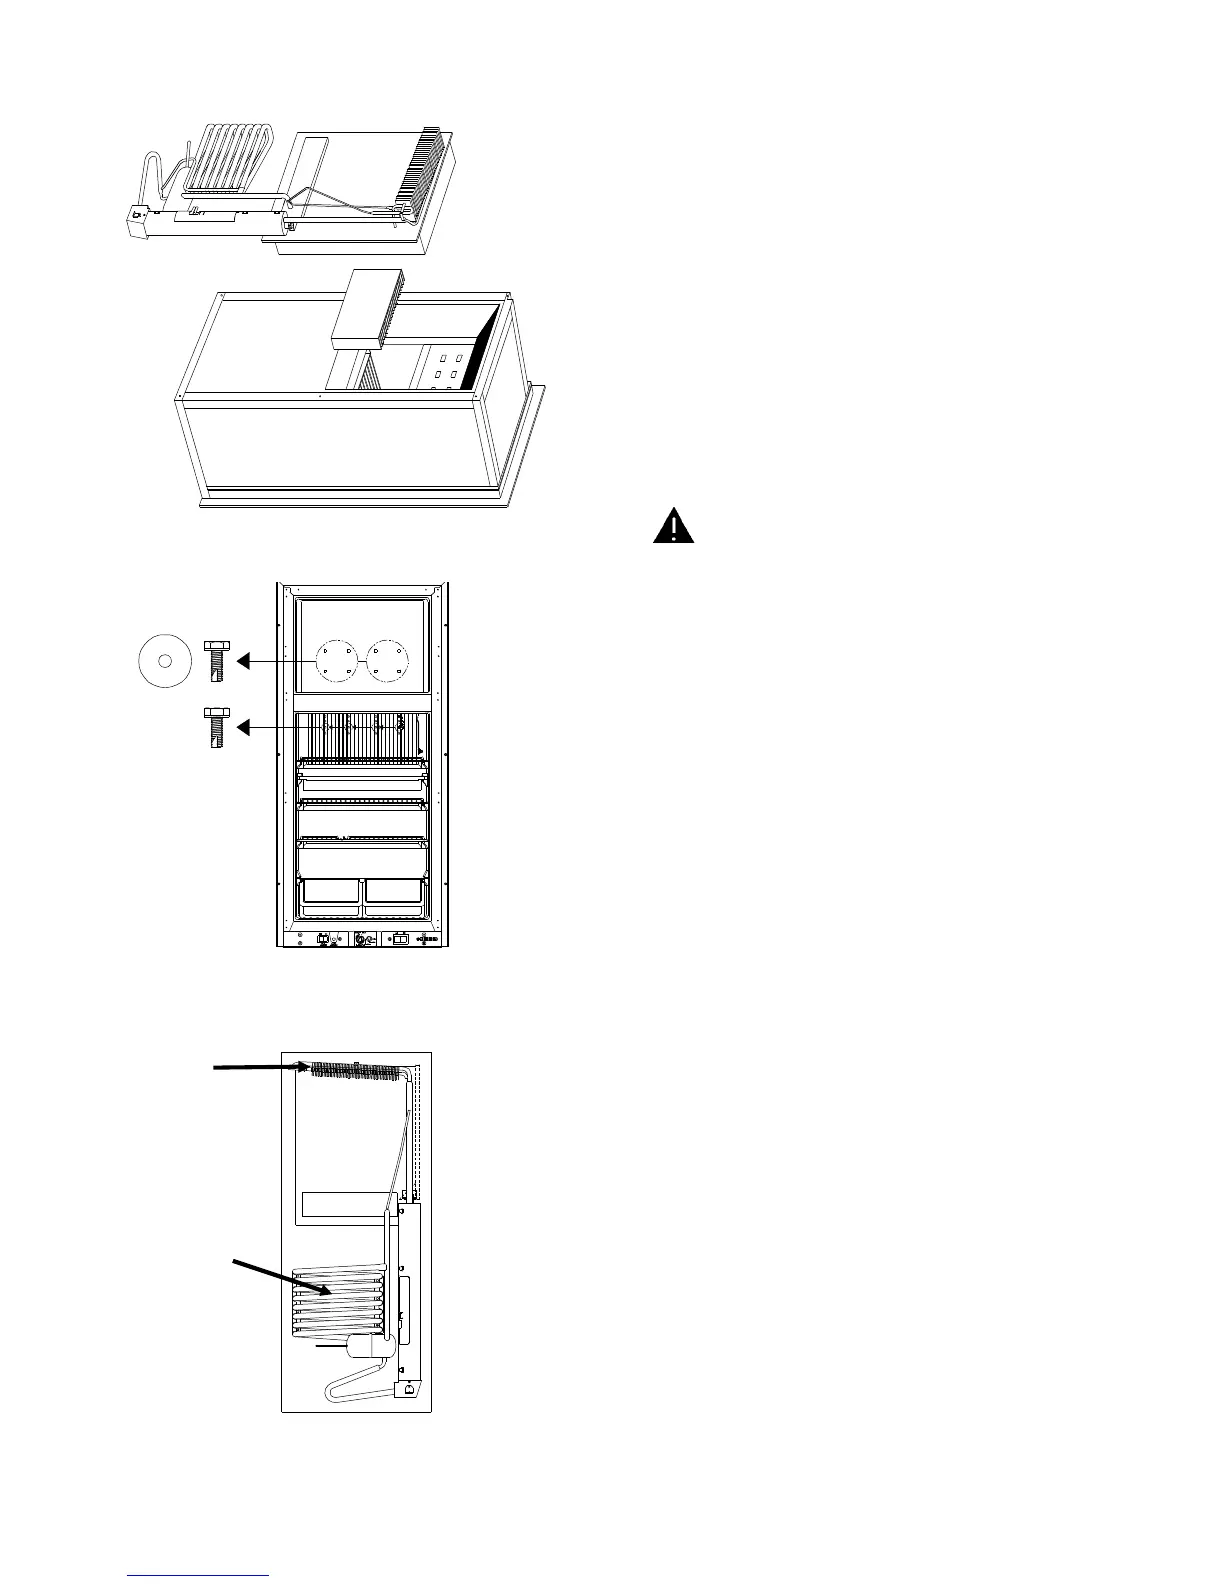
8. Align the cooling fins with the opening in the
refrigerator cabinet.
9. Slide the cooling unit into the refrigerator cabinet
until the cover plate of the cooling unit meets the
cabinet. Insure the mastic-covered tubes contact
the freezer plate and the cooling fins.
Warning: Cooling unit contains hazard-
ous liquid under pressure. Drilling holes
into the mounting surface of the cooling
unit can cause a leak, explosion or fire
which can result in severe personal in-
jury. Do not drill holes into the mounting
surface.
10. Insert the eight freezer screws and the four cool-
ing fin screws. These screws must be installed to
pull the cooling unit to the freezer plate and to the
cooling fins. Torque these screws from 60 to 80
inch-pounds.
11. Reattach the capillary tube to the 5th fin from the
right.
12. Replace the cooling unit mounting screws in the
area of absorber tubes (Figure 30).
13. Replace the cooling unit condenser mounting
screw (Figure 30). Insure the condenser slant is
correct. Refer to "Condenser Leveling Tool" (Fig-
ure 31 on page 23) for method to insure the
correct slant.
14. Insert the orifice into the burner and install the
burner to the cooling unit.
15. Insert the orifice gasket to the end of the burner
tube and connect the burner tube to the burner.
Tighten the compression fitting.
16. Install the ignition electrode and the thermocou-
ple to bracket of the cooling unit.
17. Install the burner cover base and burner cover.
18. Install the drain cup.
19. Connect heater leads.
20. Connect gas supply line to refrigerator.
21. Connect AC power cord to receptacle.
22. Start refrigerator on Gas and check all fittings
for leaks.
23. Set refrigerator in permanent location.
Figure 28
Figure 27
Area 1
Condenser
Area 2
Absorber Tubes
Figure 29
21