3. Remove all the wires that
are connected to the termi-
nals on the right side of the
Power Supply.
USE EXTREME CAUTION WHEN
REPLACING ANY DC ELECTRI-
CAL COMPONENTS. CAUTION
MUST BE TAKEN DISCONNECT-
ING THE DC SUPPLY. THE DC
SUPPLY IS CLOSE TO THE PRO-
PANE GAS SUPPLY TO THE RE-
FRIGERATOR. ARCING CAN EX-
IST WHEN DISCONNECTING
THE DC SUPPLY WHICH CAN
IGNITE A LEAK IN THE PRO-
PANE SUPPLY LINE. RESULTS
CAN BE SEVERE PERSONAL IN-
JURY OR DEATH.
4. Remove the Power Supply
cover to gain access to the
Power Supply.
5. Reconnect the DC supply to
terminals J3(-) and J4(+ ) on
the Power Supply.
6. Reconnect the AC power cord
to terminals J8 and J9.
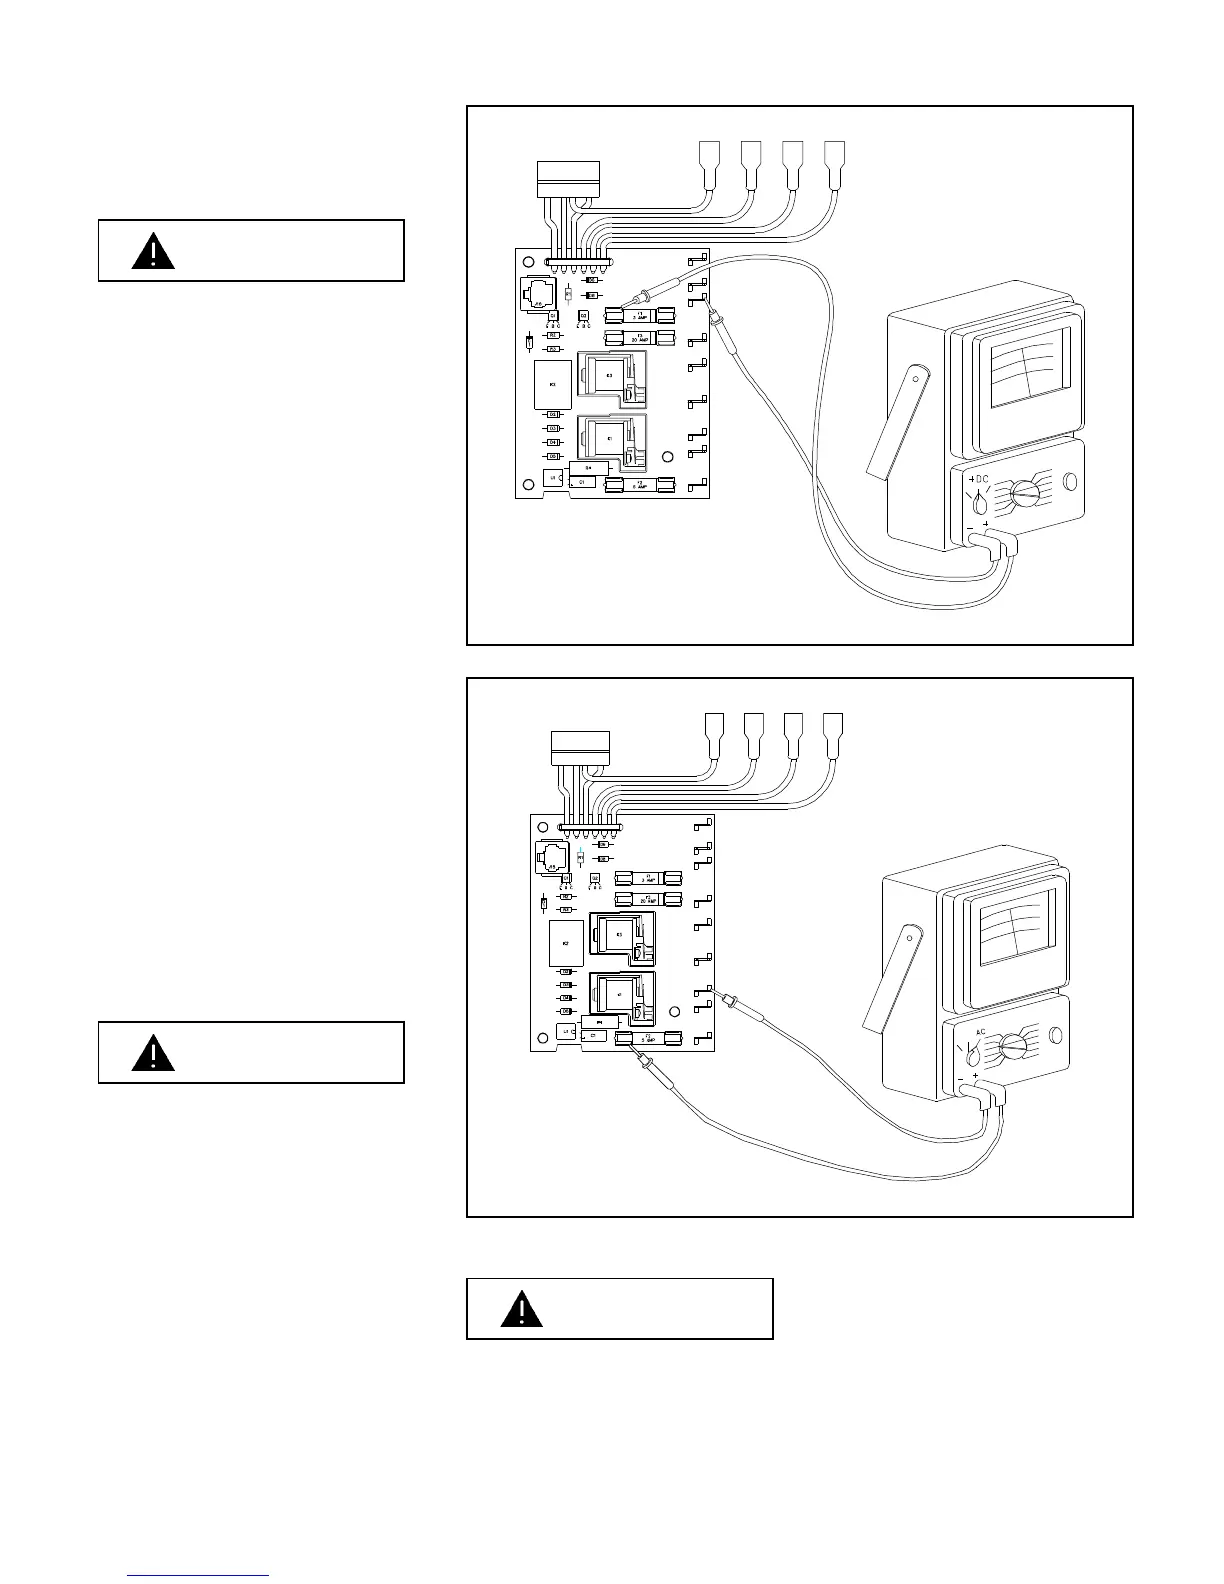
7. With the volt-ohm-meter set to
measure + 12 volts DC, check
for 12 volts through the fuse as
shown by Figure 11.23. If you
do not have 12 volts, replace
the 3 amp fuse.
NEVER OVERFUSE A CIR-
CUIT. REPLACE BLOWN FUSE
WITH EXACT REPLACEMENT
INDICATED BY NORCOLD.
OVERFUSING OF A CIRCUIT
CAN RESULT IN A FIRE.
8. With the volt-ohm-meter set
to measure 120 volts AC,
check for 120 volts through
the 5 amp fuse as shown by
Figure 11.24. If you do not
have 120 volts as shown, re-
place the 5 amp fuse.
NEVER OVERFUSE A CIRCUIT. REPLACE BLOWN FUSE WITH EXACT RE-
PLACEMENT INDICATED BY NORCOLD. OVERFUSING OF A CIRCUIT
CAN RESULT IN A FIRE.
WARNING
WARNING
Figure 11.23 3 Amp Fuse Check
AC and DC power con-
nected but not shown
AC and DC power con-
nected but not shown
Figure 11.24 5 Amp Fuse Check
WARNING
1