Installation Manual 7
- Push the bottom trim piece [9] onto the front of the
refrigerator.
- Put two screws [41] through the trim piece, the mounting
ange, and into the oor.
- Put screws through mounting ange on the rear of the
refrigerator and into the oor.
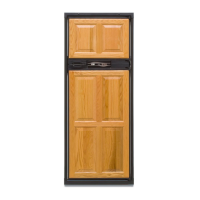
Reverse the Door Swing-Nonmetal Doors
(optional)
This refrigerator has cabinet hinges that allow you to change the
direction the door opens by moving the hinges on a diagonal to
the opposite side.
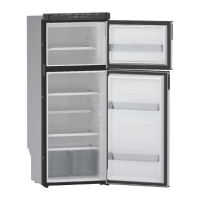
1. Remove the doors (See Art0176):
- Remove the storage bins from the doors.
NOTE: Do not mix the upper and lower hinge pins because
they are different.
- Remove and save the upper hinge pin [6] from each door.
- Pull the door latch and remove each door from the
refrigerator.
- Remove and save the lower hinge pin [64] from each hinge.
2. Change the position of the cabinet hinges and the strike plate
(See Art0178):
- Remove and save the screws from the strike plate [65a].
- Remove the two plastic hole caps that are near the strike
plate.
- Remove the L-shaped plastic covers that are opposite the
hinges.
- Remove and save the screws from the upper cabinet hinge
[66a] of each door.
- Put each of these hinges on the other side of the refrigerator
as the lower hinge [66b].
- Attach each of these hinges with screws.
- Remove and save the screws from the lower cabinet hinge
[67a] of each door.
- Put each of these hinges on the other side of the refrigerator
as the upper hinge [67b].
- Attach each of these hinges with screws.
- Put the L-shaped plastic covers over the holes that were
used by the hinges.
- Remove and save the screw [41] from the front box [68] (See
Art0157).
- Pull the front box away from the refrigerator and out from
under the controls [69].
- Reverse the front box and put it on the opposite side of the
controls.
- Attach the front box to the refrigerator with the screw.
- Put the strike plate on the opposite side of the refrigerator
[65b].
- Put the two round plastic caps into the holes that are near
the strike plate.
. Change the position of the door handles (See Art0177):
- Remove the screws [41] and door handle [70] from each
door.
- Reverse each door handle and put the lower door handle on
the upper door and the upper door handle on the lower door.
- Attach each door handle with the screws.
4. Reinstall the doors (See Art0176):
- Turn the lower hinge pins into the lower cabinet hinges.
NOTE: To prevent damage to the threads of the hinge pins,
turn the hinge pins by hand until tight and then tighten
with a screwdriver.
CAUTION: Apply Loctite removable thread locker (blue)
to the threads of the hinge screws before assembly to
prevent loosening during use. Do not allow Loctite to
contact any of the plastic surfaces of the refrigerator
because it can damage those surfaces.
- Put each door down onto the lower hinge pin.
- Align the holes in the upper hinges and hold in this position.
- Turn the upper hinge pin into the hinges of each door.
- Tighten the hinge pins.
- Put the storage bins in the doors.
 Loading...