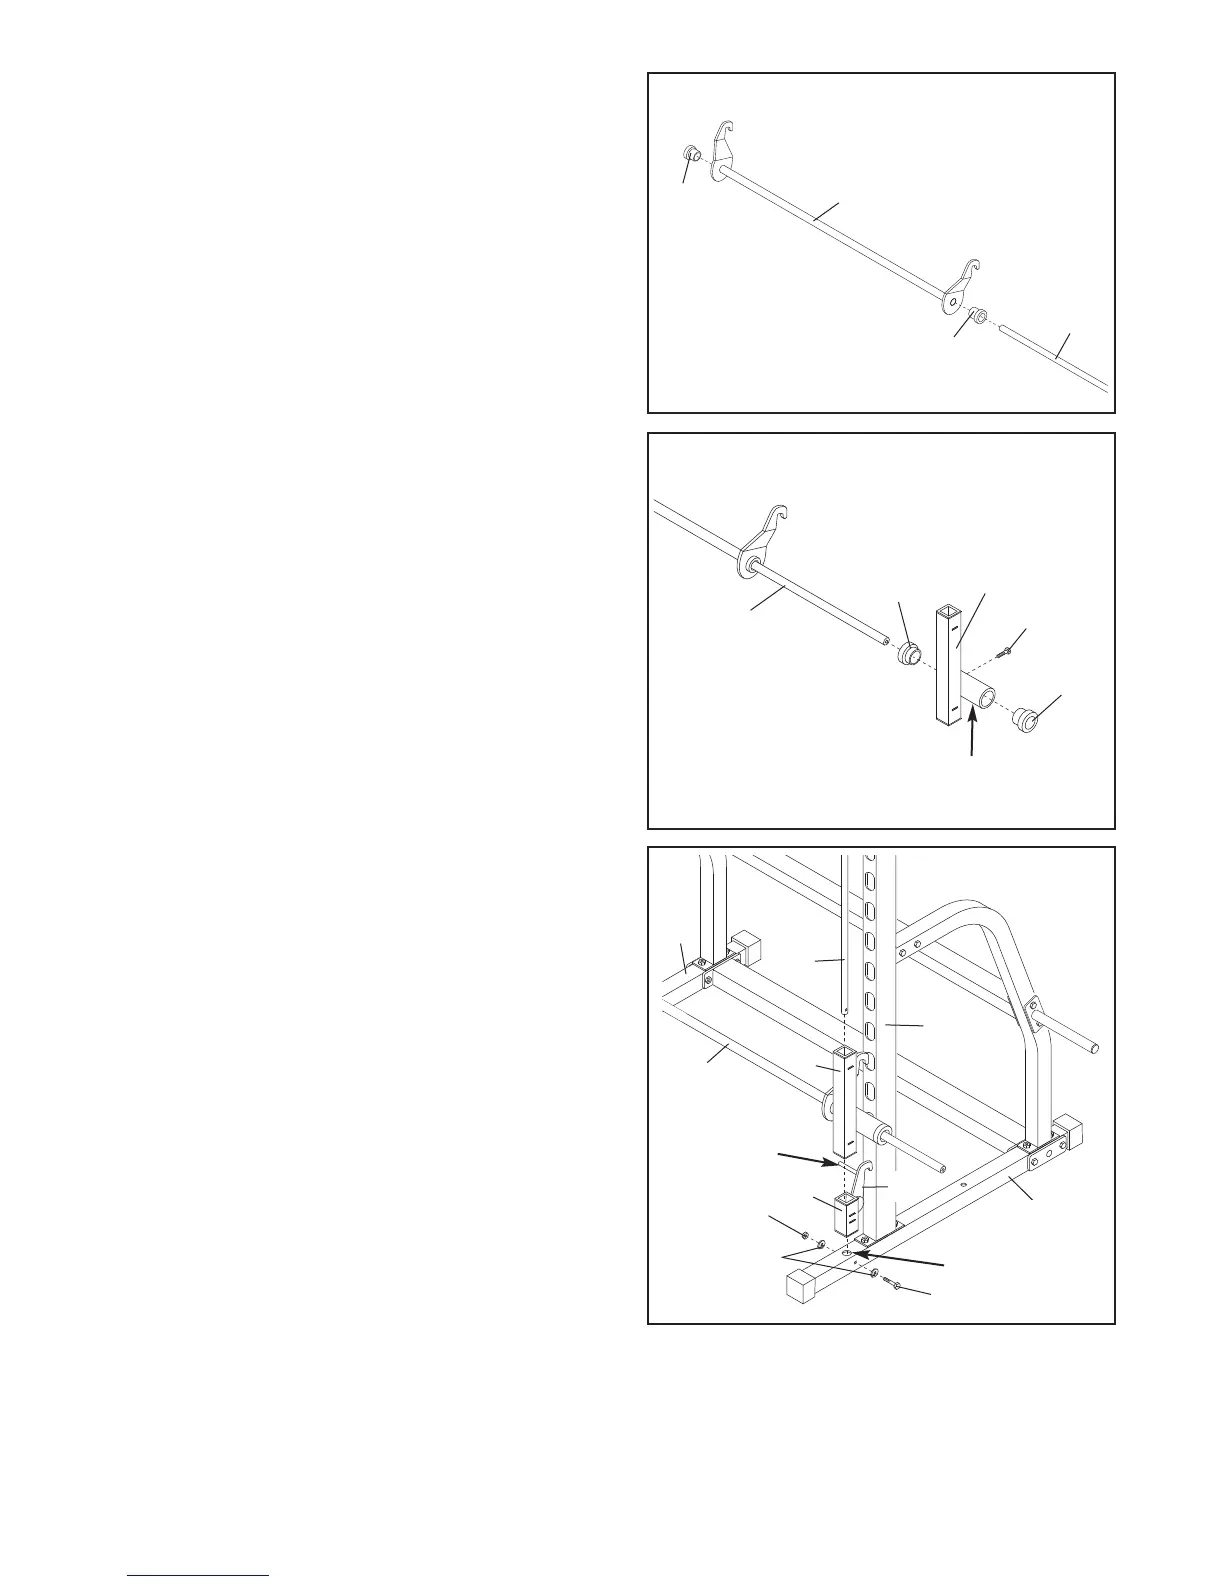
9
8. Press a 25mm Bushing (31) into each end of the
Locking Bar (20).
Insert the Barbell (21) through the Locking Bar (20)
until the Barbell is centred in the Locking Bar
.
21
31
20
31
8
9. Identify the Left Weight Glider (18) by looking at the
position of the round tube.
Press a 38mm Bushing (16) into each end of the
round tube on the Left Weight Glider (18).
Slide the Left Weight Glider (18) onto the left end of
the Barbell (21).
Make sure that the Weight Glider
is turned as shown in the drawing. Secure the
Weight Glider to the Barbell with a hand-tightened M8
x 20mm Screw (33).
Attach the Right Weight Glider (not shown) to the
right end of the Barbell (21) in the same manner.
33
18
16
21
Round tube
16
9
10. Identify the left Safety Spotter (14) by the position of
the handle on the Left Spotter Hook (42). Place the
left Safety Spotter on the left Base (4) so it is centred
over the indicated hole.
Have a second person hold the Locking Bar (20) so
that the Left W
eight Glider (18) rests on top of the left
Safety Spotter (14). Insert a Weight Guide (11) into
the Left Weight Glider, the left Safety Spotter, and the
hole in the Base (4).
Note: T
ilt the Weight Guide
away from the Upright (1) as you insert it.
Attach the Weight Guide (11) to the Base (4) with an
M8 x 63mm Bolt (23), two M8 Washers (35), and an
M8 Nylon Locknut (37). Do not tighten the Nylon
Locknut yet.
Attach the right Safety Spotter (not shown) and the
Right Weight Glider (not shown) to the right Base (4)
in the same manner
.
11
1
18
20
14
42
Handle
10
37
35
23
4
4
Hole

 Loading...