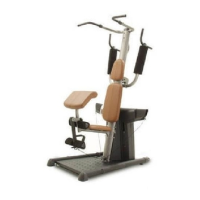
9
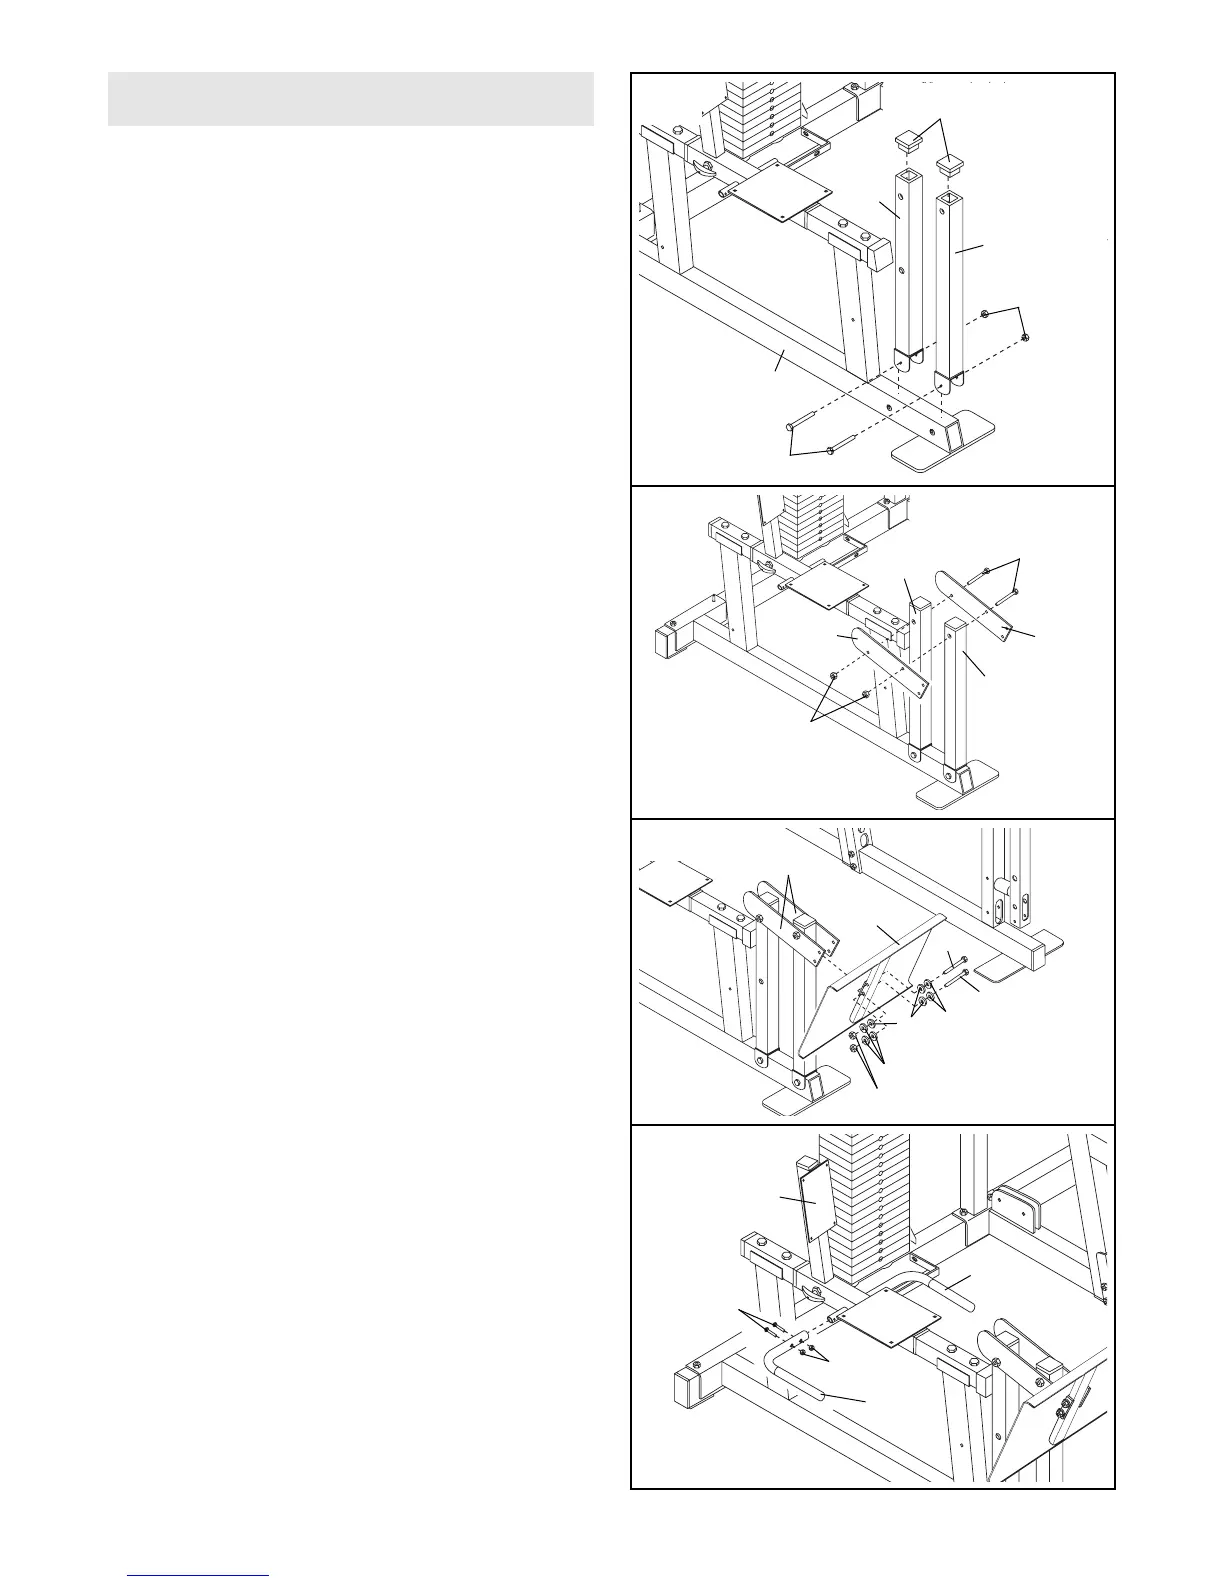
10. Attach the two Leg Press Attachments (100) to
the Rear and Forward Leg Press Uprights (97,
98) with two 3/8” x 3 1/4” Bolts (87) and two 3/8”
Nylon Jamnuts (63).
10
11. Attach the Leg Press Plate (85) to the Leg Press
Attachments (100) with two 3/8” x 3 1/4” Bolts
(87), eight 3/8” Washers (55), and two 3/8” Nylon
Jamnuts (63).
Note: All eight of the 3/8” Washers (55) must
be between the Leg Press Attachments (100)
and the welded tube on the Leg Press Plate
(85).
12. Attach a Handle (95) to the Sliding Seat Frame
(74) with two 1/4” x 1 1/2” Bolts (101) and two 1/4”
Nylon Locknuts (25).
Attach the other Handle (95) in the same manner.
101
95
85
74
11
12
25
95
9
9. Open the parts bags labeled “ARM ASSEM-
BLY.”
Attach the Rear and Forward Leg Press Uprights
(97, 98) to the Leg Press Base (84) with two 3/8”
x 3 1/4” Bolts (87) and two 3/8” Nylon Locknuts
(50). Note: The Rear Leg Press Upright (97)
has an extra hole in it.
Press two 2” Square Inner Caps (33) into the
Rear and Forward Leg Press Uprights (97, 98).
98
97
33
87
84
50
Arm Assembly
87
87
100
87
98
63
97
100
100
55
55
55
63
 Loading...