Do you have a question about the Nordson EFD E5 and is the answer not in the manual?
Details warnings for electric shock, high pressure, burns, and manual reading.
Provides essential safety instructions for preventing injury during operation and servicing.
Lists instructions to prevent fires or explosions, especially with flammable materials.
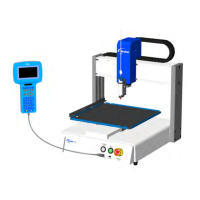
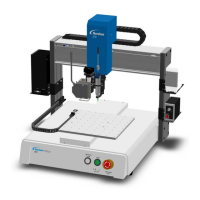
Lists technical specifications for different E Series robot models (E2-E6).
Guides on connecting the teach pendant, safety plug, and dispensing valve components.
Steps to verify installation, switch on the robot, and enable the dispensing system.
Differentiates the capabilities and functions available in Run Mode and Teach Mode.
Step-by-step guide to transition from Run Mode to Teach Mode for system configuration.
Teaches the system offset values between the dispensing tip and accessories like cameras.
Guides on configuring and enabling barcode scanning for program execution.
Step-by-step instructions to switch the system operational mode.
Focuses on manipulating stored programs and creating dispensing patterns.
Procedure for selecting, opening, and modifying existing dispense programs.
Procedure to set two reference points on a workpiece for program offset adjustments.
Updates all XY points in a program to match new workpiece positions or orientations.
Secures the system by prohibiting unauthorized access to dispense programs.
Basic steps for creating a new dispense program and running it.
Procedure for creating a single dispense dot at a specified XYZ location.
Steps to create a linear dispense path by defining start, passing, and end points.
Procedure for creating an arc or circular dispense path using start, arc, and end points.
Steps to create a circular dispense pattern by selecting points or entering a center.
Instructions for filling defined areas using various patterns like rectangles or circles.
Creates patterns on multiple workpieces by repeating a dispense pattern in an array.
Establishes a reference point for recalibrating tip height without a tip detector.
Adjusts the tip height after a tip change using the calibration point.
Sets a reference point for auto recalibration with a tip detector.
Automatically recalibrates tip height using the tip detector after a tip change.
Steps for powering on, enabling systems, opening programs, and starting operation.
Procedure to execute a dispense program by scanning a barcode.
A table listing error messages, their causes, and corrective actions for programming errors.
Guides on using the Diagnostic Menu to test system components like sensors and motors.
Explains parameters for the Dispense Dot command, including time, dwell, and retract settings.
Details parameters for the Line Start command, including speed, delay, and settling distance.
Explains parameters for Line Passing points, including speed and node time.
Describes the Arc Point command for dispensing along curves and circular paths.
Details parameters for the Line End command, including shutoff and backtrack settings.
Configuration settings for the height sensor, including input/output ports and speed.
Step-by-step guide to configure the height sensor, including sensor position and initial detect.
How to integrate height sensor readings into programs to adjust for workpiece variations.
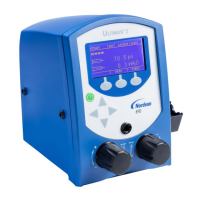
| Type | Pneumatic Dispenser |
|---|---|
| Maximum Pressure | 100 psi |
| Voltage | 24 VDC |
| Pressure Range | 0-100 psi |
| Fluid Reservoir Capacity | 5 cc or 10 cc |
| Dispense Volume Range | 0.001 ml to 5 ml |
| Operating Temperature | 10°C to 40°C |
| Power Requirements | 24 VDC |
| Dispensing Technology | Pneumatic Time/Pressure |