Do you have a question about the Nordson EFD E2 and is the answer not in the manual?
Covers electric shock, pressure, burns, and general precautions.
Hazards from materials, qualified personnel, and intended use.
Preventive maintenance, component safety, malfunction, and disposal.
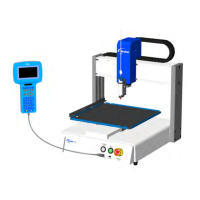
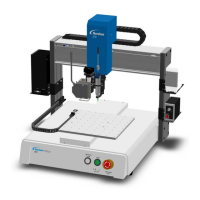
Procedures for safely unpacking the robot and its components.
Steps for positioning and connecting system components.
Steps to power on the system and verify installation.
Explanation of program structure, addresses, and command types.
Definition and calibration of tip height and purpose of mark points.
Explains Run/Teach modes, menu navigation, and data entry.
Detailed explanation of each teach pendant key and its function.
Description of menu items within the Program Menu.
Description of menu items within the Setup Menu.
Reference for Type and USB menu commands and functions.
Switching modes and intro to system parameters.
Setting speeds, limits, acceleration, Z clearance, arc jump, and park position.
Setting offsets for accessories like cameras.
Configuring barcode scanner for program execution.
Procedure to switch from Run Mode to Teach Mode.
Steps to open, edit, and name programs.
Basic steps for creating a new program and running it.
Steps to create a single dispense dot.
Steps to create a linear dispense path.
Creating patterns for multiple workpieces in an array.
Establishing a reference point for tip height calibration.
Setting up and performing auto needle adjust with a tip detector.
Steps to start the system for normal operation.
Procedures for pausing, purging, and shutting down the system.
Common error messages and their causes and corrective actions.
Procedures for testing system components using the diagnostic menu.
Physical dimensions of the E Series robots.
Pinouts and specifications for dispenser and external control ports.
Pinouts and specifications for input/output and RS232 ports.
Parameters and functions for the Dispense Dot command.
Parameters for Line Start and Line Passing commands.
Parameters for creating 2D and 3D step and repeat patterns.
Specifies the tip raise height after dispense commands.
Steps to install the software and connect to the robot.
Steps to import a DXF file and generate dispense commands.
Configuring sensor input, output, speed, and travel limit.
How to use the height sensor to check workpiece height during programs.
| Brand | Nordson EFD |
|---|---|
| Model | E2 |
| Category | Dispenser |
| Language | English |