E Series Automated Dispensing System
132 www.nordsonefd.com info@nordsonefd.com 800-556-3484 Sales and service of Nordson EFD dispensing systems are available worldwide.
Appendix D, Height Sensor Setup and Use (continued)
To Use the Height Sensor Capability
PREREQUISITES
The system is properly set up. Refer to “Setup” on page32.
The height sensor is installed, enabled, and set up. Refer to “Appendix D, Height Sensor Setup and Use” on
page128.
The program you want to edit using the height sensor capability is open.
# Key Press Step Teach Pendant Display
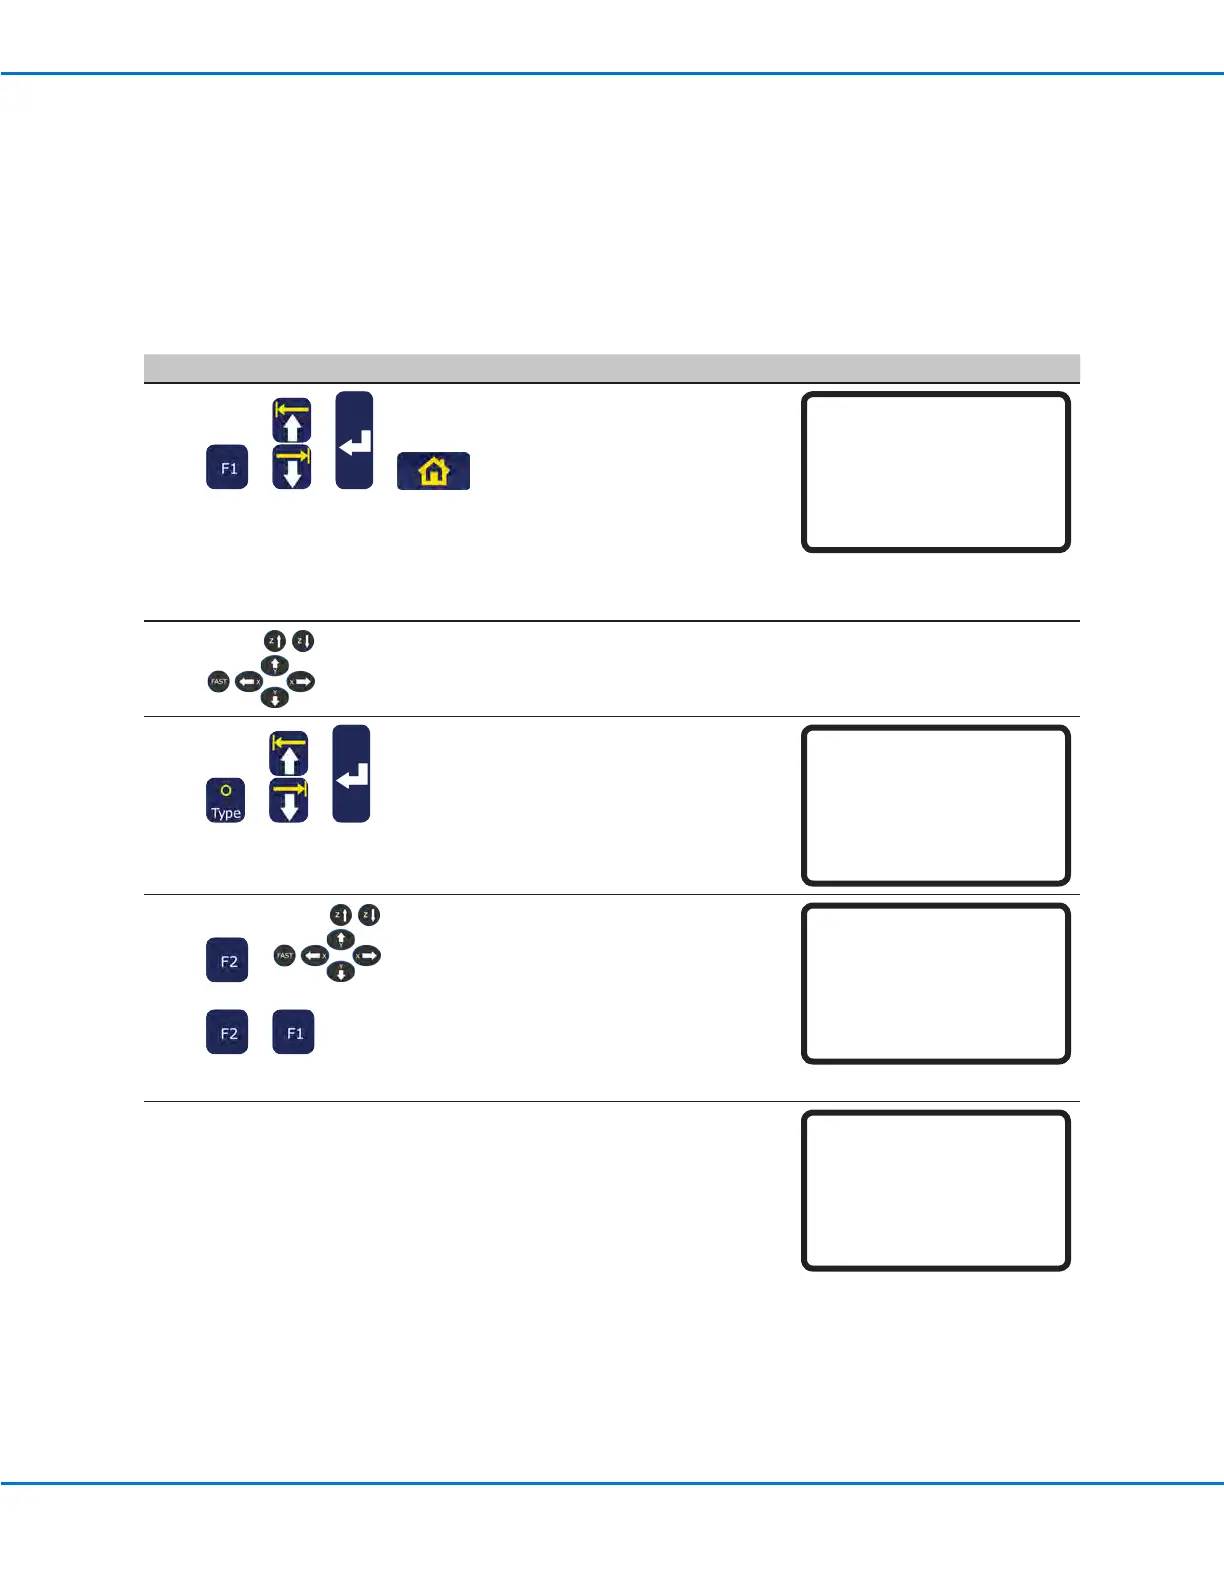
1
> > >
• Press F1.
• MOVE UP / DOWN to TEACH/
RUN.
• Press ENTER.
• Press HOME. If prompted, enter
a password.
The system opens the last
program number that was
modied prior to shutdown.
[PROGRAM MENU] 1/1
01*Teach/Run
02 Program List
03 Reset Counter
04 Program Offset
05 Needle Adjust
06 Auto Needle Adjust
2
• Jog to the location where the
system should check the height
for each workpiece.
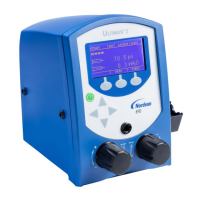
3
> >
• Press TYPE.
• MOVE UP / DOWN to HEIGHT
SENSOR.
• Press ENTER.
[TYPE] 4/4
22 Fill Area
23 Acceleration
24 Dummy Point
25 Wait Time
26 Stop Point
27 Park Position
28*Height Sensor
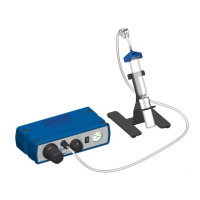
4
> >
>
• Press F2 to lower the probe.
• Use the Z jog keys to move
the probe to the desired XYZ
location and then lower the probe
to approximately 10 mm (0.4”)
above the location
• Press F2 to raise the probe.
• Press F1 to accept the value.
Height Sensor
------------------------------
X: 58.42 mm
Y: 114.35 mm
Z: 10.00 mm
[F1] OK [F2]Probe [F3] Current
The system will now check the
workpiece height each time the
programs runs.
An example program is shown at
right.
0001>Z Clearance Rel 5.000
0002 EMPTY
0003 Height Sensor
0004 EMPTY
0005 Dispense Dot 0.150
0006 Dispense Dot 0.150
0007 End Program
0008 Empty