E Series Automated Dispensing System
124 www.nordsonefd.com info@nordsonefd.com 800-556-3484 Sales and service of Nordson EFD dispensing systems are available worldwide.
Importing a DXF File
Follow this procedure to import a DXF le, select the desired elements of the imported DXF le, and to generate the
commands that will create the selected pattern.
PREREQUISITES
The system is properly installed and set up. Refer to “Installation” on page14 and “Setup” on page32.
Remote Command is disabled. Refer to “Setting Up the System for Remote Operation” on page113.
The Teach Pendant cable is connected to the robot.
The system is in the Teach Mode. Refer to “How to Switch from Run Mode to Teach Mode” on page44.
The tip height is calibrated. If the tip was changed, perform a Needle Adjust (systems without a tip detector) or
Auto Needle Adjust (systems with a tip detector). Refer to “Calibrating the Tip Height” on page70.
The DXF le you want to import is available on the PC.
If the imported DXF le has the length units set as inches, the INCH -> MM checkbox on the DXF Option screen is
checked. Refer to “Modifying the DXF Import Options” on page123.
The actual workpiece is properly positioned on the xture plate.
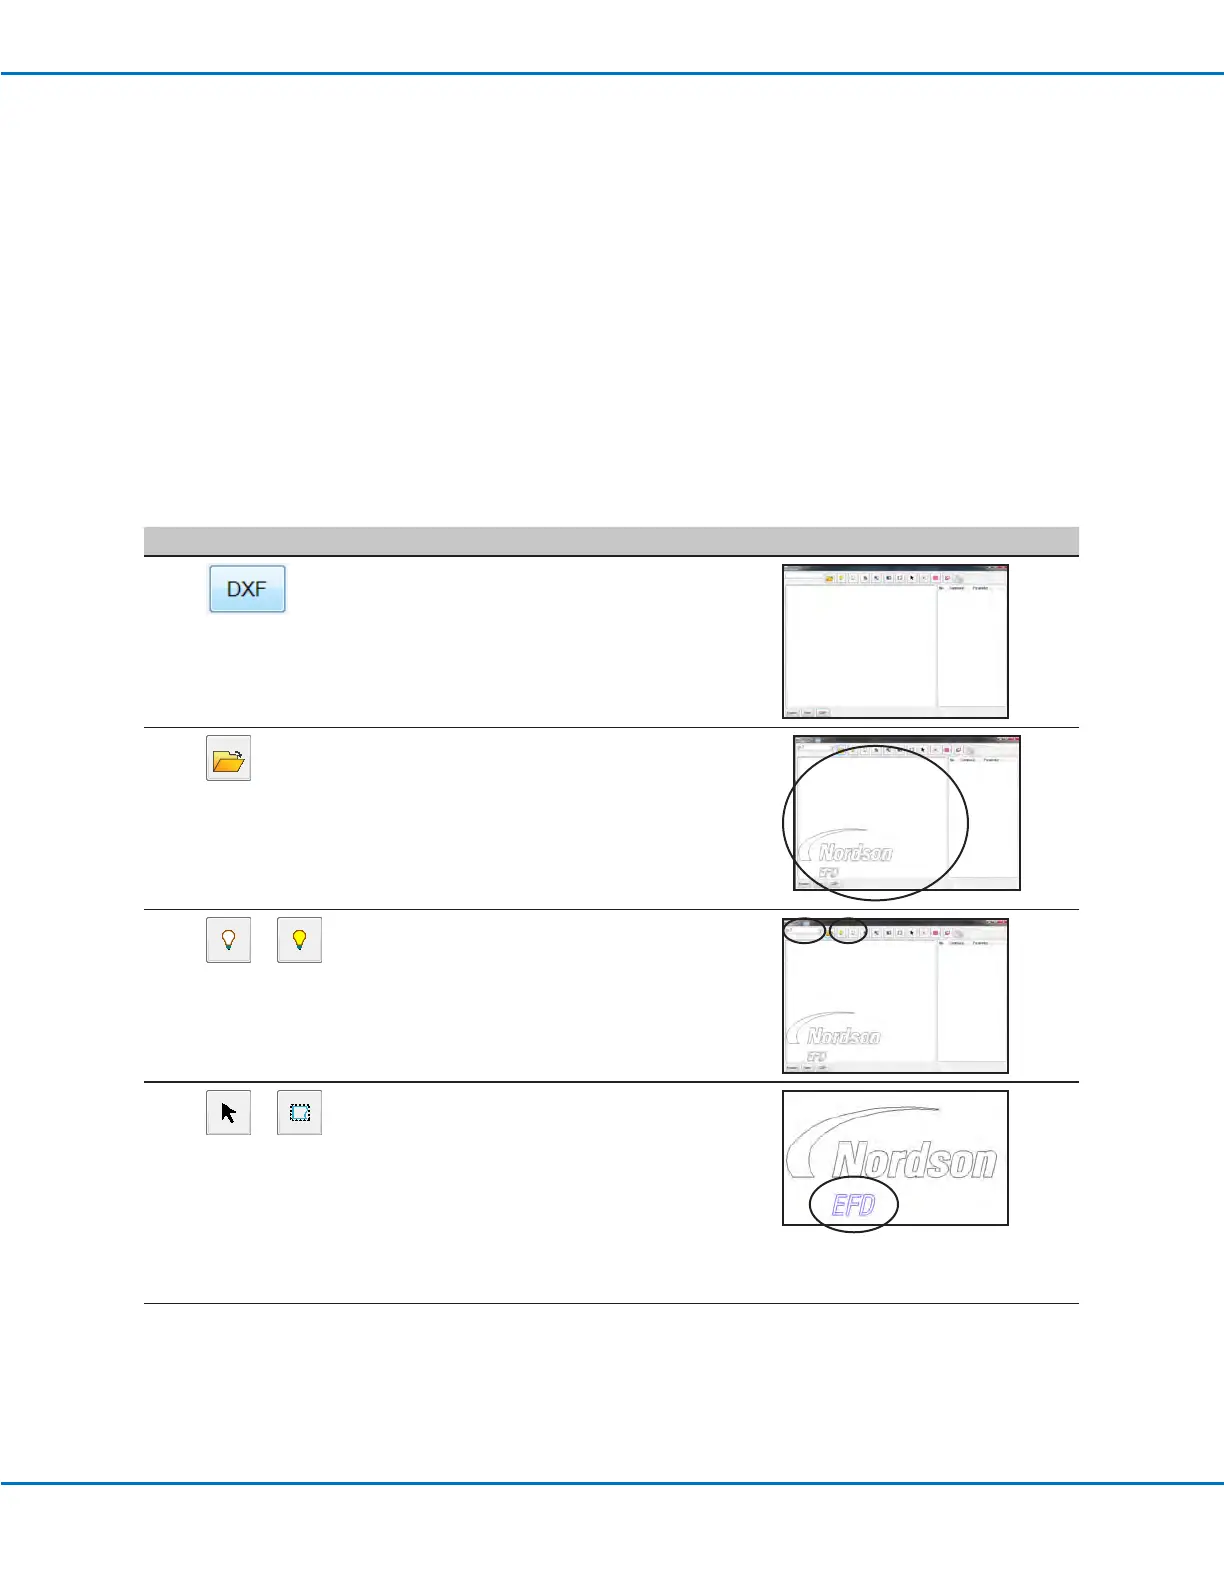
# Click Step Reference Image
1
Click DXF.
The DXF screen appears.
2
Click OPEN A FILE and then double-click
on the DXF le you want to import.
The le appears in the DXF screen
drawing window.
3
or
Hide or show drawing layers as needed:
• To select individual layers to hide or
show, use the drop-down menu at the
top left of the screen.
• To hide all or show all layers, click
HIDE ALL LAYERS or SHOW ALL
LAYERS.
4
or
Select the points and / or lines onto which
you want to dispense material.
Selected points and / or lines turn blue.
For this example, the letters EFD are
selected.
NOTE: Refer to “1. DXF Screen Editing
Icons” on page121 for an explanation of
all the selection icons.
Continued on next page