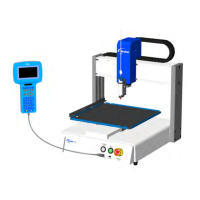
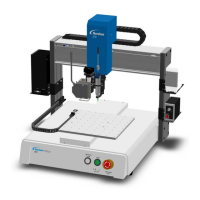
E Series Automated Dispensing System
60 www.nordsonefd.com info@nordsonefd.com 800-556-3484 Sales and service of Nordson EFD dispensing systems are available worldwide.
How to Make a Dot
PREREQUISITES
The system is in the Teach Mode. Refer to “How to Switch from Run Mode to Teach Mode” on page44.
# Key Press Step Teach Pendant Display
1
• Jog the dispensing tip to the desired
XYZ location for the dispense dot.
2
>
• Press SHIFT > TYPE to open the
Dispense Dot screen.
• Make XYZ coordinate changes as
needed.
Dispense Dot 1/3
------------------------------
X: 130.93 mm
Y: 37.39 mm
Z: 45.54 mm
[F1] OK [F2] Next [F3] Current
3
>
• Press F2 to move through the Dispense
Dot parameter screens.
• Press F1 to save and exit.
Dispense Dot 3/3
------------------------------
Retract Distance: 100.00 mm
Retract Low: 10.0 mm/s
Retract High: 10.0 mm/s
[F1] OK [F2] Next
4
>
• Press SHIFT > END to register the end
of the program.
5
• Press START to run the program.
Creating Patterns
This section provides quick-reference procedures for creating the most commonly used dispensing patterns. Use
the procedures in this section in tandem with “Appendix A, Type Menu Reference” on page89, which provides
detailed information on commands.
For basic procedures on how to create a program and how to manipulate programs (such as opening programs or
copying, inserting, and deleting commands), refer to “Working with Programs and Commands” on page44.
About Navigating the Type Menu
• Press the MOVE UP, MOVE DOWN, ENTER, and numeric keys to move through and change XYZ values.
• Press F1 (OK) to save displayed values and exit the menu.
• Press F2 (Next) to accept displayed values and move to the next screen.
• Press F3 (Current) to change displayed coordinates to the current tip location.
• Press ESC to cancel any changes to return to the program.