E Series Automated Dispensing System
21www.nordsonefd.com info@nordsonefd.com 800-556-3484 Sales and service of Nordson EFD dispensing systems are available worldwide.
Run Mode vs. Teach Mode
The system has two modes of operation: Run and Teach.
In the Run Mode, you can:
• View a list of programs and select a program.
• Run a program.
• Reset the counter (this function is password-protected).
• Update all the XYZ values in a program if the location and / or orientation of a workpiece changes.
• Perform a manual or automatic tip height calibration (required after a tip or needle change).
In the Teach Mode, you can:
• View or change system settings.
• Calibrate the tip height.
• Set up inputs/outputs.
• Create, edit, copy, move, and name programs.
• Test-run programs.
• Upload and download programs using the SVC USB port.
• Perform hardware and software diagnostic testing.
When you switch on the robot, the system is in the Run Mode. To switch to the Teach Mode, refer to “How to Switch
from Run Mode to Teach Mode” on page44.
Executing Functions and Entering Numeric Data
Execute functions by pressing keys either individually or consecutively:
• When you press a single key, the Teach Pendant executes the function shown in white. For example, when you
press the Type key, the Type menu opens.
EXAMPLE: Press
to open the Type menu.
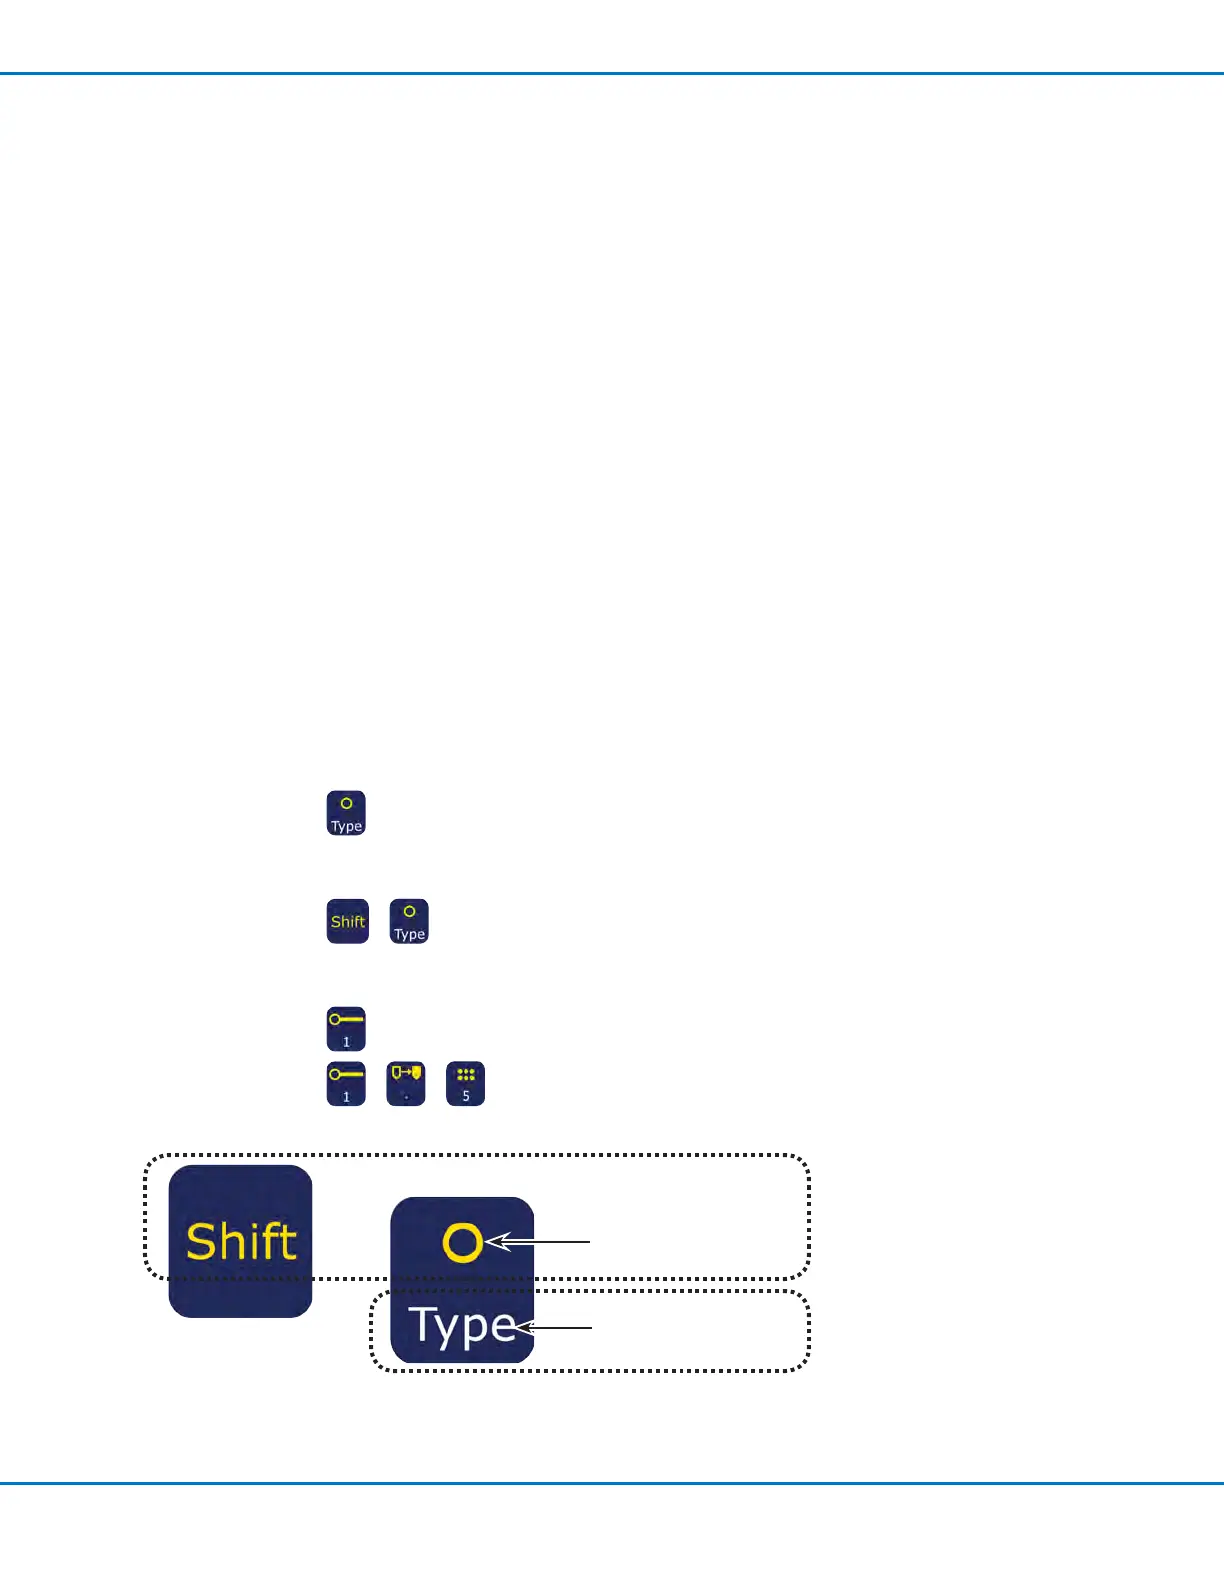
• To execute the function shown in yellow at the top of a key, press and release the Shift key, then press the
desired key. For example, to select the Dispense Dot command, press the Shift key, then press the Type key.
EXAMPLE: Press
> to insert a Dispense Dot command.
When a number is required, the Teach Pendant automatically switches to numeric entry mode. The number keys
have a white number on the bottom of the key.
EXAMPLE: Press
to enter the number 1.
EXAMPLE: Press > > to enter the number 1.5.
Execute the function shown in
YELLOW by rst pressing and
releasing the SHIFT key, then
pressing this key
Execute the function
shown in WHITE by
pressing this key once
+