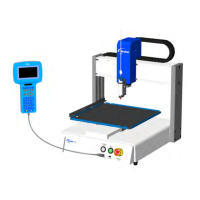
E Series Automated Dispensing System
115www.nordsonefd.com info@nordsonefd.com 800-556-3484 Sales and service of Nordson EFD dispensing systems are available worldwide.
Appendix C, DXF File Import Using TeachMotion DXF
TeachMotion
™
DXF is a software utility designed to import DXF les, thus simplifying dispensing program
development. Importing a DXF le into the TeachMotion DXF software creates a dispensing program that includes all
the commands necessary to replicate the user-selected points, lines, arcs, and circles of a DXF le.
This software can also be used to create and modify the dispense programs stored on the Teach Pendant, allowing
you to conveniently manage all dispense programs through a personal computer (PC). This appendix provides an
overview of the TeachMotion DXF software and the procedures for using the software to import DXF les.
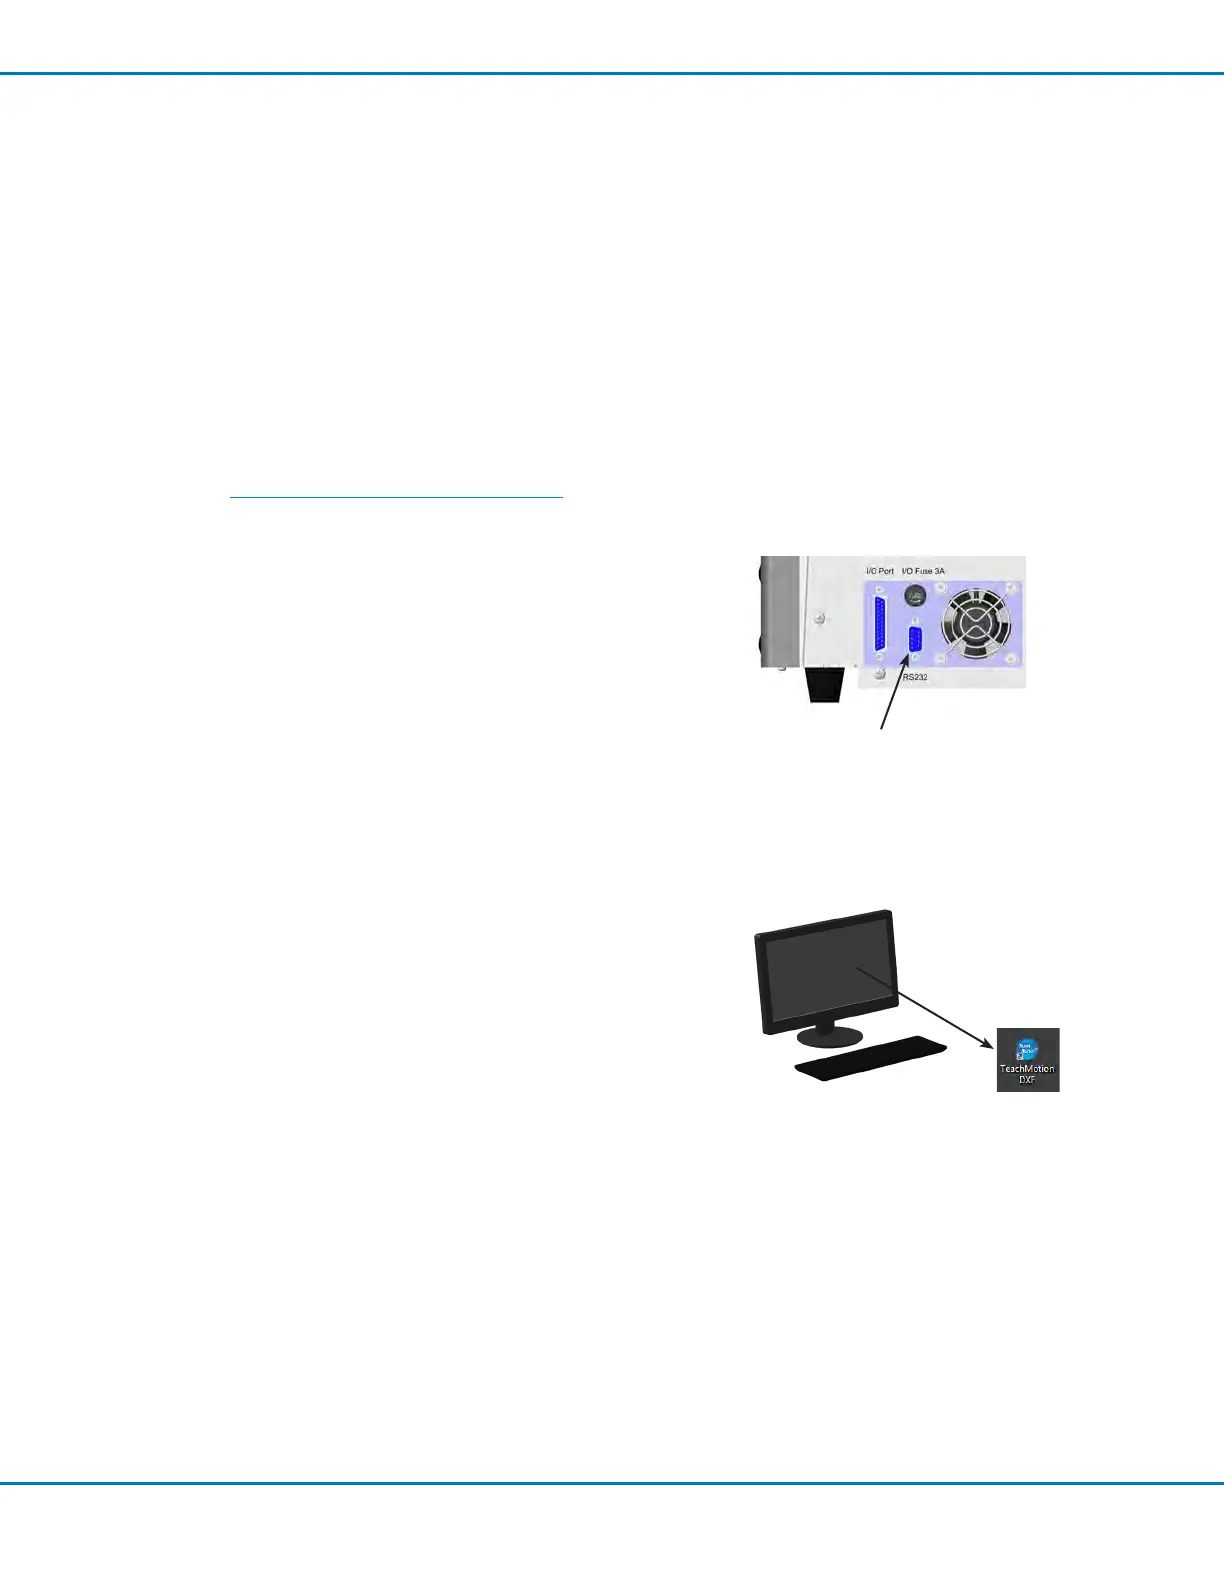
RS232 port
Installing TeachMotion DXF and Connecting
to the Robot
1. Go to http://www.nordsonefd.com/efdmanuals/ to download the
TeachMotionDXF software.
2. Install the TeachMotion DXF software on a PC.
3. Connect a DB9 female straight cable to (1) the RS232 port on the
back of the robot and (2) to the PC/PLC.
NOTE: If the PC does not have an on-board serial port, use a USB-
to-serial converter with the DB9 cable. Refer to “Pre-Congured
Output Cables” on page78 for part numbers.
4. Switch on the robot.
5. On the Teach Pendant, press F1 > TEACH/RUN to enter the Teach
Mode.
NOTE: The Teach Pendant cable should already be connected to the
Teach Pendant port on the front of the robot.
6. Disable REMOTE COMMAND under the Setup menu. Refer to
“Enabling or Disabling Remote Communication” on page113.
7. On the PC, double-click the TeachMotion DXF icon. The software
automatically connects to the robot.