E Series Automated Dispensing System
125www.nordsonefd.com info@nordsonefd.com 800-556-3484 Sales and service of Nordson EFD dispensing systems are available worldwide.
Importing a DXF File (continued)
# Click Step Reference Image
5
or
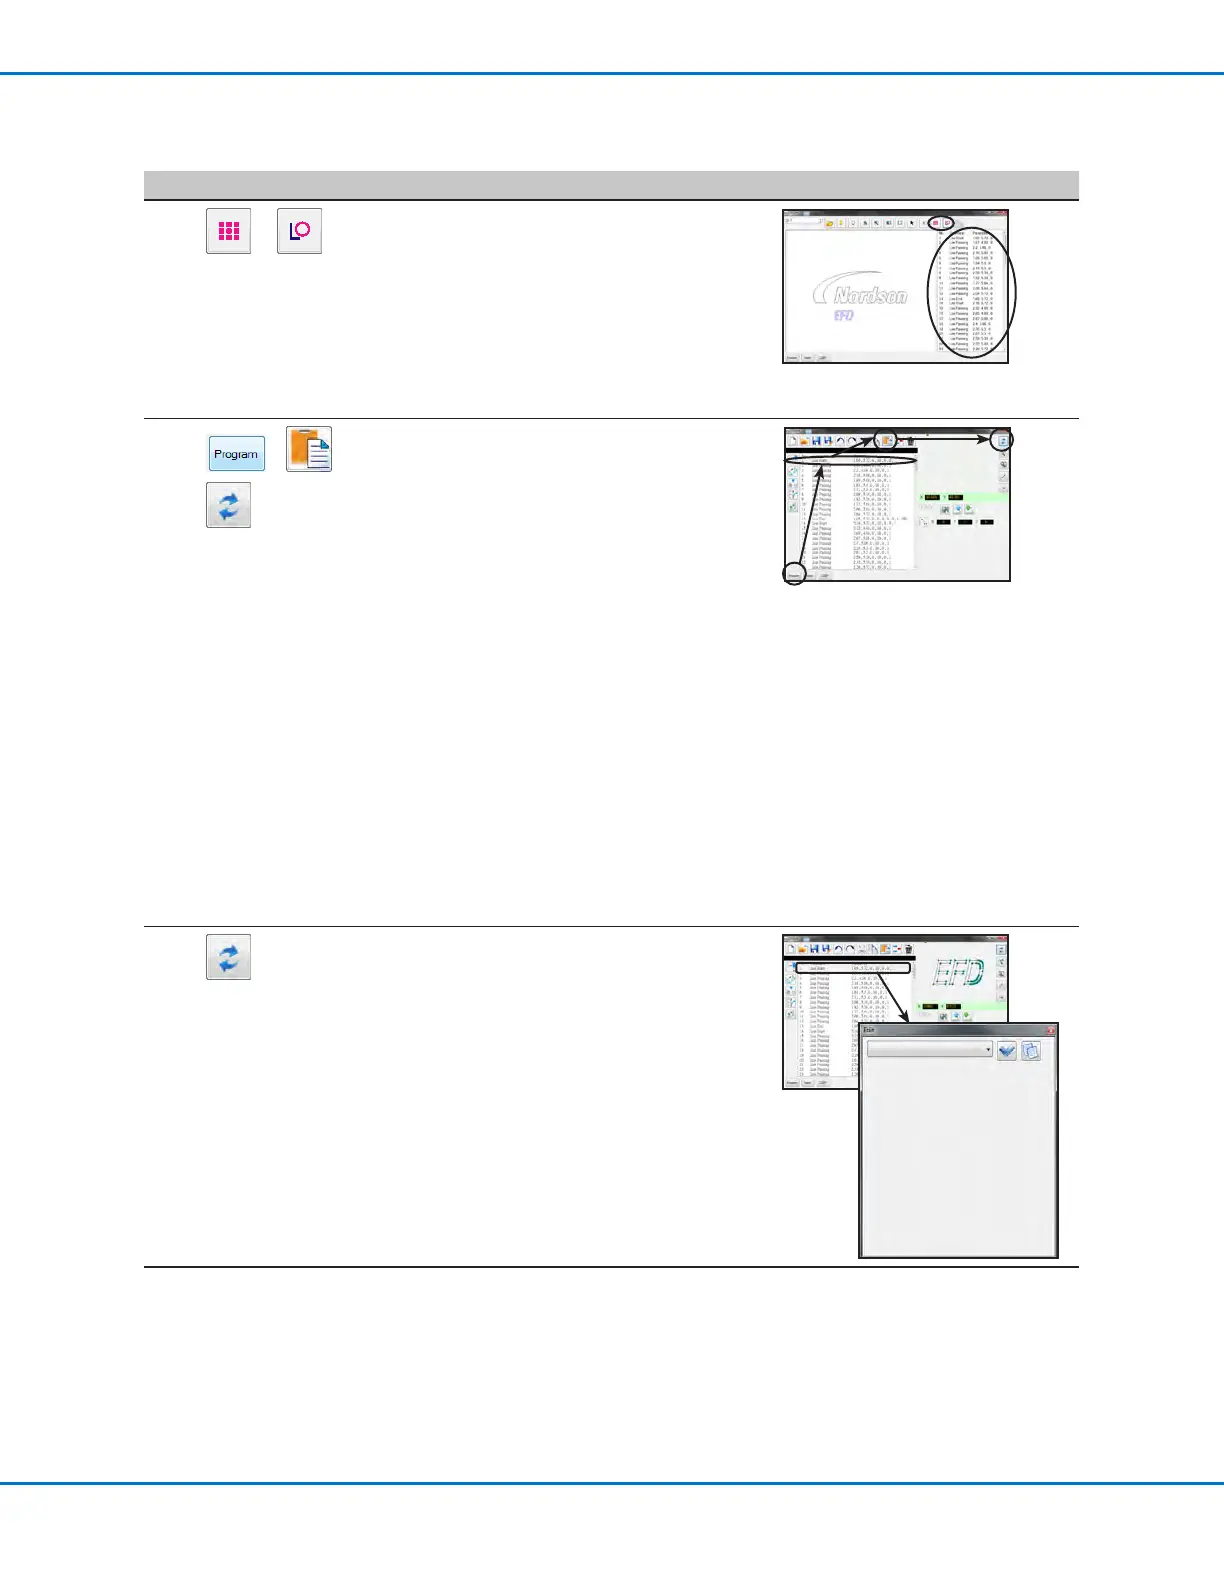
Click POINT DISPENSE (for dispense
dots) or LINE DISPENSE (for lines, arcs,
and circles).
NOTE: For this example, click LINE
DISPENSE because the selection (EFD) is
composed of lines.
The system generates the program
commands that will create the selected
pattern.
6
> >
Click the PROGRAM tab, select an empty
Address line, then click PASTE and then
REFRESH.
The commands appear in the Program
screen command window and the
imported lines appear in the grid window.
NOTES:
• The dispense pattern may appear very
small in the grid window.
• If the dispense pattern is off the grid
window, modify the OFFSET X, Y values
in the DXF screen Option window. Refer
to “Modifying the DXF Import Options”
on page123.
• If the imported DXF le has the length
units set as inches, click the INCH
-> MM checkbox in the DXF screen
Option window and then re-import
the le. Refer to “Modifying the DXF
Import Options” on page123 for more
information.
7
In the grid window, left-click and hold
to pan the view and use the center
scroll wheel to zoom in and out until the
selected pattern is easily viewed.
Double-click on a command to make
changes to the dispense program as
needed. After making any change, click
REFRESH to update the view in the grid
window to show the changes.
The next step is to match the program
commands to the actual workpiece.
Continued on next page