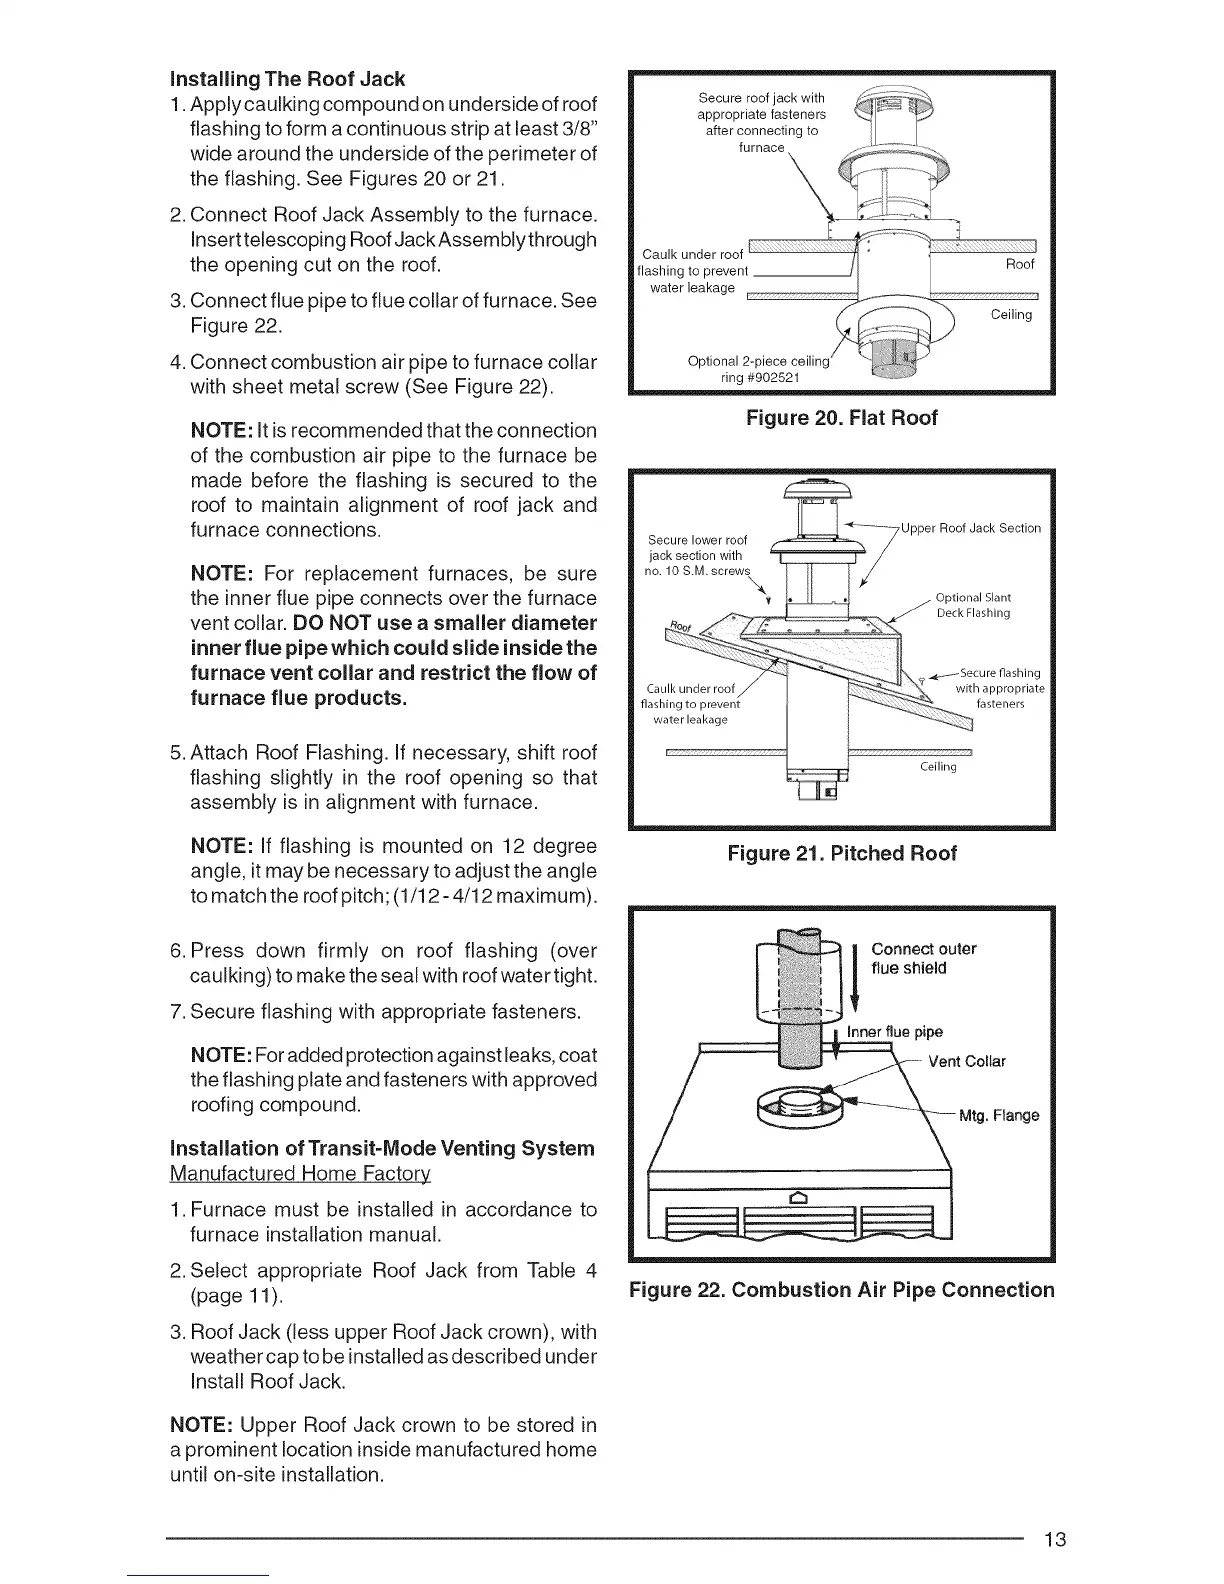
Installing The Roof Jack
1. Apply caulking compound on underside of roof
flashing to form a continuous strip at least 3/8"
wide around the underside of the perimeter of
the flashing. See Figures 20 or 21.
2. Connect Roof Jack Assembly to the furnace.
Insert telescoping Roof JackAssembly through
the opening cut on the roof.
3. Connect flue pipe to flue collar of furnace. See
Figure 22.
4. Connect combustion air pipe to furnace collar
with sheet metal screw (See Figure 22).
NOTE: It is recommended that the connection
of the combustion air pipe to the furnace be
made before the flashing is secured to the
roof to maintain alignment of roof jack and
furnace connections.
NOTE: For replacement furnaces, be sure
the inner flue pipe connects over the furnace
vent collar. DO NOT use a smaller diameter
inner flue pipe which could slide inside the
furnace vent collar and restrict the flow of
furnace flue products.
5. Attach Roof Flashing. If necessary, shift roof
flashing slightly in the roof opening so that
assembly is in alignment with furnace.
NOTE: If flashing is mounted on 12 degree
angle, it may be necessary to adjust the angle
to match the roof pitch; (1/12 - 4/12 maximum).
6. Press down firmly on roof flashing (over
caulking) to make the seal with roof water tight.
7. Secure flashing with appropriate fasteners.
NOTE: For added protection against leaks, coat
the flashing plate and fasteners with approved
roofing compound.
Installation of Transit-Mode Venting System
Manufactured Home Factory
1. Furnace must be installed in accordance to
furnace installation manual.
2. Select appropriate Roof Jack from Table 4
(page 11).
3. Roof Jack (less upper Roof Jack crown), with
weather cap tobe installed as described under
Install Roof Jack.
NOTE: Upper Roof Jack crown to be stored in
a prominent location inside manufactured home
until on-site installation.
Secure roof jack with
appropriate fasteners
after connecting to
furnace
Caulk under tool
flashing to prevent
water leakage
Roof
Ceiling
, ,, /
Optional 2-ptece cethng
ring #902521
Figure 20. Flat Roof
JSeku_e_tl OwerritlO f _Upper Roof Jack Section
no. 10S.M. screw X I _ j Optional Slant
Deck Flashing
Secure flashing
Ca with appropriate
flash fasteners
Figure 21. Pitched Roof
__ onnect outer
flue shield
ue pipe
: Vent Cellar
Mtg. Flange
Figure 22. Combustion Air Pipe Connection
13

 Loading...