Lighting and Accessories
96.
DYNAMO-INSPECTION
OF
COMMUTATOR
&
BRUSHGEAR.
About
once
every
six
months
remove
the
dynamo
cover
for
inspection
of
commutator
and
brushes.
The brushes must
make
firm
contact
with
the
commutator.
The brushes
are
held in
boxes
by
means
of
springs;
move
the brush
to
see
that it
is
free
to
slide
in its
holder.
If
it
sticks
remove
it and clean with a cloth
moistened
with
petrol.
Care
must
be
taken
to
replace
the
brushes
in
their
original
position,
otherwise
they
will
not bed properly
on
the
commutator.
If, after
long
service,
the
brushes
have
become
worn
to
such
an
extent that they will not
bear
properly
on
the commutator, they must
be
replaced.
Always
use
genuine
Lucas
brushes.
Brushes
should
be
fitted
by a
Service
Agent
Now
examine
the
commutator.
It
should
be
free
from
any
trace
of
oil
or dirt
and
should
have
a highly
polished
appearance.
Clean
a dirty or
blackened
commutator
by
pressing
a
fine
dry cloth
against
it
while
the
engine
is
slowly
turned
over
by
hand.
If
the
commutator
is
very
dirty,
moisten
the
cloth
with
petrol.
97.
LUBRICATION.
The
bearings
in
the
dynamo
are
packed
with
grease
during
assembly
and will last
until it
is
necessary
for
the
dynamo
to
undergo
a
complete
overhaul.
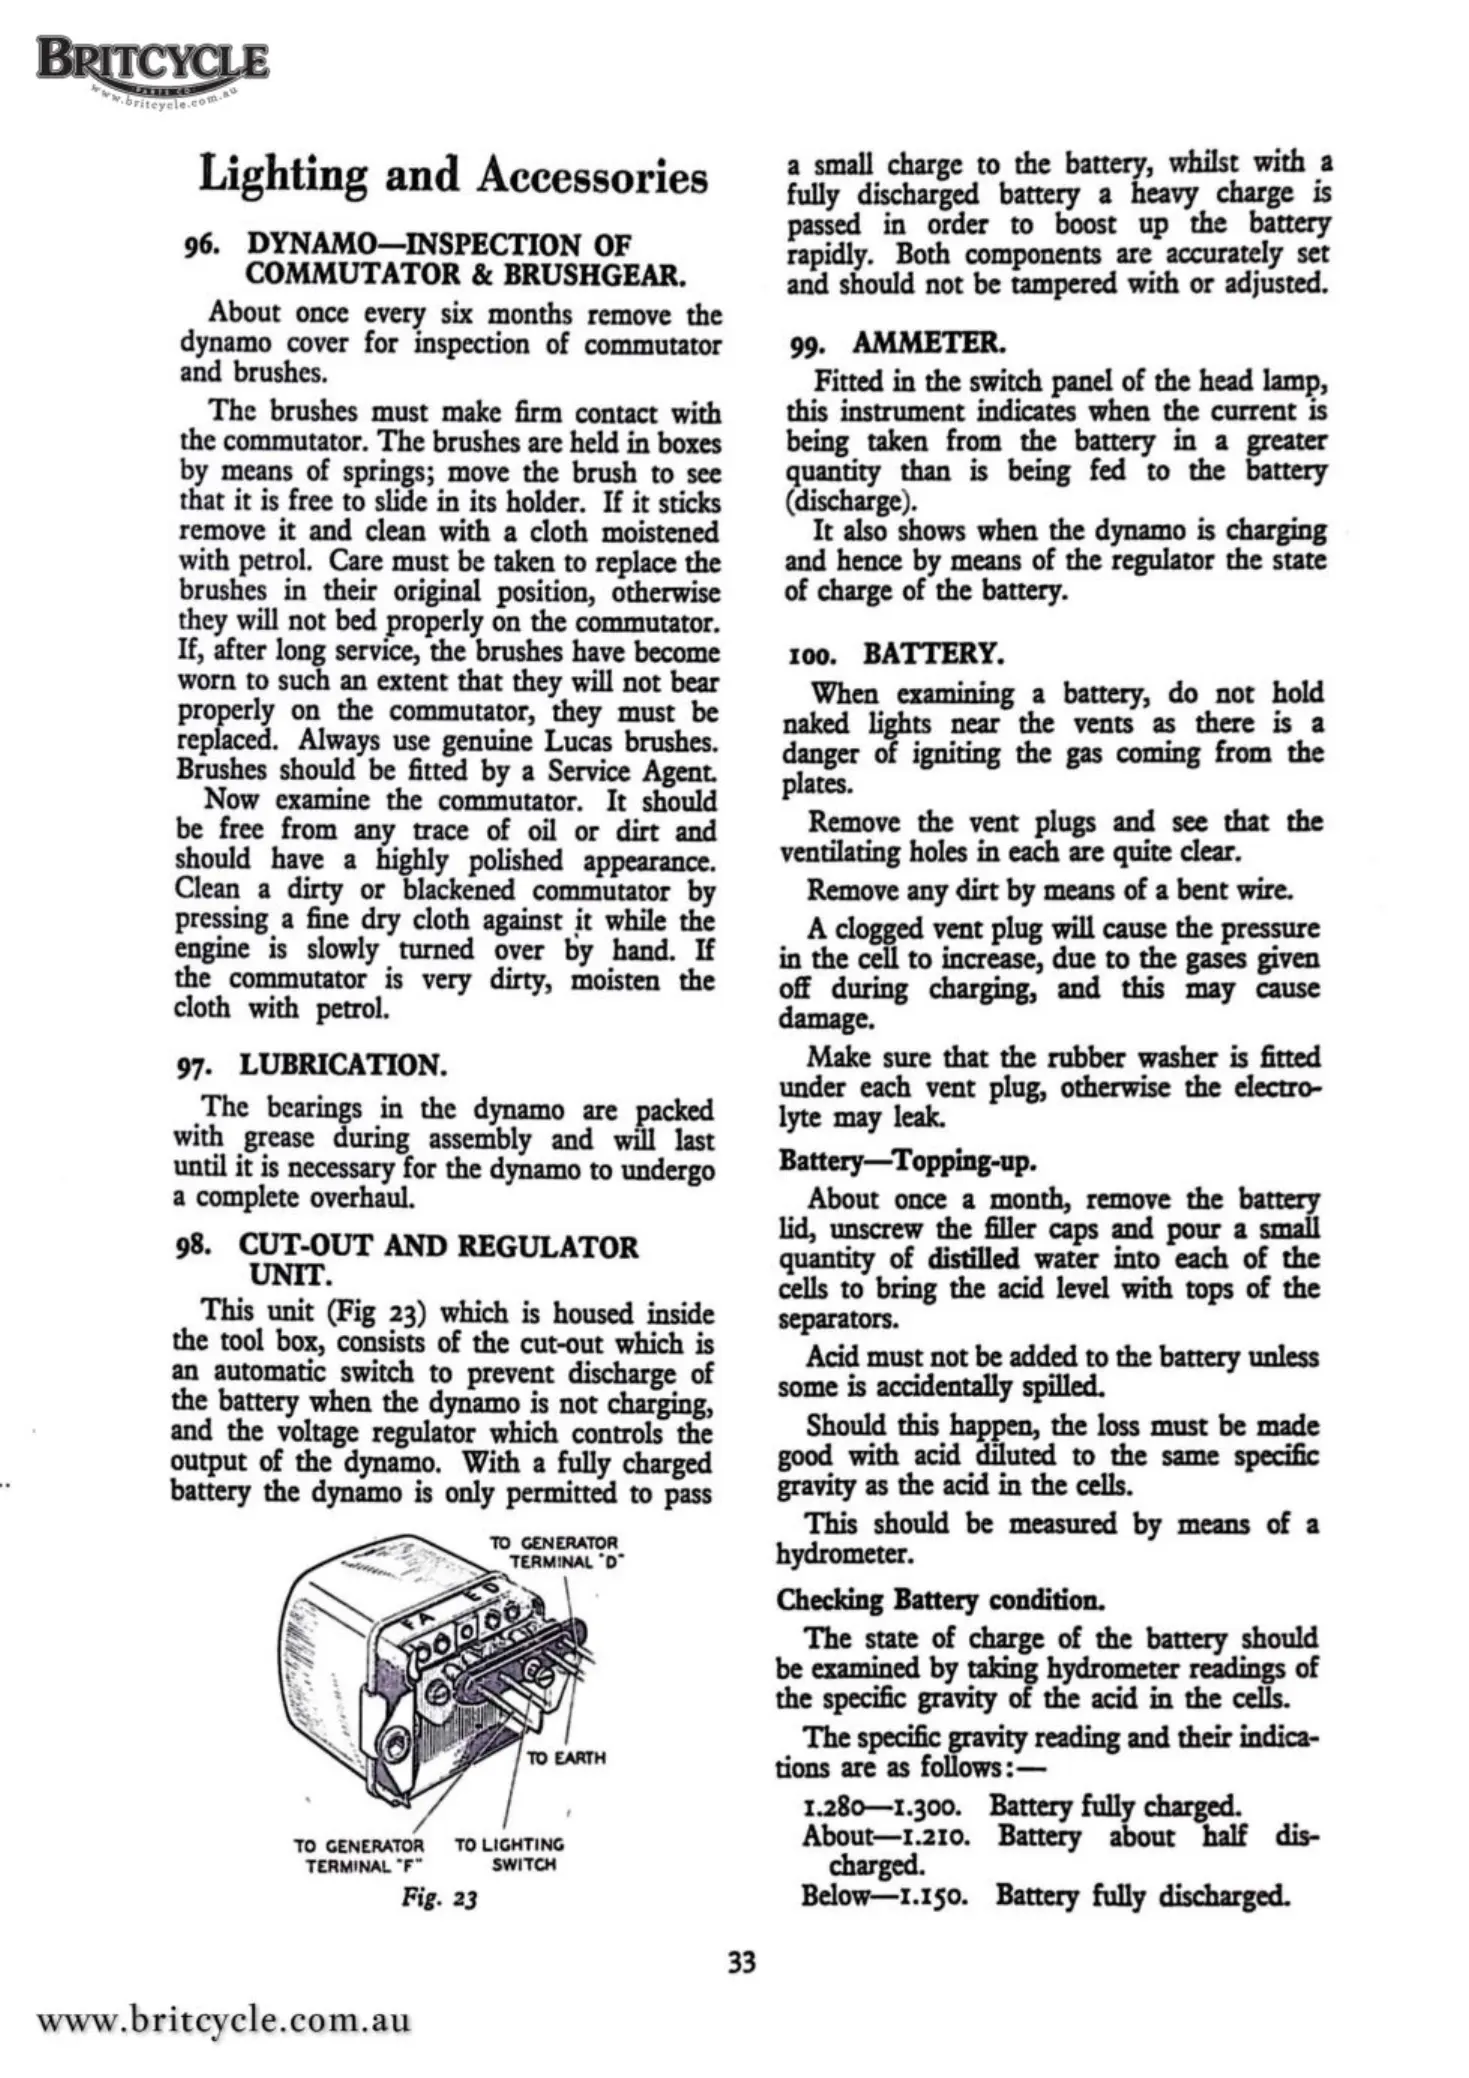
98.
CUT-OUT
AND
REGULATOR
UNIT.
This unit (Fig
23)
which
is
housed
inside
the
tool
box,
consists
of the cut-out
which
is
an
automatic
switch
to prevent
discharge
of
the battery when the
dynamo
is
not
charging,
and
the
voltage
regulator
which
controls the
output of the
dynamo.
With a
fully
charged
battery the
dynamo
is
only
permitted
to
pass
TO
GENERATOR
TO
LIGHTING
TERMINAL
"F
"
SWITCH
Fig.
23
33
a
small
charge
to the battery, whilst with a
fully
discharged
battery a
heavy
charge is
passed
in
order to
boost
up
the battery
rapidly.
Both
components
are accurately set
and
should
not
be
tampered
with or adjusted.
99.
AMMETER.
Fitted in the
switch
panel
of the
head
lamp,
this
instrument
indicates
when
the current is
being
taken
from
the battery in a greater
quantity than
is
being
fed
to the battery
(discharge).
It
also
shows
when
the
dynamo
is
charging
and
hence
by
means
of the regulator the state
of
charge
of the
battery.
100.
BATTERY.
When
examining
a battery,
do
not hold
naked
lights near the
vents
as
there is a
danger
of igniting the
gas
coming
from
the
plates.
Remove
the vent
plugs
and
see
that the
ventilating
holes
in
each
are
quite
clear.
Remove
any
dirt
by
means
of
a bent
wire.
A
clogged
vent plug will cause the pressure
in the cell to increase, due to the
gases
given
off
during charging, and this
may
cause
damage.
Make
sure that the rubber
washer
is fitted
under
each
vent plug,
otherwise
the electro-
lyte
may
leak.
Battery-Topping-up.
About
once
a month,
remove
the battery
lid,
unscrew
the
filler
caps
and
pour a
small
quantity of distilled water into each of the
cells
to bring the
acid
level
with
tops
of the
separators.
Acid
must not
be
added
to the battery
unless
some
is
accidentally
spilled.
Should
this
happen, the
loss
must
be
made
good
with
acid
diluted to the
same
specific
gravity
as
the
acid
in the
cells.
This
should
be
measured
by
means
of a
hydrometer.
Checking
Battery
condition.
The state of
charge
of the battery should
be
examined
by
taking
hydrometer
readings
of
the
specific
gravity
of
the
acid
in the
cells.
The
specific
gravity
reading and their
indica-
tions
are
as
follows:-
1.280-1.
300.
Battery fully
charged.
About-1.210. Battery about half dis-
charged.
Below-I. I
50.
Battery
fully
di$Cbargcd.
 Loading...