Trinity Lx │Installation and Operation Instructions Lx Series
66
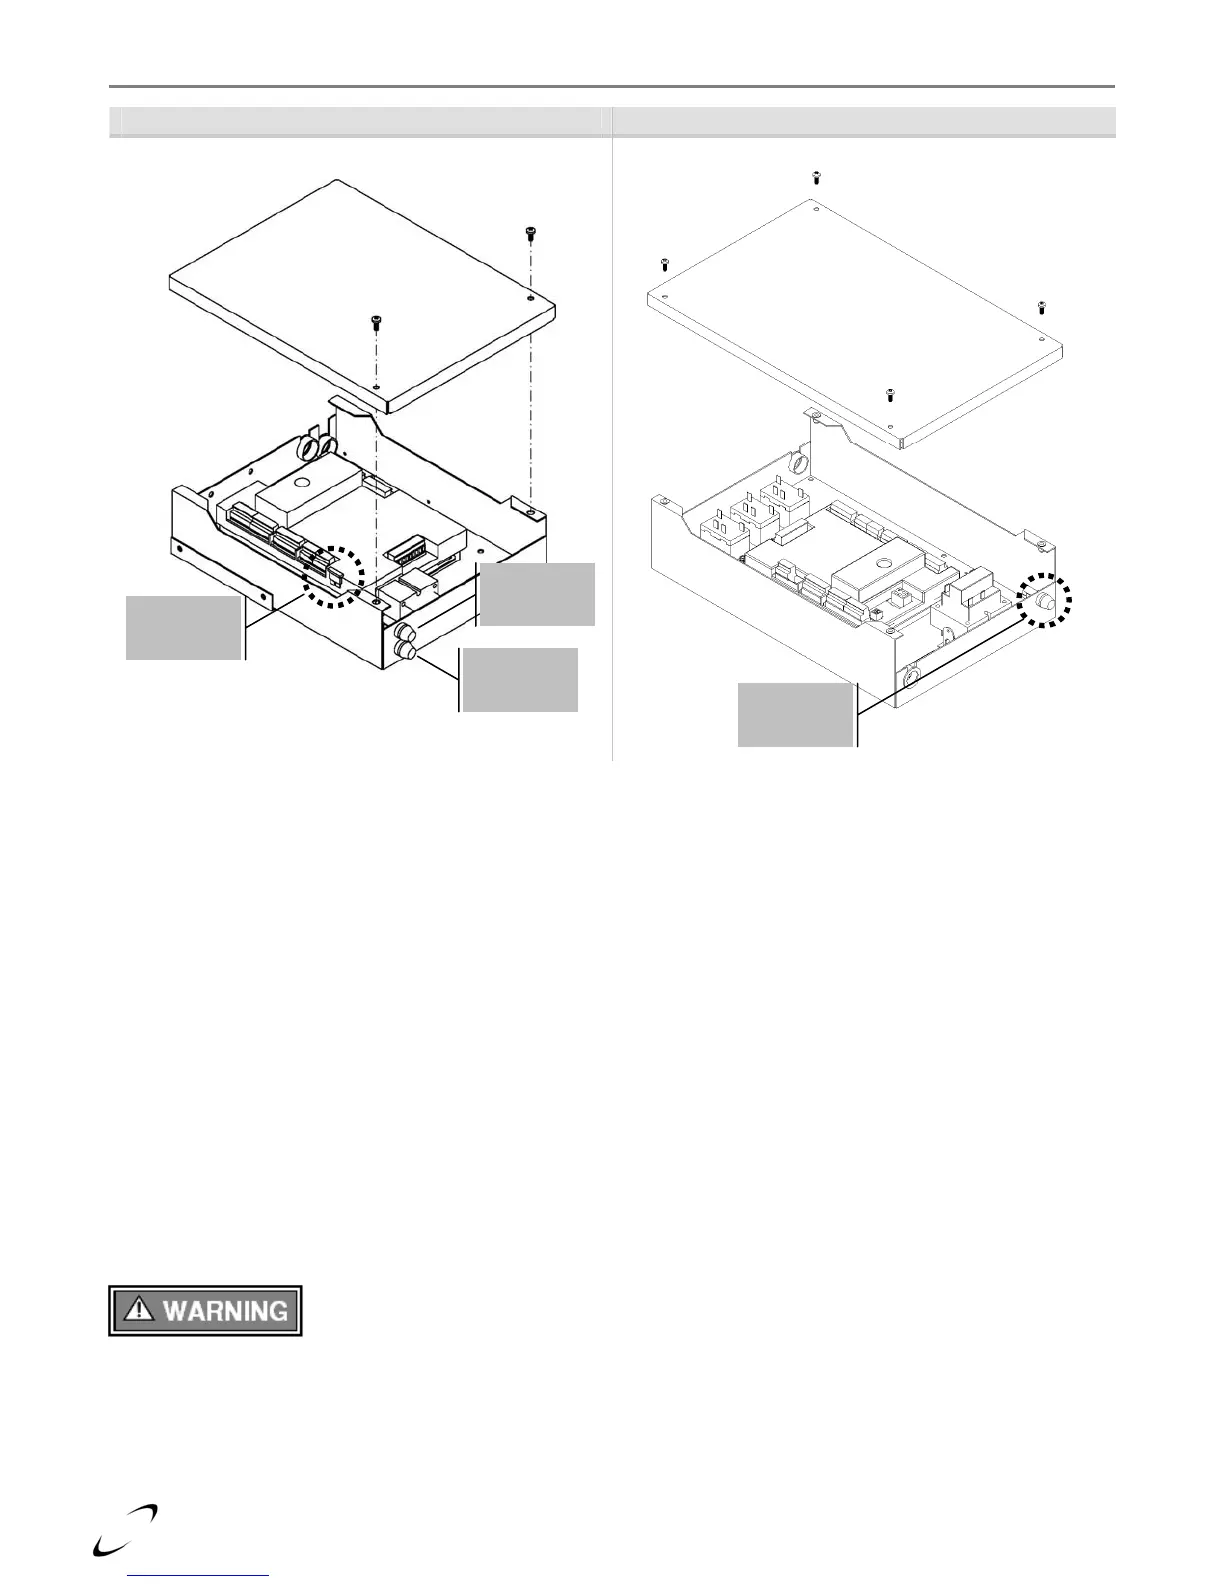
Figure 14-1(a) Lx150-400 Figure 14-1(b) Lx500-800
Control Panel Fuse Locations Control Panel Fuse Location
Fuses
There are three (3) fuses associated with the Trinity Lx150-400 controller but only one (1) with the Lx500-800
controller. Check these fuses before replacing the controller or any other electrical component; if the fuse is
blown, it will prevent the protected device(s) from functioning.
To check, and if necessary replace, the fuses:
• Remove all 120VAC power from the appliance. Be careful to check that the unit is not powered from more
than one source e.g. a UPS (uninterruptible power supply).
• Remove the front cover.
• On models Lx150-400 the control panel is located below the heat exchanger. Fuses "A" and "B" are
accessible by removing the spring-loaded knurled knob of their respective holders. Push the knob toward
the panel, and twist approximately 1/4 turn counter-clockwise.
• To access Fuse "C", remove the two #10 pan-head Phillips screws and lift the top cover from the panel. The
auto blade type fuse is installed in an "inline" style fuse holder.
• On models Lx500-800, the control panel is located above the heat exchanger toward the back of the unit.
Fuse "A" is accessible by removing the spring-loaded knurled knob from its holder. Push the knob toward
the panel, and twist approximately 1/4 turn counter-clockwise.
After inspecting and if necessary replacing fuses, replace the panel cover and front cover. Restore power to the
appliance and confirm proper operation.
Only replace fuses with identical parts, see Figures 14-1(a) and (b). Failure to follow this
warning may result in component failure, fire, property damage, serious injury or death.
Fuse “C” ATO
2A 32V Auto
Blade Type
Fuse “A” 3AG
7A 250V
Fast-Actin
Fuse “B” 3AG
7A 250V
Fast-Actin
Fuse “A” 3AG
7A 250V
Fast-Actin