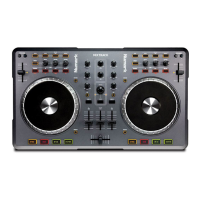
Beat Assist
Of course all music doesn't have hard, steady beats, and let's face it,
sometimes you need the music set up yesterday. For those occasions we
have included a Beat Assist Button.
If the Beatkeeper™ is having trouble matching the beat to the flashing
red Beat LED, or if you need to sync up Immediately, tap the Beat Assist
button 2-8 times as you hear the beat, the same way you would tap your
feet to the music. Pressing the Beat Assist Button more than once aligns
the Beatkeeper™ to your taps. Note that the Sync Lock LED illuminates,
signifying that the Beatkeeper™ is now locked in with the beat. Simply put,
if the Beatkeeper™ isn't on track, or you're in a real hurry, you need to press a
button twice instead of once. We know it's tricky, but we're sure you can handle
it.
If the Beatkeeper™ is synced to the correct BPM but is aligned to the
music's offbeat, tap the Beat Assist button with the beat of the music just
once and you will have brought the Beatkeeper™ back in sync.
2 Channel Mixing
After you feel comfortable syncing up the Beatkeeper, you're ready to mix.
Mixing with the Beatkeeper has three parts: syncing to the music (which
you've done), aligning the tempos, and aligning the beats. Once these
three things are done, you will have a perfect mix. No more guessing, tapping,
or embarrassing fades.
Choose another music selection and start it on your right channel.
Sync up the first song as described in the last section. With the first selection
synced (Sync Lock LED illuminated), sync up the right channel the same way
you set up the left.
As the second Sync Lock LED illuminates, a new dimension of DJing
begins: VISUAL MIXING.
The bar graphs on the top of the Beatkeeper have now been activated and
are updating automatically.
NOTE: In order to perform a mix which is tracked by the Beatkeeper, both
channels MUST be synced. This is indicated by the yellow Sync Lock LED
being lit for both inputs.
In order to create the perfect mix, your goal is to keep both bar graphs
as close to centered (green or yellow) as possible.
First, align the top graph, the Tempo Difference Graph. This graph
indicates how close the two BPMs are to each other. If they are exactly the
same tempo, the green LED in the middle will light up. If one song is faster than
the other, the bar graph will shift towards the faster song. If the Tempo
Difference graph is not centered, adjust the speed of one of the inputs
using the pitch control. For example, if the Tempo Difference graph has a red
LED illuminated closer to the right channel of the Beatkeeper, the right channel
is faster than the left channel, either slow down the right channel, or speed up
the left channel. If the opposite is true, the Tempo Difference Graph has a red
LED illuminated on the left channel, indicating the song on the left channel is
faster than that the right channel, either slow down the left channel, or speed up
the right channel.
The second step involves the bottom graph, the Beat Offset Graph. This
graph indicates how close the individual beats are. Both BPMs may be the
same but the beats may not be in sync. This is often described as the “ping-
pong” effect. If the beats are matched, the green LED in the middle lights up. If
the beats of one input are earlier than beats of the other input, the Beat
Offset Graph will shift toward the song with the earlier beats.
To align the Beat Offset Graph when using CD Players, adjust the
appropriate pitch bend. If you are using turntables, hold or apply pressure to
the record/turntable and then release to “shift” the beat.