INSTALLATION
NOTE: For purpose of explanation, 'Source' refers to any CD player,
turntable, or line input device (tape deck, etc.) to be used with the
Beatkeeper.
• First locate the output patch cords connecting one of your sources to
your mixer. Disconnect the ends that are presently connected to your
mixer and reconnect them to the "CH 1" inputs of the Beatkeeper.
• Repeat the previous step for all other sources you wish to connect.
• Now using the patch cords provided, connect the outputs of the
Beatkeeper to where your sources were originally patched into your
mixer.
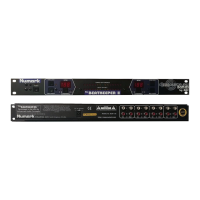
• Next plug the Beatkeeper into a live outlet using the power adapter
provided. If you are using your Beatkeeper in a mobile setup, be sure that the
connection is secure so that it does not become loose during transport due to the
weight of the adapter. Plug the free end of the adapter into the rear panel where
the Beatkeeper is labeled "9V 500mA".
• After you have it all plugged together you will need to mount your
Beatkeeper in a secure location. If you are going to insert your new
Beatkeeper into a rack, now's the time (mounting hardware is included with your
Beatkeeper). Be sure that the power cords as well as the patch cords coming to
and from your Beatkeeper are not tangled or going through an area where they
might be pulled out, pinched or melted.
• Finally, push the power button. When you have power, the power LED is on,
both BPM displays show 2 dashes (--), and the Mid BPM range LED (yellow) will
illuminate.
NOTE: If you are installing for turntables, be sure that the ground wires
from your turntables are securely connected to your mixer.